Chart your course
How to Find and Repair Soft Deck Areas
Quick answer
The short version
A soft sailboat deck needs investigation before it needs filler. Keep people and rig loads off the suspect area, compare it with known-firm laminate, mark its full boundary, and look uphill for the water entry point. A moisture meter or tapping survey can help map the problem, but neither proves the core's condition by itself. The repair must remove damaged material, restore the core and skins, and stop the leak that started the damage. A marine surveyor or repair professional should assess softness around chainplates, stanchions, mast steps, or other highly loaded fittings.
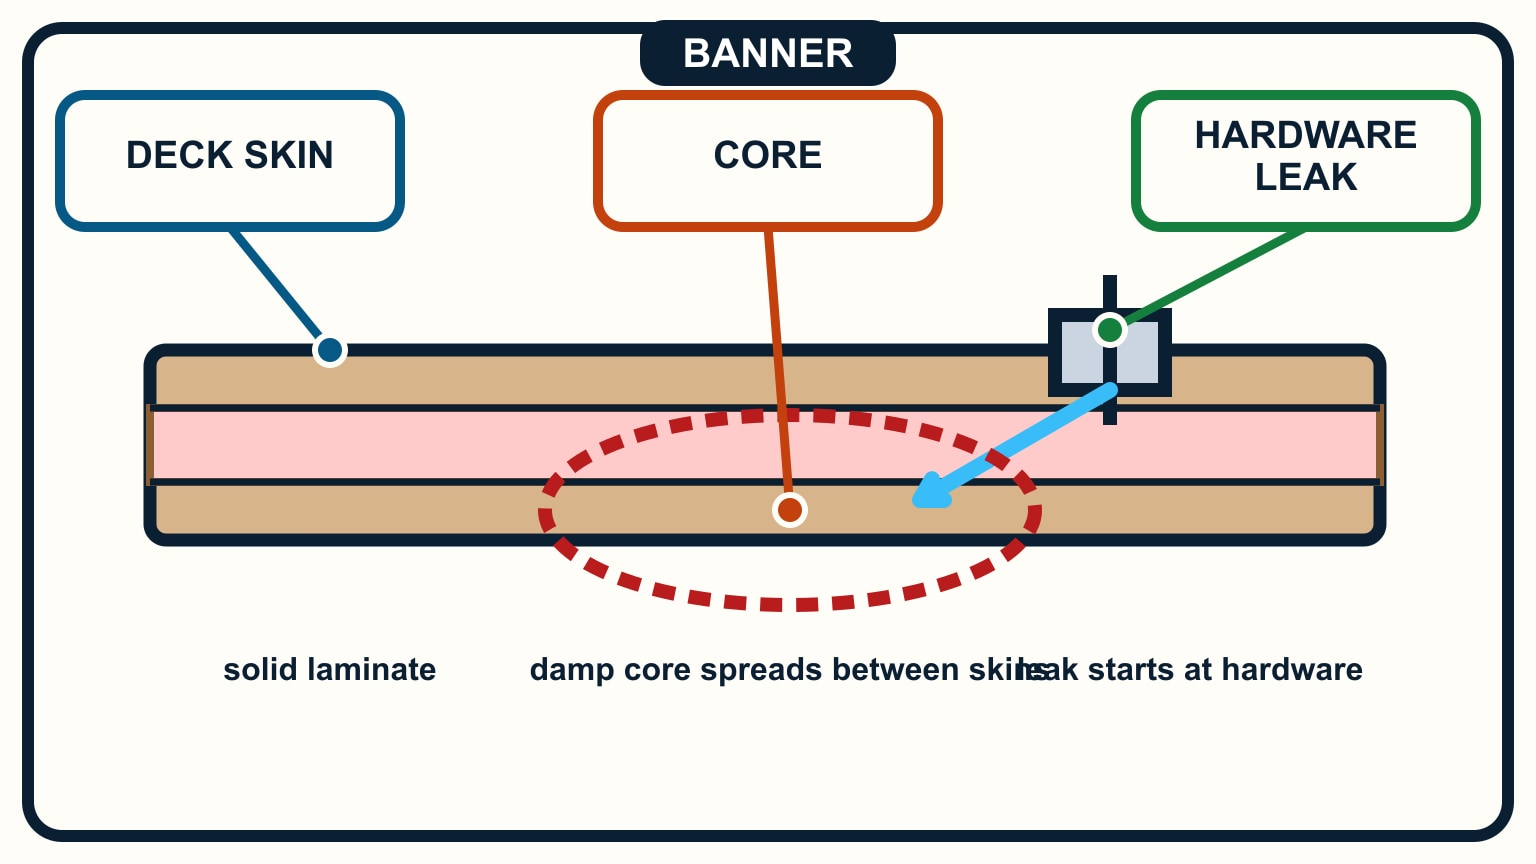
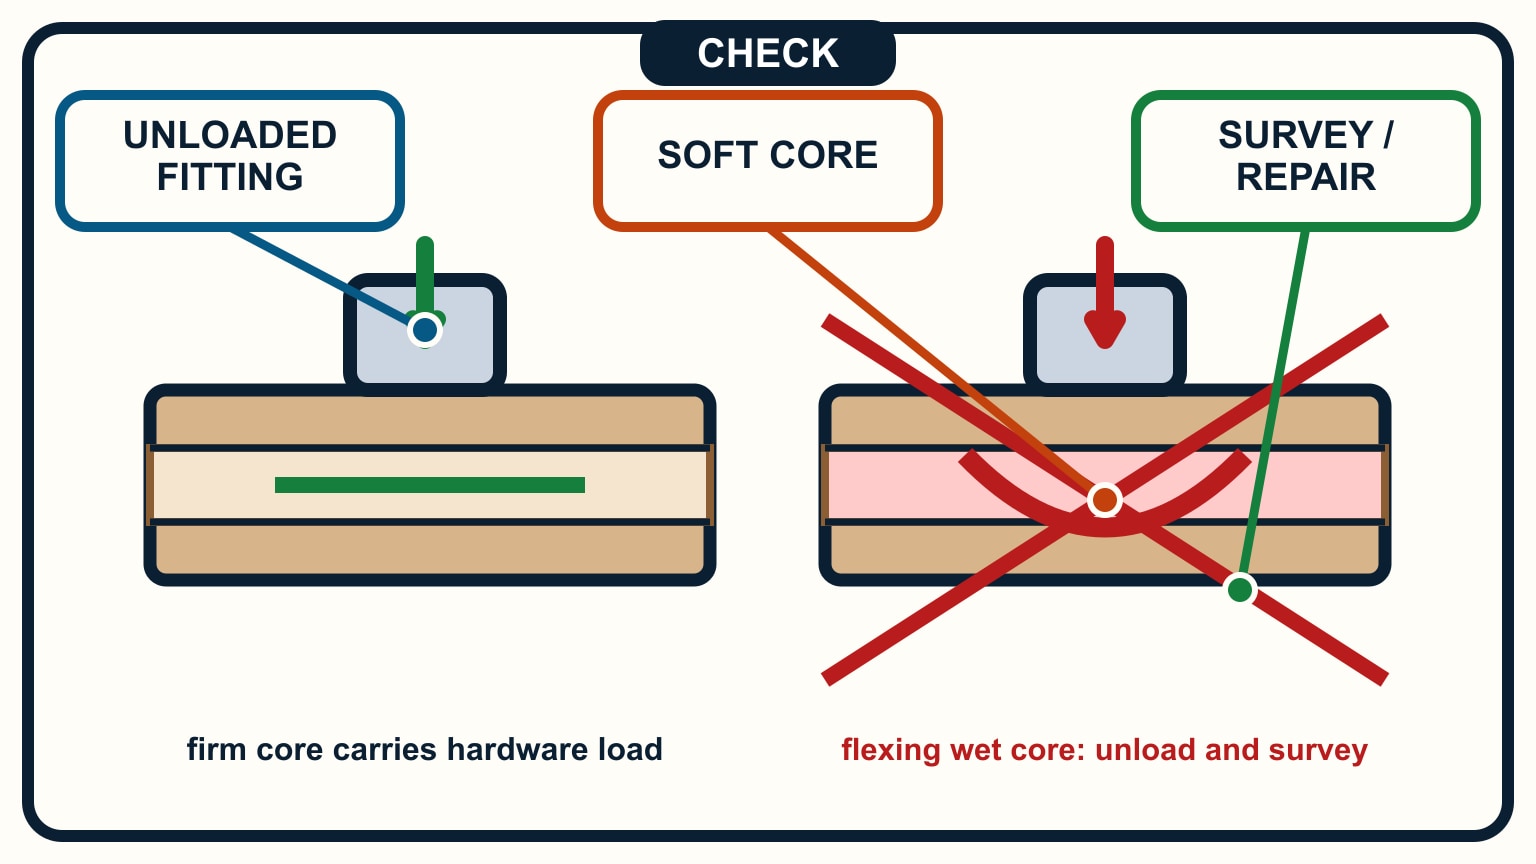
Most decks are easier to understand as a sandwich: an outer skin, a lightweight core, and an inner skin. The core gives the panel stiffness without the weight of solid laminate. When a leak reaches that core, the skins can lose support or separate from it. Your first job is to establish what has changed and keep the defect from carrying a load. If you are still learning how the structure fits together, read deck core moisture explained before planning a repair.
Start with the load, not the sound
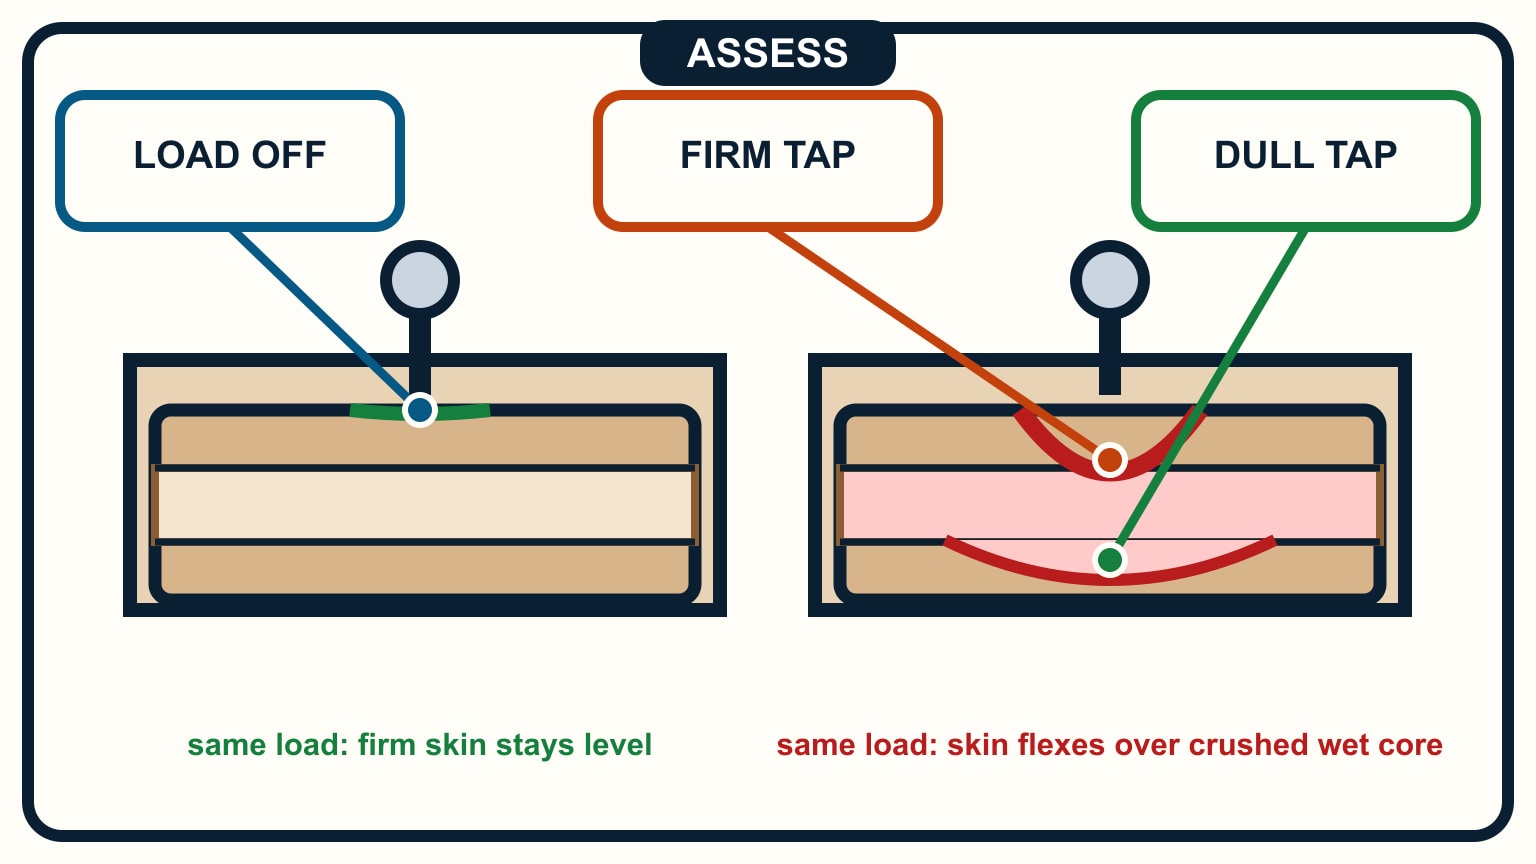
A dull tap matters, but the fitting above it matters more. Walk around the area without bouncing on it. Note whether the panel flexes under ordinary foot pressure and whether the surface is cracked, raised, stained, or distorted. Then identify everything that loads the panel: a stanchion base, cleat, chainplate cover, mast step, winch, track, or deck fitting. A small patch beside a highly loaded fitting deserves a different response from an equally sized patch in an unloaded locker lid.
Keep the test gentle. Hard hammer blows can damage a thin skin and prove nothing useful. Surveyors commonly compare the sound of nearby firm laminate with the suspect area, moving in a close pattern so the transition can be heard. The absolute note is less useful than the change from one patch to the next. Mark that change with removable tape or a washable pencil rather than drilling exploratory holes around the deck.
If the fitting carries rig, guardrail, towing, anchoring, or crew loads, stop using it until the structure is assessed. Moving a line to another proper strong point may reduce immediate load, but do not improvise a new load path through hardware whose backing you cannot see. A sailboat survey red-flags guide helps put this observation in the wider structural inspection.
Map the boundary on a dry deck
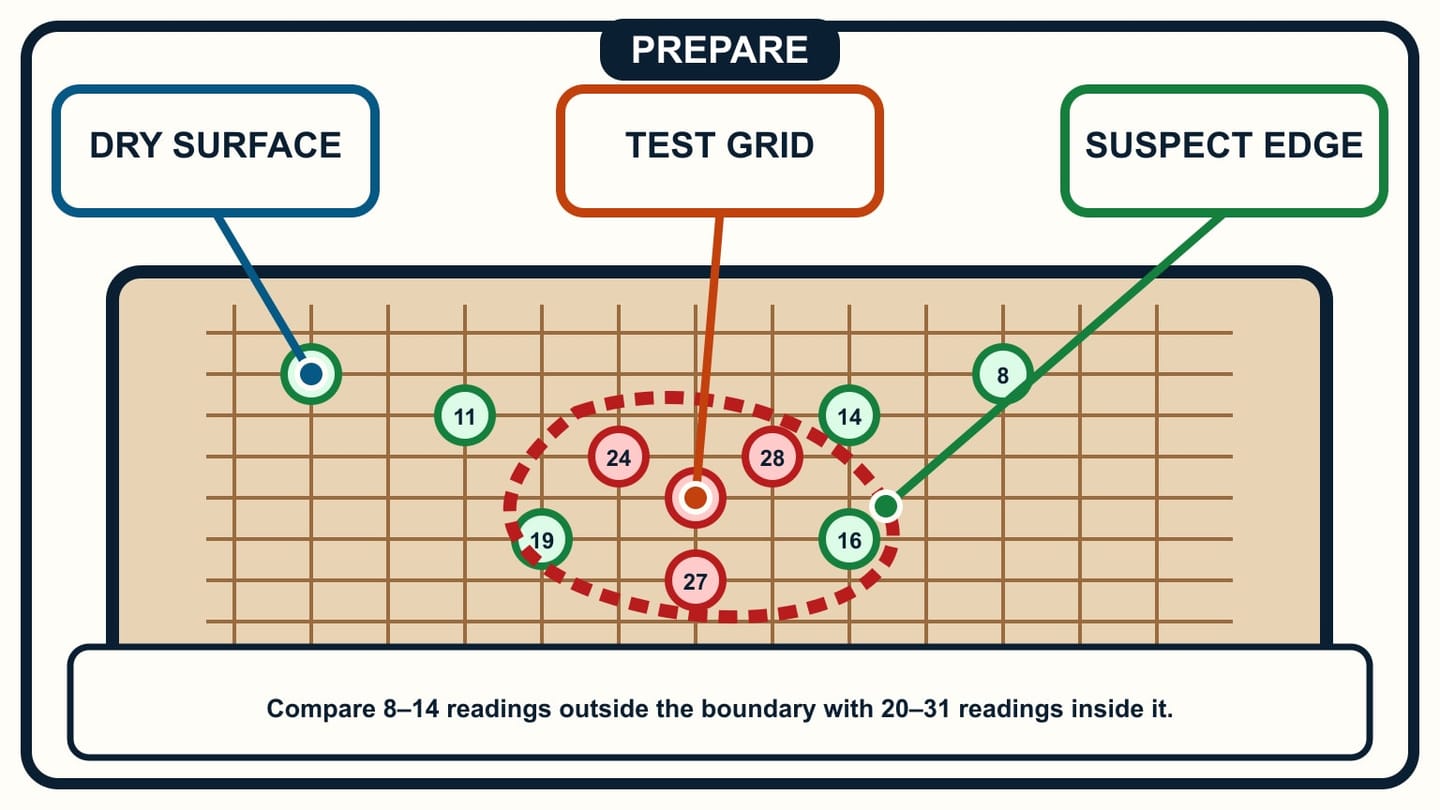
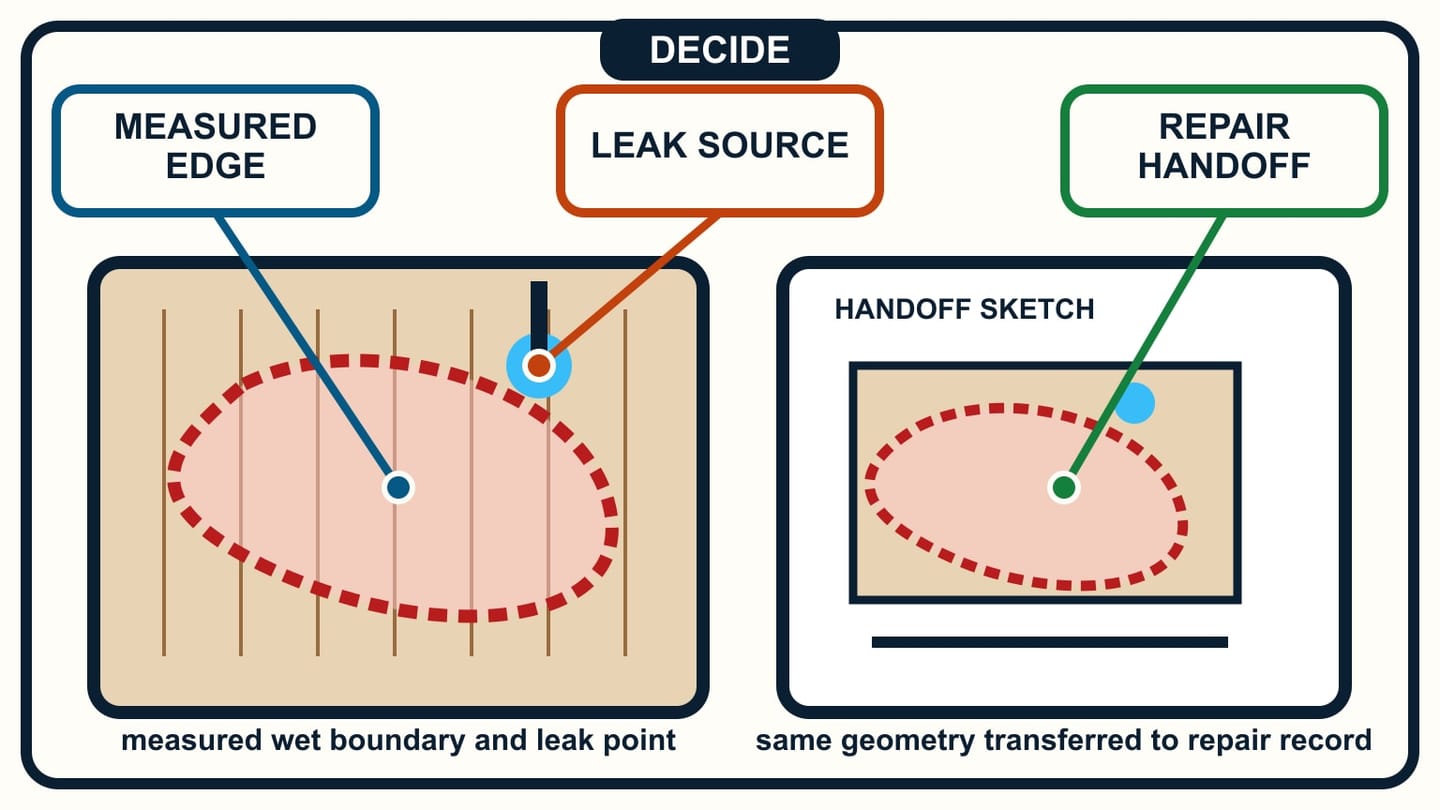
Dry the surface and remove loose gear before mapping. Work from known-firm laminate toward the suspect patch, then repeat from several directions. A neat oval drawn after two taps is guesswork. Real moisture paths follow fittings, fastener holes, core joints, slopes, and gravity, so the affected area may be uneven or extend farther on one side.
A moisture meter can add another layer of evidence. Readings need comparison with dry areas of similar construction because metal, wiring, tanks, surface moisture, and laminate thickness can change the response. Treat the meter as a screening tool, not a verdict. Its useful output is a pattern that agrees or disagrees with tapping, visible damage, and flexing.
Record the date and conditions. A deck tested after rain may read differently from the same deck after a dry spell. Photograph the whole area, then close views of cracks, fittings, sealant edges, and the marked boundary. Add a simple dimension from a fixed object so the repairer can relocate the patch after tape is removed.
Do not start cutting merely because the outline looks complete. The outside signs show where to investigate; they do not reveal whether the core is damp, crushed, rotten, detached from a skin, or sound beneath a damaged surface. That diagnosis controls how much material must be opened and rebuilt.
Trace water back to its entry point
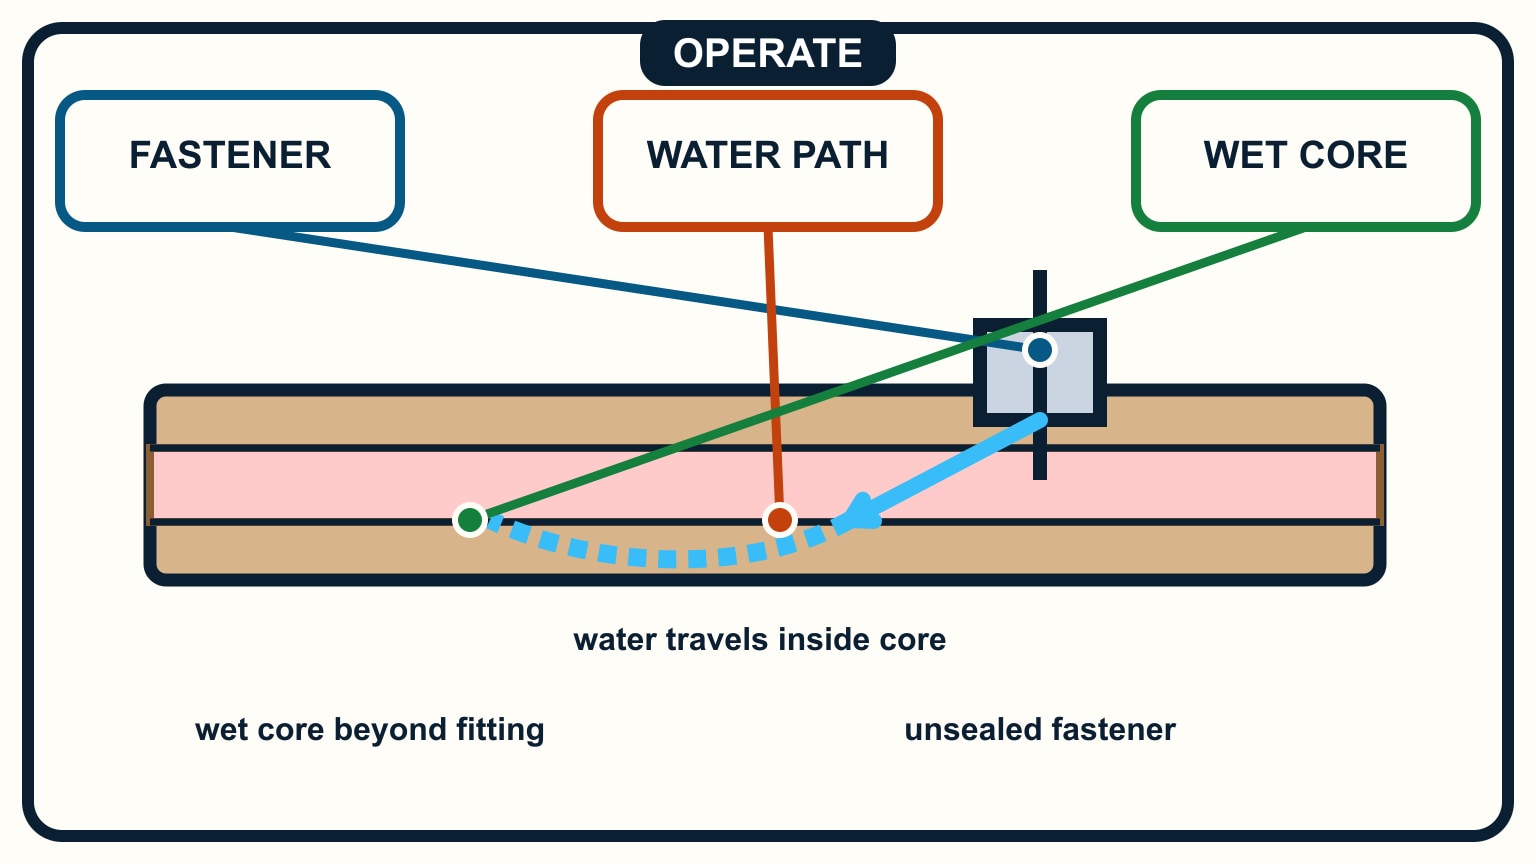
The wettest or softest place is not always where water entered. Start above the boundary and inspect every penetration through the deck. Look for split sealant, a lifted bedding edge, a loose fastener, a hairline crack around a fitting, or a drainage path that keeps water standing against hardware. Inside the boat, follow staining or dampness on the underside where access allows.
Old sealant smeared around a fitting is not evidence that the fastener holes are sealed. A reliable repair removes and rebeds the leaking hardware according to its installation requirements. In a cored deck, the fastener penetrations also need a design that keeps water away from the core. The correct detail depends on the structure and fitting, which is why the boat builder's information and the repair system instructions belong in the job file.
Work one possible source at a time. If you wet the whole cabin top with a hose, every path becomes active and the result is hard to interpret. The same disciplined isolation used to find rainwater leaks on a sailboat works here: begin low, use a controlled amount of water, allow time for it to appear, and move upward only after the lower zone stays dry.
Stopping the entry point matters even when the structural repair cannot begin immediately. Covering the soft patch while leaving a leaking stanchion above it only hides the symptom and gives water another route into the new work.
Decide whether this is a repair-shop job
Some deck work is within an experienced owner's reach. The WEST SYSTEM repair manual, for example, sets out separate methods for skin delamination and damaged core. That does not make every soft spot a suitable first composite project. The consequence of a poor repair depends on location, load, access, materials, and how well the remaining laminate can be bonded.
Escalate early when the area reaches a chainplate, mast step, stanchion, pulpit, cleat, windlass, track, or another fitting that can put large loads into the deck. The same applies when both skins appear damaged, the boundary keeps expanding, the underside is inaccessible, or the structure has already changed shape. A surveyor can define the defect; a competent composite repairer can define the laminate schedule and working method.
Avoid the tempting shortcuts. Drilling scattered holes and injecting resin may leave wet or crushed core in place, create isolated hard spots, and conceal the boundary from a later repairer. Covering the surface with a plate can spread a load into laminate that is still unsupported. Cosmetic gelcoat work cannot restore a failed sandwich.
If the boat must remain afloat while you arrange help, mark the no-step area, move only removable loads, and keep water out with a temporary weather cover that does not trap more moisture. A refit-priority plan can keep this structural item ahead of finish work.
Give the repairer evidence they can use
A useful handover is short and physical. Include an overall deck plan, the marked dimensions, comparison areas that sounded firm, meter readings if taken, weather before the inspection, visible movement, and photographs of both sides. List nearby hardware and any leak tests performed. Say which loads were removed and whether the boat has been sailed since the defect was found.
Ask the repairer how they will confirm the boundary, expose the core, dry or remove damaged material, prepare the remaining skins, replace the core, rebuild the laminate, finish the surface, and prevent water returning through the fitting. Those are stages to discuss, not instructions for a single universal method. The correct access may be from above or below, and the repair material must suit the existing structure.
After the work, keep the drawings and photographs with the maintenance record. Recheck the repaired area and the rebedded hardware after rain and after it has carried normal loads. A dry cabin does not by itself show that the core stayed dry, so include the fitting in the boat's regular leak and fastener inspection.
The aim is not to make the evidence disappear. It is to restore a continuous load path and leave a record clear enough that the next owner, surveyor, or yard can understand what was opened and rebuilt.
SailStarter's lessons can help you recognize deck hardware, load paths, and the checks that belong in a calm pre-departure routine. Use that foundation to describe the problem clearly, then let a surveyor or repair professional set the method where structure is involved. The most useful beginner action is often a disciplined stop: unload the fitting, keep the area dry, document what you found, and resist a cosmetic fix that removes the warning without restoring the deck.
Keep the marked boundary and photographs with the maintenance record. They give the surveyor a useful baseline if the sound or feel changes before repair.
Try it from the lesson
Can you spot the next move?
What cushions the gap between the boat and dock before they touch?
Why you can trust this guide
. We build each guide from public seamanship and safety sources, then teach the universal principle before any local difference.