Chart your course
Boat Engine Checks Before You Start
Quick answer
The short version
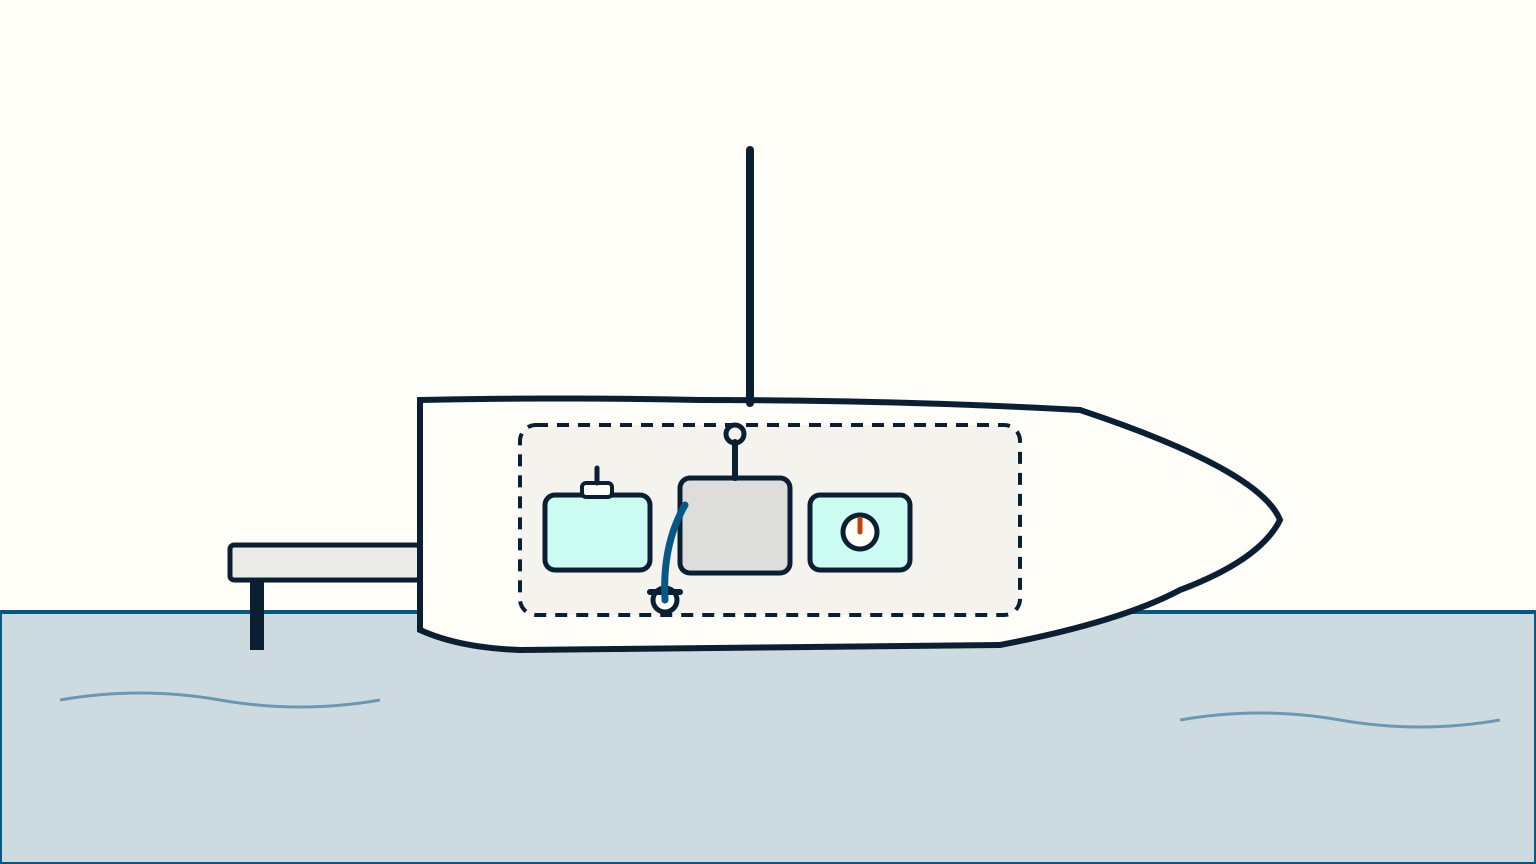
Before you turn the key: check the fuel level and, if there is a fuel valve, that it is open; check the engine oil on the dipstick; open the raw-water seacock that cools the engine, and know that one from the boat's other seacocks; turn on the battery switch; and put the gear lever in neutral. A gasoline engine adds one more step first: run the bilge blower. The moment the engine catches, look for water flowing from the exhaust outlet. No water means shut down and investigate, not wait and see. Before you cast off, check the steering moves freely, confirm a winch handle is aboard, and disconnect shore power.
An engine that quits five minutes after you leave the dock may show a problem that a pre-start check could have found. Below is that sweep in order: what to check in the engine bay before you turn the key, why a boat's several seacocks are worth knowing apart, what to look for when the engine starts, and the wider checks to make before casting off. The routine becomes a habit: the same checks, in the same order, every time, so nothing gets skipped when you are in a hurry.
The Pre-Start Sweep
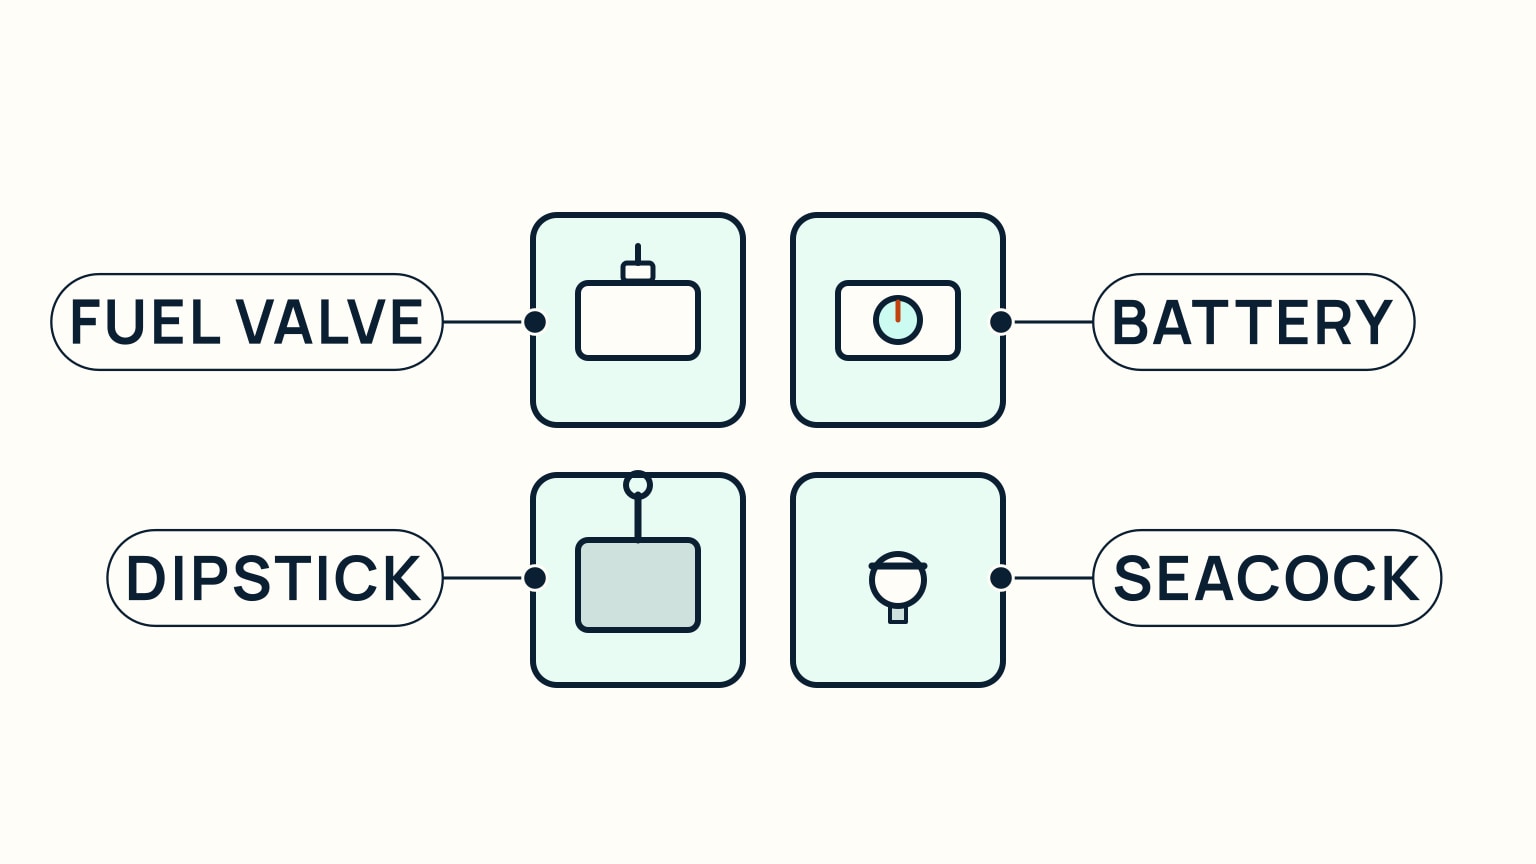
Before you touch the key, sweep four places in the engine bay, plus one more if your boat has it. Check the fuel level, and if there is a fuel tap or valve, confirm it is open and in line. Running low on fuel part-way through a trip is one of the most common on-the-water emergencies, and a look at the dock avoids it entirely. Pull the dipstick and check the oil level, even if you checked it yesterday; a small leak can appear between one start and the next. Open the raw-water seacock that cools the engine. It is often left closed at the dock, so confirm it, and any other seacock in use, before you start. Turn on the battery switch, set to the position that includes the starting battery if there is a selector. Put the gear lever in neutral by hand; not every transmission stops you from starting in gear. Where fitted, clip the kill cord to yourself before you start the engine, or at the latest before you put it in gear. Thrown clear of the helm, it cuts the engine automatically. A gasoline engine adds one more step first: run the bilge blower to clear fuel vapor before you touch the key.
Know Your Seacocks Before You Need Them
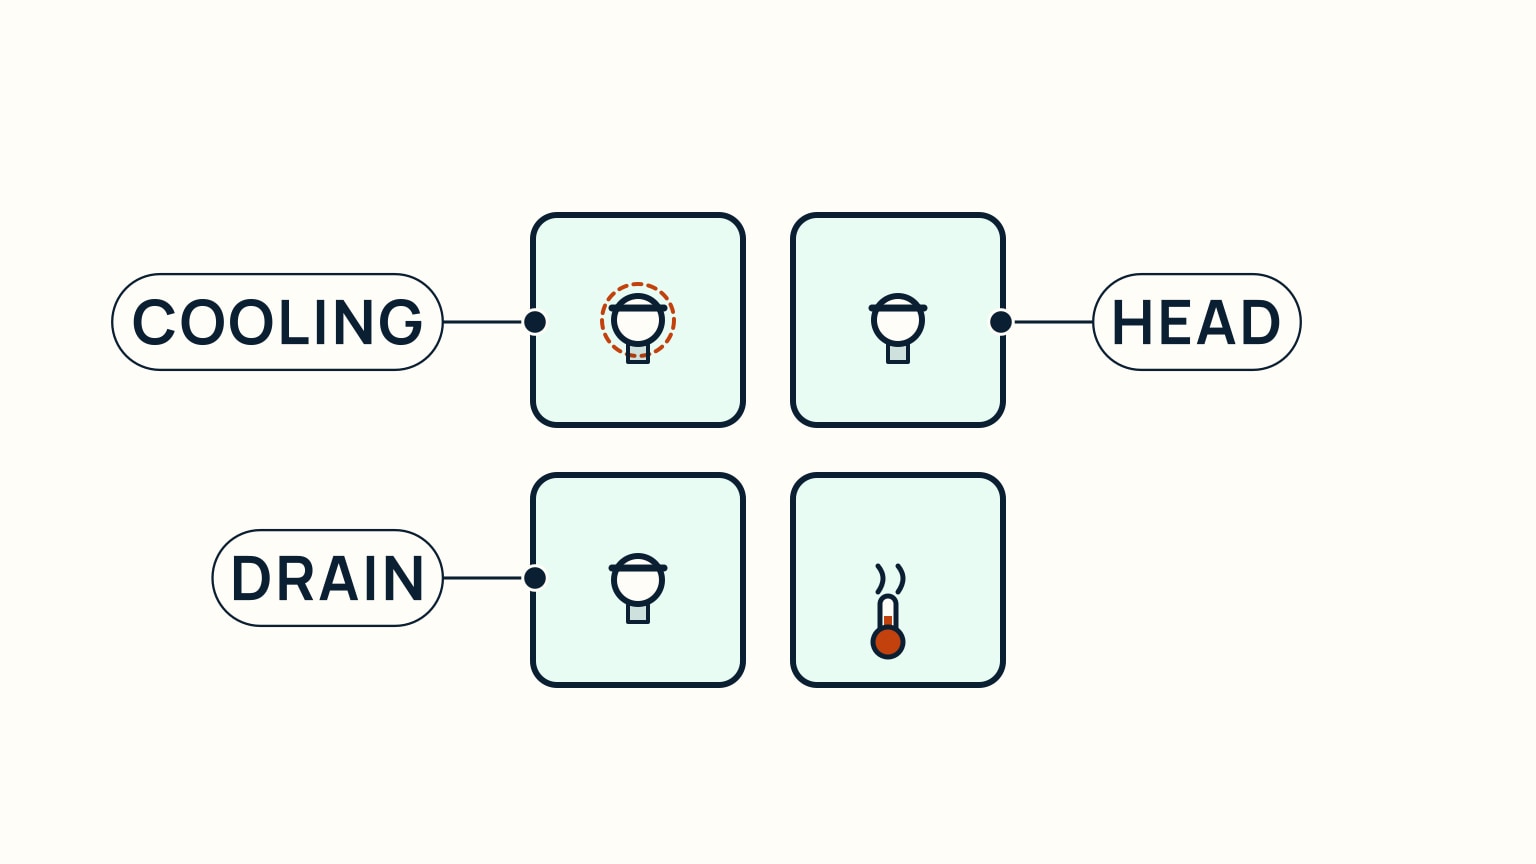
A boat commonly carries several distinct seacocks doing different jobs: one for engine cooling, one for the head, one for a cockpit drain, and sometimes more. They look similar, and from the companionway it is easy to lose track of which is which. That confusion is exactly what turns into trouble: close or forget the wrong one and the engine's raw-water pump has nothing to circulate, which shows up as an overheating engine or, in a worse case, a raw-water pump smoking under load. Knowing, ideally labeling, each seacock by the job it does is what prevents that mix-up. It means you can find the right one quickly during the ordinary pre-start sweep, and just as quickly in an emergency, when there is no time to trace a hose back to figure out what a valve actually controls. Spend a few minutes the first time you are aboard a boat identifying every seacock and what it feeds. After that, opening the right one before you start becomes as automatic as checking the oil.
The Instant It Starts, Watch the Tell-Tale
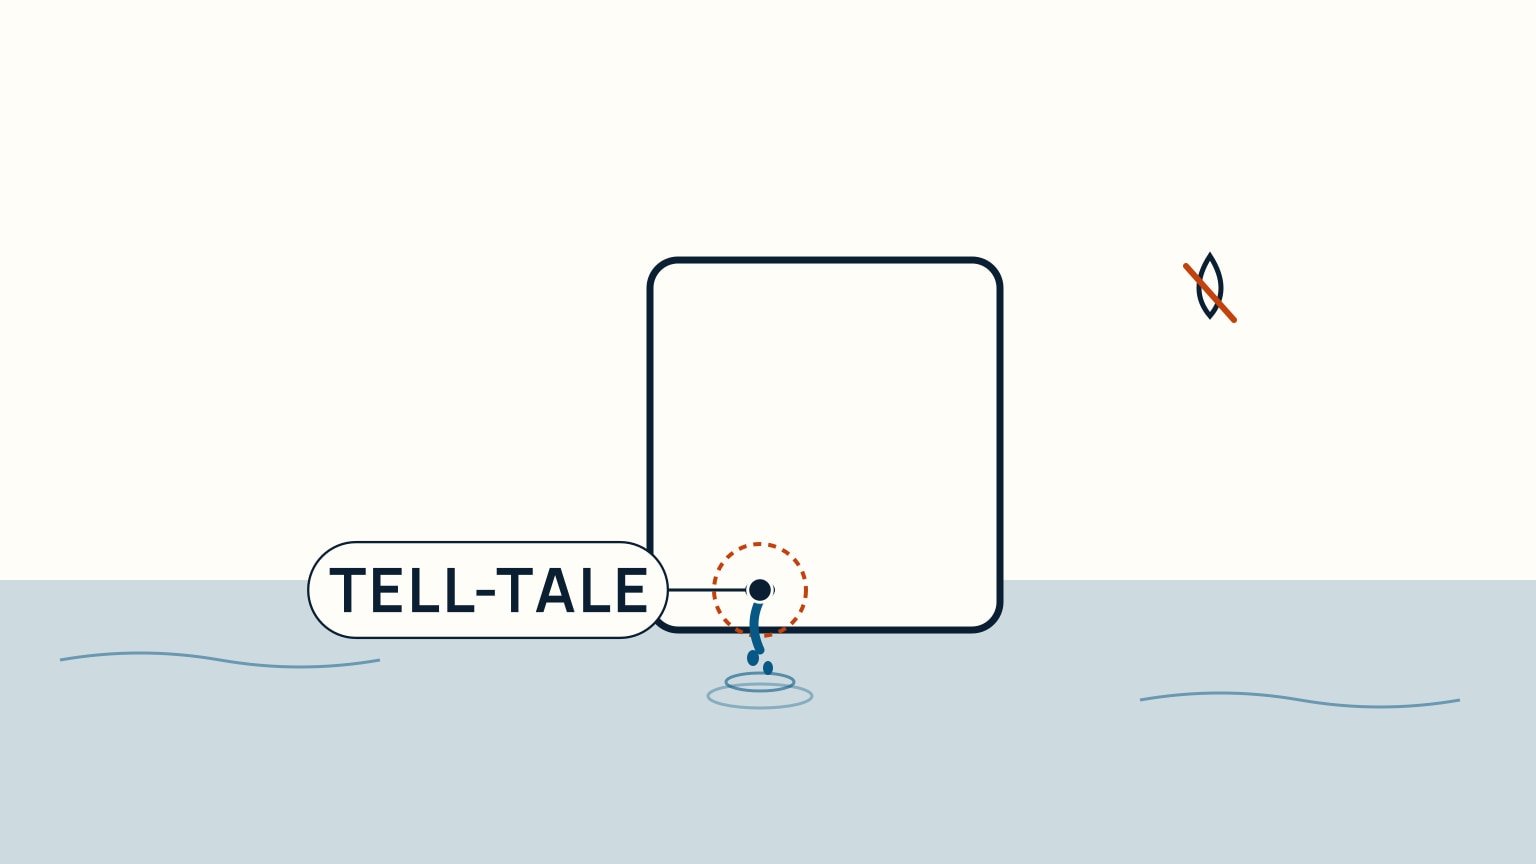
The moment the engine catches, look for water flowing steadily from the exhaust outlet. Sailors call this the tell-tale, and it is the simplest proof that the raw-water pump is actually circulating cooling water through the engine. If you see a steady stream, the cooling system is doing its job. If you see none, shut the engine down immediately instead of waiting to see if it clears. Only once it is off should you investigate, starting with the temperature gauge. A missing tell-tale most often traces back to something simple at the water intake (a seacock that never got opened, or a blocked strainer), though it can also mean the raw-water pump's impeller has failed. With the boat still tied to the dock, take one more moment before you rely on the engine to leave: briefly shift into forward, then reverse, and confirm it answers both. Finding a problem now, alongside the dock, beats finding it out in the fairway with no easy way back.
Before You Cast Off
A few more checks are worth making before you leave, even though they are not down in the engine bay. Turn the wheel or tiller through its full range each way and feel for anything that is not smooth: chafing, unusual friction, or play all signal a steering system worth sorting out before you rely on it. Confirm a winch handle is aboard; without one to hand, you cannot trim or reef when you need to. Disconnect the shore-power cord in order (the boat's own breaker, then the shore pedestal's breaker, then unplug) and stow it before you cast off. Get in the habit of lifting a bilge floorboard often, engine running or not, just to confirm the bilge is dry; a routinely dry bilge is what lets new water be spotted the moment it appears, rather than only once it has accumulated. Round out the sweep with a basic tool kit and a few spares, kept dry and stowed low, so a small on-the-water fix does not turn into a bigger problem.
Use a cold-engine baseline
Before the first start of the day, inspect from the same positions and in the same order. Look at fluid levels by the engine maker's method, belt condition and tension, hoses, clamps, wiring, mounts, strainers, leaks, bilge condition, fuel supply, and the exhaust path you can safely see. A repeatable route makes a new stain, loose connection, or low level easier to notice.
Do not reach near moving or hot parts. If a check requires opening a pressurized system, turning machinery, or working on fuel or high-current wiring, follow the manual and use qualified help.
Watch the start and warm-up
Confirm the controls are set as the boat's procedure requires. Start the engine and observe warning lights, gauges, sound, vibration, charging indication, cooling-water discharge where applicable, and exhaust. Compare with the known normal state. Stop and investigate an alarm, missing cooling flow, leak, smoke, or unusual noise rather than hoping it will clear under load.
The battery troubleshooting guide helps separate charging problems from storage and load problems. The bilge-water guide helps identify whether new liquid is water, coolant, oil, or another system leak.
Test propulsion before casting off
With lines secured and the area clear, follow the boat's procedure for checking ahead, neutral, and astern response. Confirm steering and controls move freely. Brief the crew before any propeller engagement and keep lines out of the water.
After the short test, inspect again for leaks or changes. Disconnect shore services, close panels, secure tools, and record any defect. A successful start is only one part of readiness. The engine must cool, charge, shift, and run without a new warning.
Keep a simple log of hours, service, fluids, filters, belts, impellers where fitted, and recurring observations. Use the engine maker's maintenance schedule rather than a universal interval. Trends in sound, consumption, leakage, or starting can then be checked before they become a departure-day surprise.
None of this is complicated, and you don't need to be a mechanic to run through it. It is a short, repeatable sweep: a few things to check before you turn the key, one thing to watch the instant it starts, and a few more before you cast off. Do it in the same order every time and it stops feeling like a checklist and starts feeling like second nature, which is exactly when it is most likely to actually get done, even when you are in a hurry to catch a favorable tide or beat a change in the weather. SailStarter's beginner lessons build this same habit step by step, alongside the other groundwork that turns starting the engine from a chore into something you barely think about. If you are just starting out, it is a good place to begin.
Try it from the lesson
Can you spot the next move?
The engine is idling, the boat is safely secured and the propeller area is clear. What should you confirm before departure?
Why you can trust this guide
. We build each guide from public seamanship and safety sources, then teach the universal principle before any local difference.