Chart your course
Anchor Scope Explained: What Ratio to Use and How to Set It
Quick answer
The short version
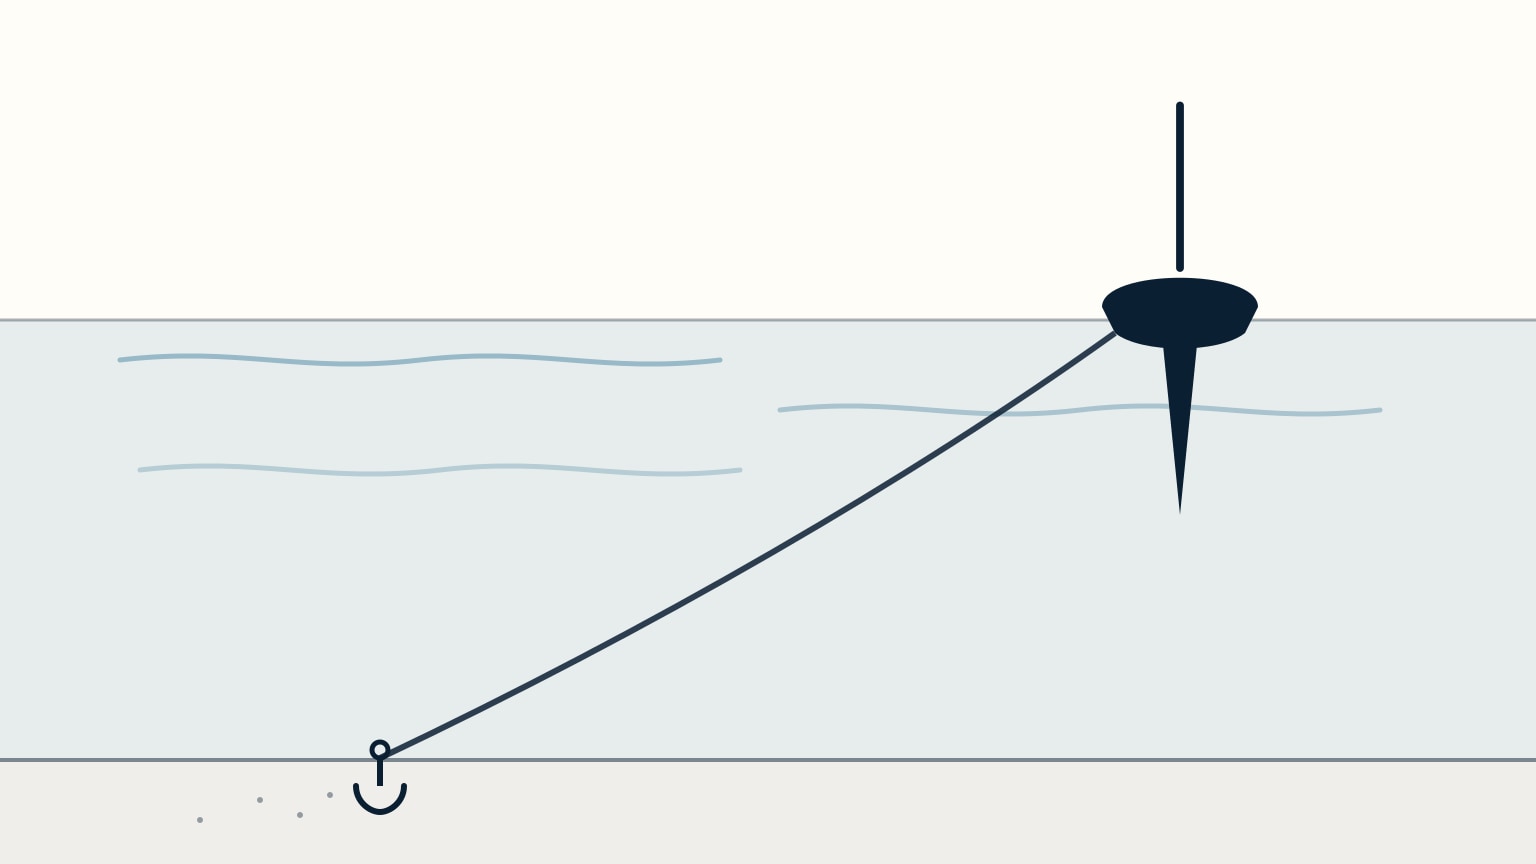
Anchor scope is the ratio between how much rode you let out and the total height of your bow above the seabed; depth at high water plus your bow's height above the surface. Published guidance differs by source and by rode: figures run from about 4:1 up to 7:1 for chain and 5:1 up to 10:1 for rope, climbing as conditions worsen, so treat any single number as a starting point, not a fixed rule. More scope flattens the pull on the anchor so it digs in instead of getting hauled straight up and out. To set it well: approach into the wind, stop, lower under control, pay out while drifting back, snub, then prove the anchor is actually holding before you relax.
You picked the right anchor for the bottom and found a sheltered spot with room to swing. Now comes the part that actually keeps you there overnight: how much rope or chain to let out, and how to lower it so it digs in instead of skating across the seabed. Scope sounds like a small detail, but it's the difference between an anchor that rides out a wind shift and one that quietly walks itself out of the bottom at 2 a.m. This article covers the math, the published ratios, why the geometry matters, and the exact sequence for lowering, paying out, and proving the set. If you haven't sized your ground tackle yet, that's lesson 12.1; if you haven't picked your spot, that's lesson 12.2. This picks up right where both leave off.
What Scope Means and How to Calculate It
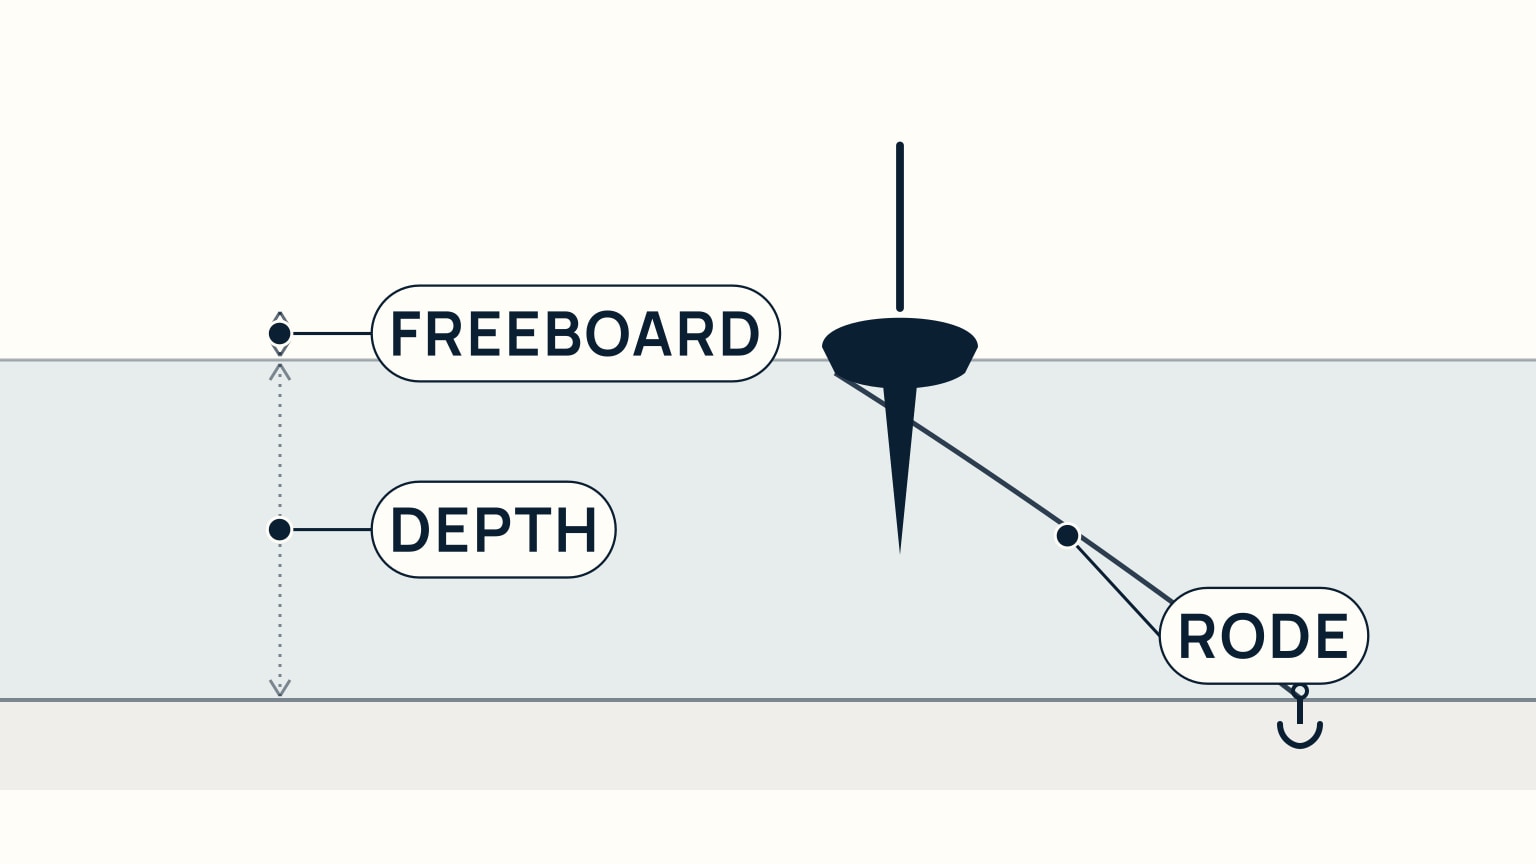
Scope is the ratio between the length of rode you let out and the total height your bow sits above the seabed: not just the water's depth, but depth plus the height of your bow (or anchor roller) above the surface. Two independent sources describe the same shape (depth of water plus freeboard) and one spells out a detail worth holding onto: use the depth at high water, so a rising tide never quietly shortens the scope you actually laid. A worked example from the American Sailing Association makes it concrete: with 10 feet of depth and 4 feet of freeboard at the bow, a 7:1 scope calls for (10 + 4) × 7 = 98 feet of rode. Swap in your own boat's freeboard and the tide table's high-water figure for your anchorage, and the same formula gives you the number to actually pay out: always measured against the deepest water you'll sit in over the whole stay, not the flattering depth you saw the moment the anchor first went down.
Once it's paid out, you can sanity-check that number without a tape measure. Multiply the bow height you can see above the water by the ratio you're aiming for, and that length of rode, fully stretched and taut, is roughly what should show between the bow and the surface. If it looks short against that quick multiplication, you haven't paid out enough yet. Carrying more rode aboard than you strictly expect to need is the general consensus for exactly this reason: the math above is only useful if there's enough chain or line on the boat to reach the ratio conditions actually call for.
How Much Scope to Use
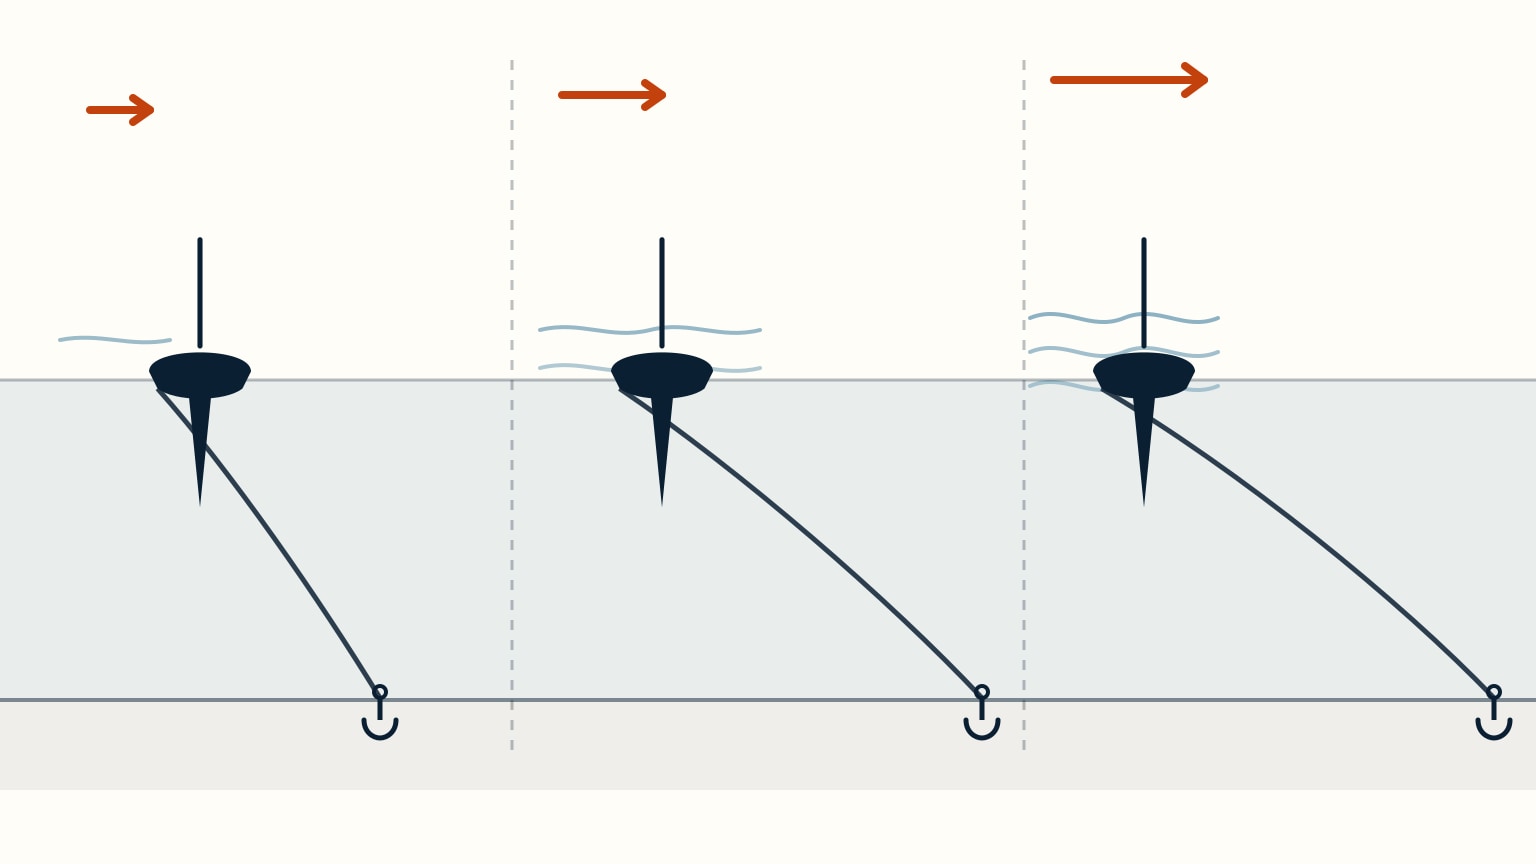
Published guidance agrees on the shape but not on one exact number, so treat every ratio here as a range, not a rule. The BoatUS Foundation study guide's standard figure is 7:1, dropping to 5:1 for a lightweight anchor on a small boat in good weather conditions. It adds that a prudent boater always carries extra rode, just in case. Safe Skipper scales scope with both cable type and conditions: in calm water, a 3:1 minimum for chain or 5:1 for rope; in light-to-moderate conditions, 5:1 for chain or 8:1 for rope; in worsening conditions, 8:1 for chain and 10:1 for rope. An RYA-affiliated Day Skipper course gives a lower floor (4:1 for all-chain rode, or 6:1 for rope backed by a short length of chain) as its stated minimum. Wherever a source splits the number by cable material, the pattern is the same: rope gets more scope than chain for the same conditions, and every ratio climbs as wind and sea build. Pick from the upper end of whichever range fits your rode and the forecast, not the bottom.
None of these ratios are a one-time calculation you set and forget. In tidal waters, the rise and fall of the tide changes the depth under you through the night, so scope that looks generous the moment you drop the hook can quietly shrink as the water rises. Check it again, and let out more rode, if you're anchored for several hours or overnight. That's exactly why the calculation above uses the depth at high water rather than the depth you happen to see on arrival. If you haven't picked the spot itself yet, choosing your anchorage is where swing room and holding ground get sorted before scope becomes the question.
Why Long Scope Holds and Short Scope Doesn't
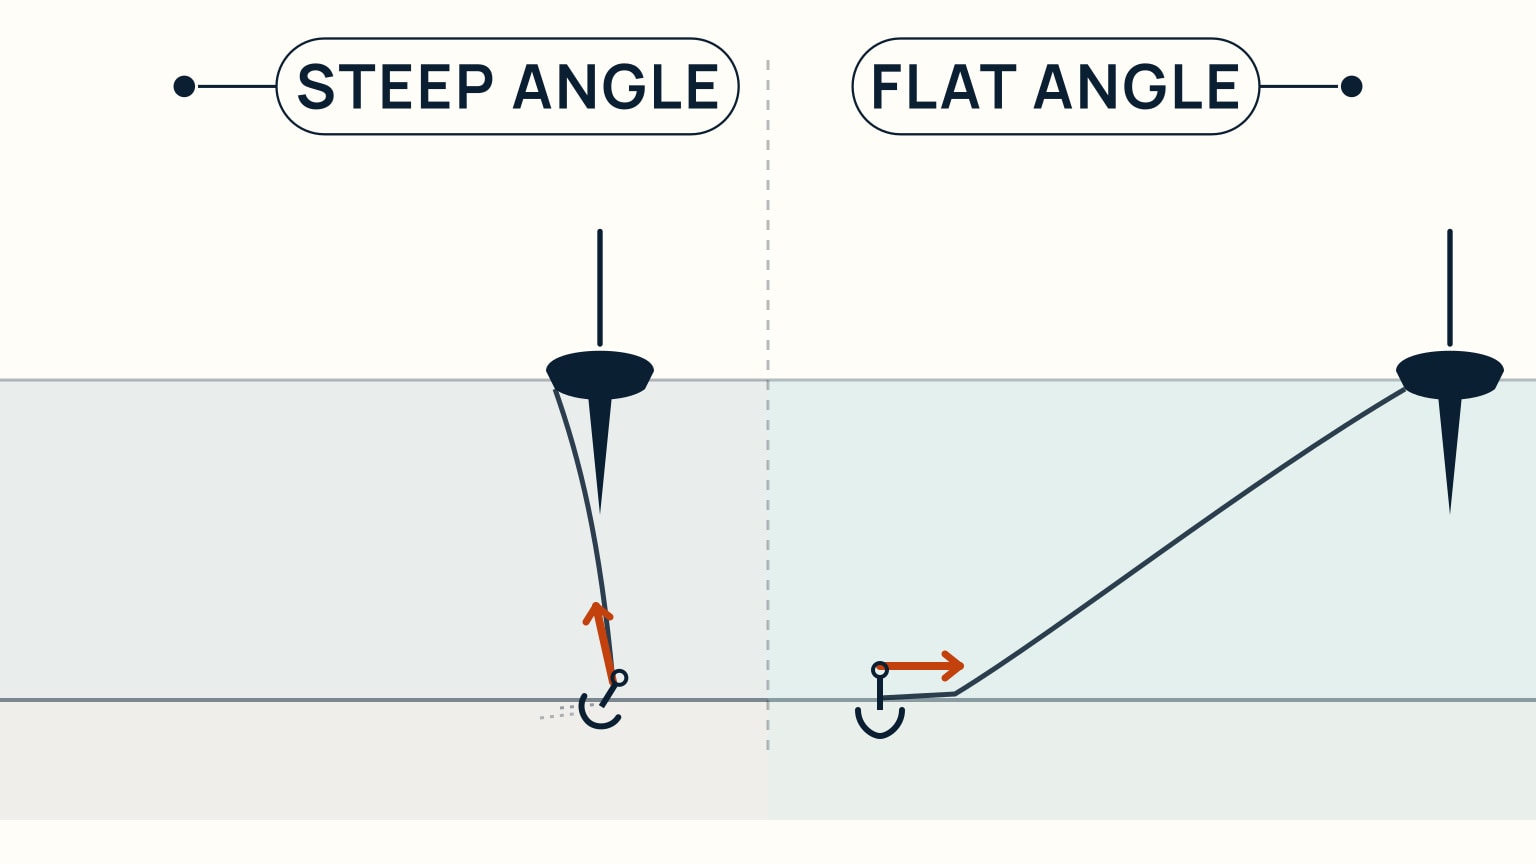
For an anchor to work, the pull on its cable has to run close to parallel with the seabed. The moment that pull steepens toward vertical, the anchor breaks out and drags instead of digging in. Two things keep the pull flat: enough scope that a length of cable actually lies along the bottom before it rises to the boat, and, with a chain or part-chain rode, the weight of the chain itself, which sags into a catenary curve between anchor and boat. That curve does double duty: it keeps the pull low, and it acts as a shock absorber, so a sudden gust straightens and tightens the cable before the load ever slams into the anchor. Cut the scope short and both mechanisms disappear: there's no cable left lying on the bottom to hold the pull down, and no curve left to absorb a gust, so the very load that should bury the anchor deeper instead levers it out. Chain is heavier than rope specifically because that weight is doing this job; which is also the likely reason the published ratios above consistently ask for more scope on a rope rode than on chain.
The choice of rode material follows the same logic. Chain is stronger than rope and won't chafe against the seabed the way rope can, which is part of why an all-chain rode gets away with less scope in the ratios above. Rope is lighter and easier to handle, but more prone to chafe and less secure on its own, so it's commonly paired with a length of chain nearest the anchor: enough chain to lie on the bottom and do the catenary's job, with rope making up the rest of the rode for a lighter overall package. That combination, not rope alone, is what the higher rope-rode scope figures above assume. If you're still weighing rode and ground tackle choices for your own boat, anchor types covers that decision in more depth.
Setting the Anchor: From Approach to Proving the Set
Lowering the hook well matters as much as picking the ratio. Approach your chosen spot slowly, heading into the wind or the tide (whichever is stronger) and bring the boat to a stop over the spot. Every source is blunt on this next point: lower the anchor under control, never throw it. As the boat drifts or is blown back, pay out rode in a controlled manner rather than letting it run free, then snub the cable: make it fast and let the boat's own weight pull against it to set the anchor. Once the scope is out, ease into gentle, sustained reverse throttle and check that the cable stays tight and the anchor holds: a deliberate check, not just hoping the wind will tell you later. Then prove the set instead of assuming it: take a transit of two fixed shore objects, or a couple of compass bearings, and watch whether they hold their relative position. If they drift apart, you're dragging. A firm tug on the rode by hand tells you how solidly it's set, and repeating your bearing check periodically afterward is what actually catches a slow drag before it becomes a problem.
Treat the proving step as a real test, not a formality. If your transit or bearings drift apart, or the boat doesn't sit steady against that little reverse thrust, the anchor hasn't dug in: bring the rode back in and repeat the whole approach-lower-pay out-snub sequence in a fresh spot rather than trusting a set that hasn't proven itself. A dragging anchor rarely announces itself with drama at first. It's a slow walk across the bottom that a transit check catches long before you'd feel it in the cockpit, which is exactly the failure this site's dragging anchor guide walks through end to end, including what to do if you wake up to find it's already happened.
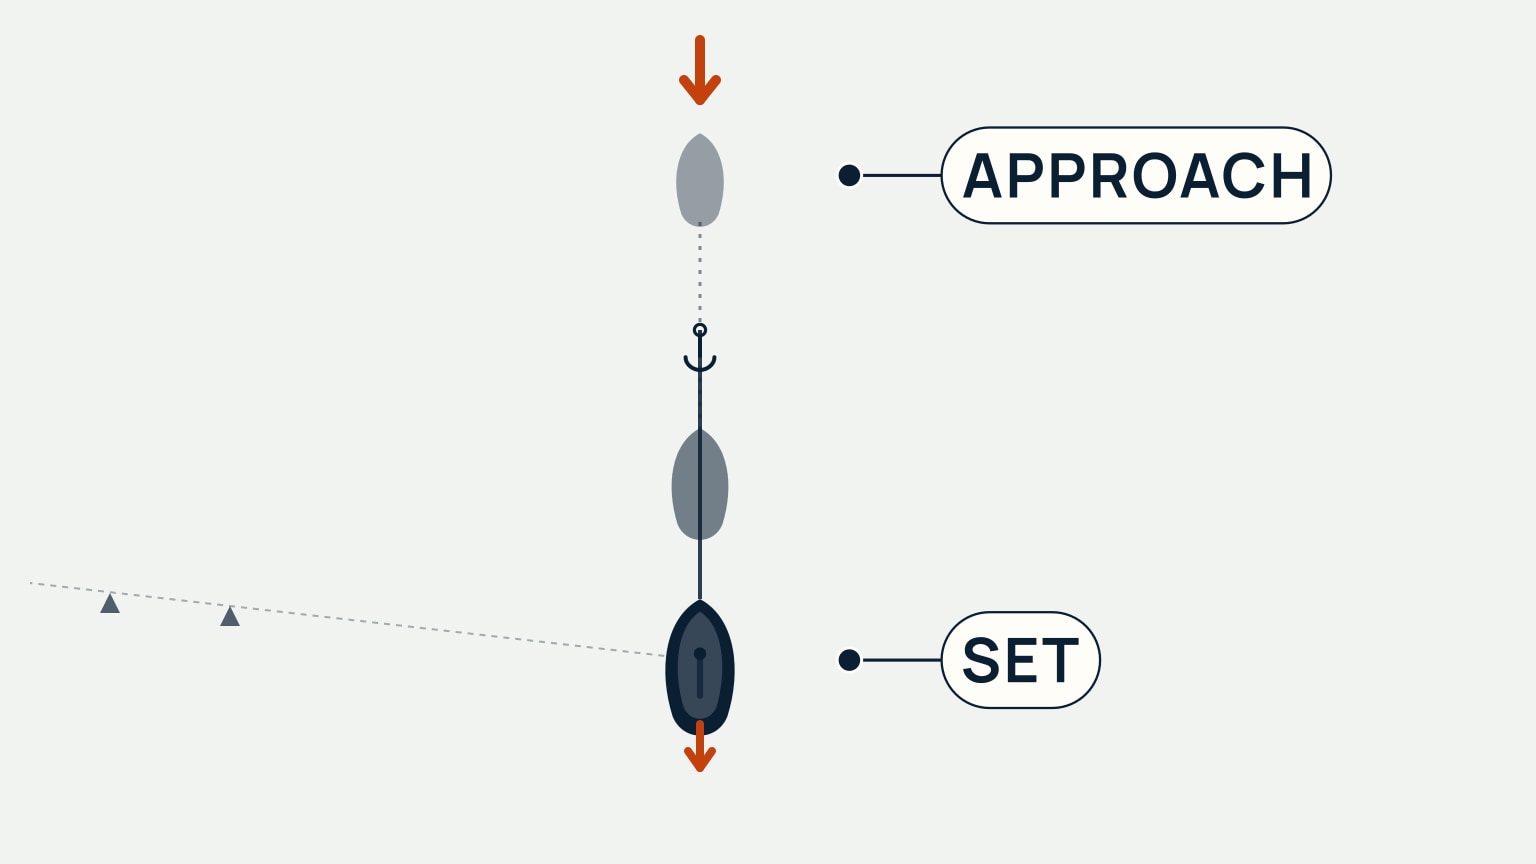
Scope and setting are the two things that turn a correctly sized anchor in a well-chosen spot into a boat that actually stays where you left it. SailStarter's lesson 12.3, "More rope than you think: scope & setting," walks through this same sequence hands-on: calculating scope for your own boat and the tide you're facing, comparing a steep pull against a flat one, and running the full approach-to-proving-the-set procedure step by step. If you've already worked through 12.1 (the gear) and 12.2 (the spot), this is the lesson that ties the whole anchoring picture together. Come try it, and put a real number on the next rode you pay out.
Try it from the lesson
Can you spot the next move?
Your guidance calls for 6:1 here. Greatest expected water depth is 5 m and bow height is 1 m. How much rode do you pay out?
Why you can trust this guide
. We build each guide from public seamanship and safety sources, then teach the universal principle before any local difference.