Chart your course
How to Choose an Anchorage: 4 Things to Check
Quick answer
The short version
Choosing a safe anchorage comes down to four checks, done before the anchor ever goes down. First, shelter: assess how calm it looks now and whether the forecast keeps it that way, since a spot sheltered from today's wind can turn into a lee shore if the wind swings overnight. Second, bottom: the chart prints the seabed type in short letter codes (S for sand, M for mud, and more), and sand or mud generally holds far better than rock or coral. Third, depth at low tide, with real margin for your draft. Fourth, swing room: the circle your boat traces around its own anchor, clear of neighbors, hazards, and channels. Run all four, in that order, and you're anchoring on judgment, not luck.
Arrive somewhere new by boat and the water in front of you can look like one uniform, anchorable patch: right up until you have to pick a spot and commit an anchor to it. Every anchorage, whether it's a crowded harbor or an empty cove, gets judged the same way: is it sheltered, is the bottom any good, is there enough water underneath at low tide, and is there room to swing without meeting a neighbor, a hazard, or the shore? Skip any one of those checks and the spot that looked perfect at 4 p.m. can turn into a bad night at 2 a.m. This isn't guesswork: it's the same short, repeatable process sailors run every time they choose where to anchor. Here's what each check actually involves, and why the order matters.
Shelter: Check Now, and Check the Forecast
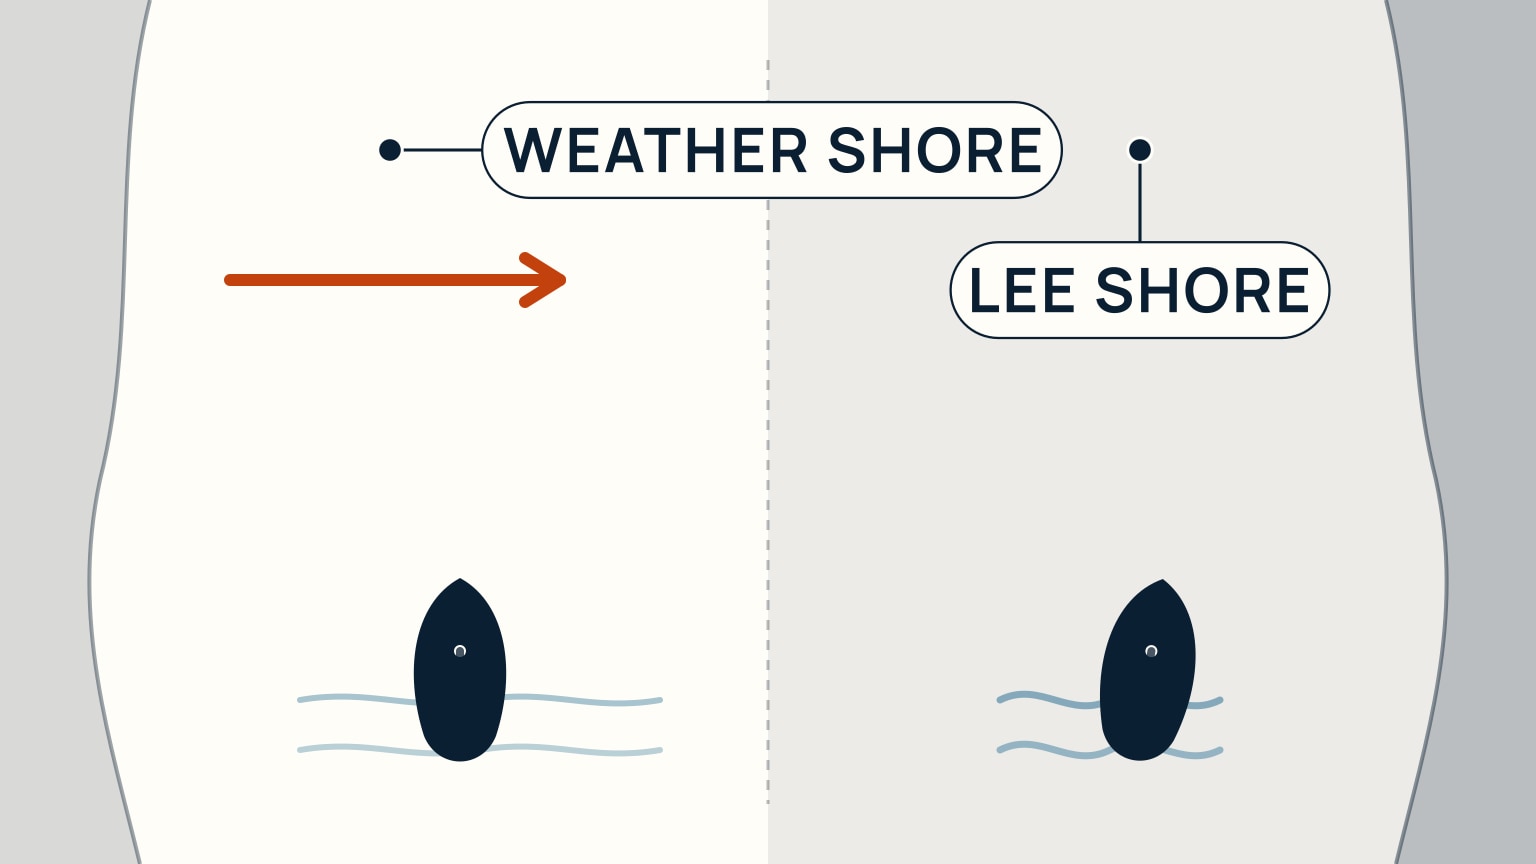
Shelter means protection from wind and waves, but the check goes beyond "is it calm right now." Decide whether the spot stays sheltered for as long as you plan to be there. Check the forecast as well as the sky: if the wind is due to shift, will the spot that's calm at anchor time still be calm at 2 a.m.? The specific danger even has a name: a lee shore, any stretch of shoreline the wind is blowing toward. Anchoring close to one is generally discouraged, and the risk doesn't shrink in bad weather; a distant storm's wind and wave effects hit a lee shore at full strength, which is exactly why a calm afternoon spot can turn dangerous overnight. In an exposed anchorage, plan an escape route you could follow even in poor visibility, and keep checking the forecast throughout the stay. If you don't already know the anchorage, aim to arrive with real daylight left: it's what lets you actually see the hazards, the other boats, and the bottom before you commit to a spot.
Bottom: Read the Chart Before You Arrive
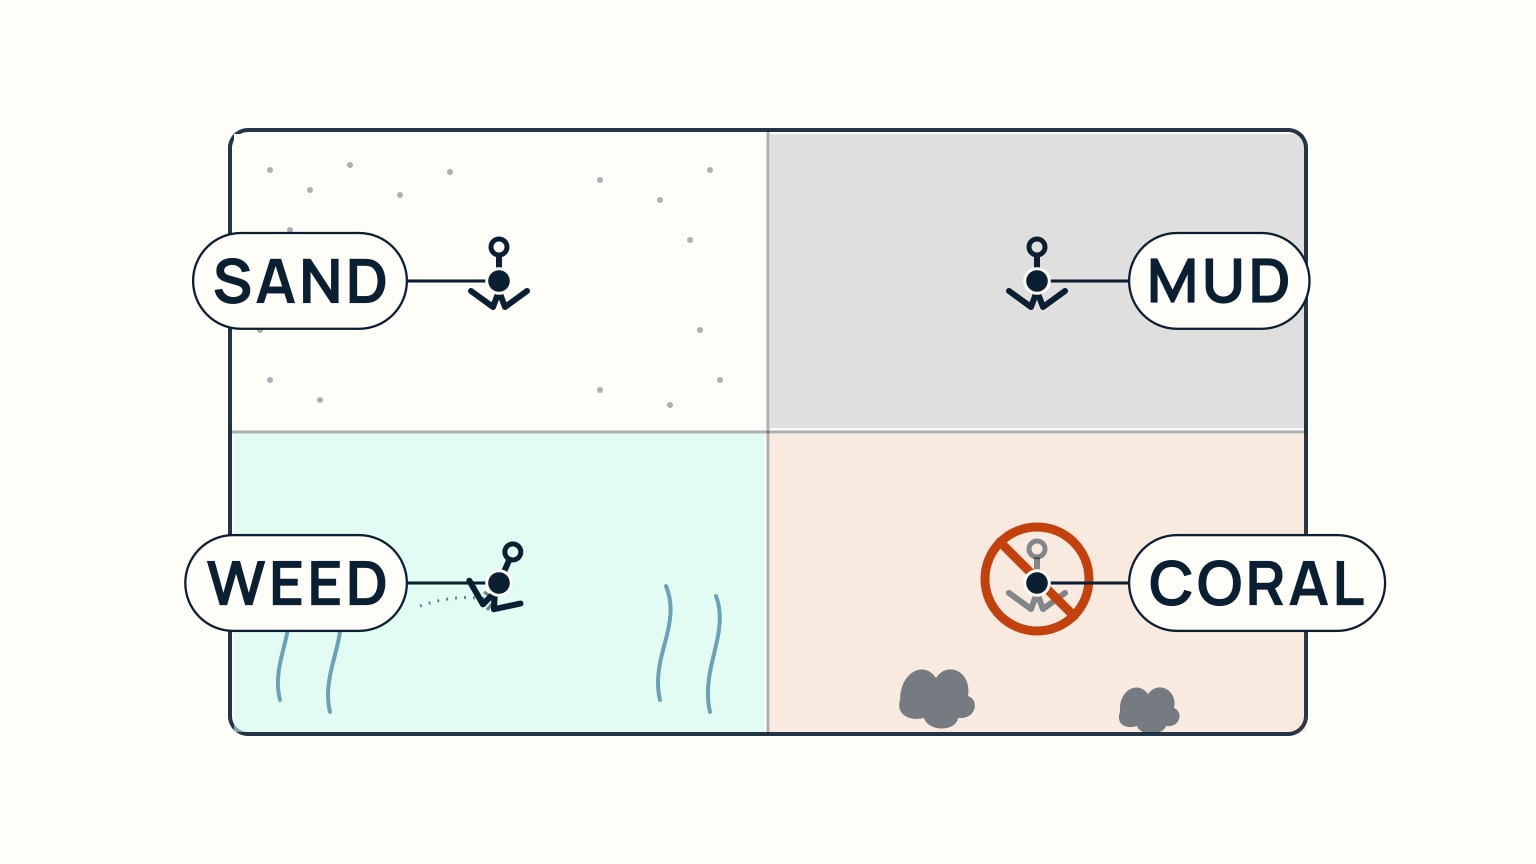
What the anchor actually grips matters as much as where you park it. Sand and mud are the reliable bottoms; rock and weed are not, and both the anchor and the seabed pay for it if you guess wrong. You don't have to guess. The chart tells you the bottom type before you ever arrive, printed as short letter codes: S for sand, M for mud, R or Rk for rock, Wd for weed, Co for coral, and more besides for clay, gravel, shells, and mixed bottoms. Treat the printed letter as a strong hint, not a certainty: bottom material can vary over short distances and shift over time, so the code is where you start looking, not where you stop. Coral deserves its own rule: anchoring on it causes real physical damage to the reef, which is why mooring buoys are the standard alternative wherever they're provided. In some protected areas, anchoring on coral or seagrass isn't just discouraged, it's an enforced local rule, so it's always worth checking the specific area's regulations before you anchor anywhere near a reef.
Depth: Enough Water at Low Tide
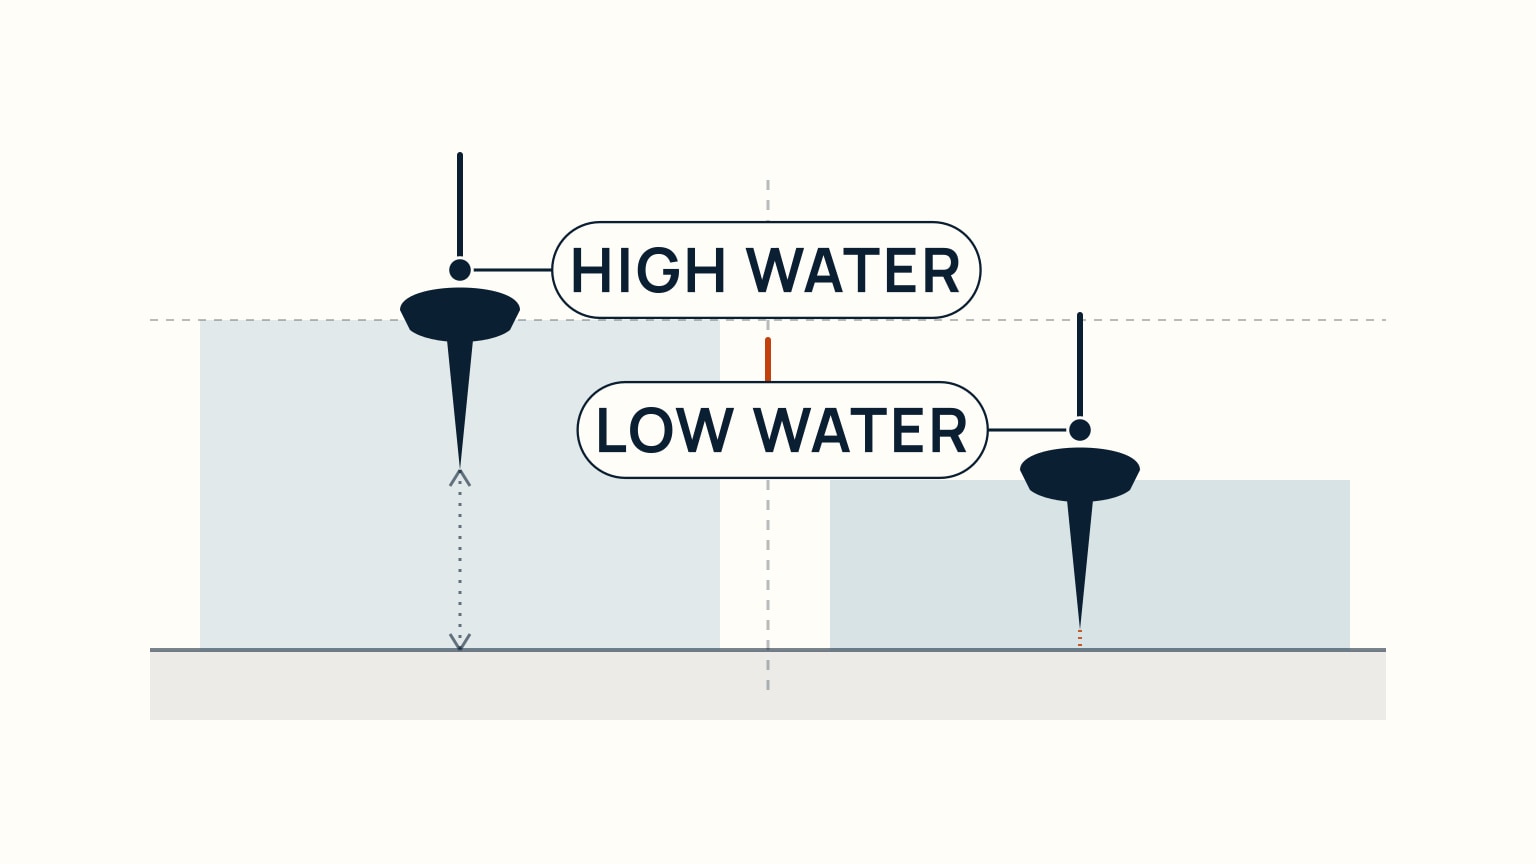
Depth has to work at the bottom of the tide rather than only at the moment the anchor goes down. Tide is a range across the day, and the check has to account for how far the water will actually fall before you're back aboard: adequate depth means enough water for your draft at low tide, with a margin, not the flattering number you saw at high water. Get this wrong in either direction and it costs you: too little water at low tide and your keel can find the bottom; too much rise on the other end, and the rode you paid out at low tide is no longer enough scope once the tide comes back in. Both ends of the cycle matter, which is why depth gets checked against a tide table for the whole time you'll be anchored, not eyeballed once on arrival. It's a small step with an outsized consequence: a missed depth check is one of the few anchoring mistakes that can put your boat aground while you sleep.
Swing Room: Read the Circle, Not the Gap
Compare the whole stay, not the arrival snapshot
Mark where the wind and current may come from during the planned stay. A boat can swing around its anchor as either changes, so the clear area must work through the expected directions. Include neighboring boats and their likely swing, shore, shoals, rocks, moorings, navigation channels, and any area where anchoring is prohibited.
Estimate depth for the highest and lowest water you expect, then include the boat's draft and the required under-keel margin. Scope is based on the vertical distance from the bow roller to the seabed, not charted depth alone. The anchor and rode also need room to set before the boat reaches the edge of the safe circle. The draft and under-keel-clearance guide helps with that depth check.
Look at shelter in both wind and waves. Land that blocks the forecast wind may still leave an open fetch in another direction or allow swell to wrap into the bay. If the forecast shifts overnight, the comfortable corner at arrival may become exposed. Identify where you would move and what cue would trigger that decision.
Confirm the choice after anchoring
Set the anchor using the boat's established procedure, then verify holding rather than assuming the engine load or quiet cockpit proves it. Take visual transits or bearings, use position monitoring as a supplement, and check depth. Repeat after the boat settles and after a change in wind or current.
Watch how neighboring boats lie. Different hulls, windage, keel shapes, rode materials, and scope can make boats swing differently. More distance is useful when you cannot confirm another boat's anchor position or rode. If another crew arrives too close, address it early while both boats can still move easily.
Before sleep or leaving the cockpit, agree on alarm settings, watch arrangements, forecast checks, and the response to dragging. Keep the engine or sails, deck lighting, clothing, and departure route ready for the conditions. The tide-table guide cannot replace the chart, forecast, and local restrictions for the actual place, but it helps verify the depth through the stay so a scenic bay does not become the only decision criterion.
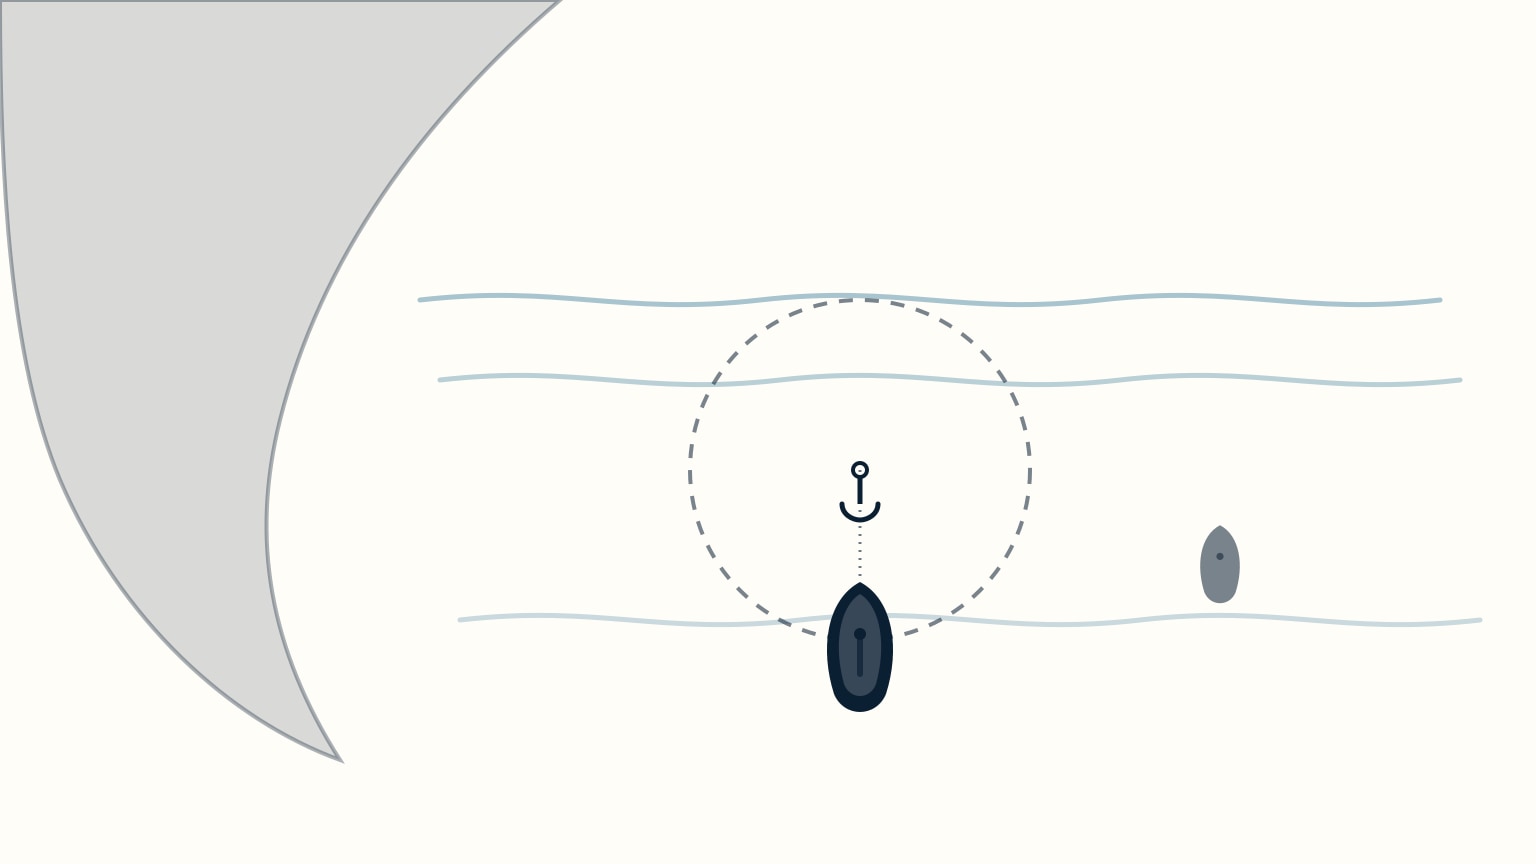
An anchored boat isn't a fixed point: it swings around its anchor as wind and current shift, tracing a circle whose radius runs out roughly as far as the rode you've paid out. That circle is bigger than most beginners expect: assume the wind can back or veer a full 180 degrees, and with, say, 100 feet of rode out, a complete reversal can put you nearly 200 feet closer to the shore or a hazard than where you started. Every neighboring boat is swinging on its own circle too, so the right comparison isn't the gap of open water you can see right now, it's whether your full circle and theirs overlap once the wind turns. Reading how boats already there are lying, especially ones close to your own size and shape, gives you a good read on how much room to leave, since similar hulls tend to swing the same way in the same wind. Then check the chart for what a glance at the water can't show: channels, fairways, cables, and moorings all deserve a wide, deliberate berth, and by longstanding etiquette, boats already anchored keep the spot they chose first.
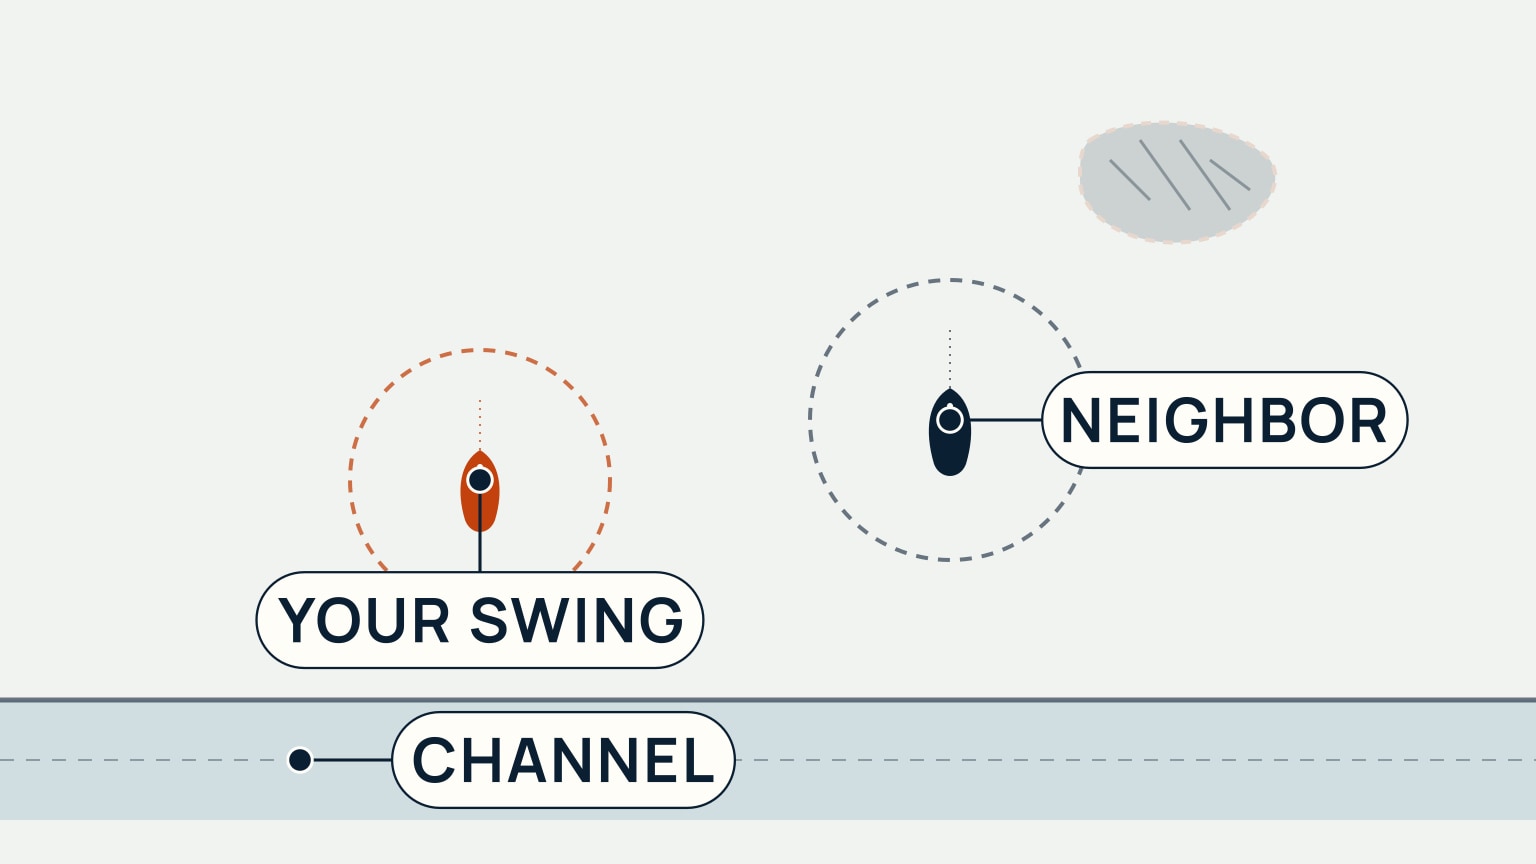
Run through all four checks (shelter, bottom, depth, swing room) and choosing an anchorage stops being a guess and starts being a five-minute routine you repeat every time you arrive somewhere new. None of the four is hard on its own; the skill is doing all four, in order, before the anchor goes down, instead of after something goes wrong at 2 a.m. SailStarter's lesson 12.2, "Choosing your spot," walks through this exact process hands-on, with an interactive diagram for reading swing circles against neighbors, channels, and hazards so you can see the geometry rather than just read about it. If you've already sized your ground tackle in lesson 12.1, this is the next five minutes worth spending before your first real anchorage. Come try it.
Try it from the lesson
Can you spot the next move?
The chart shows a kelp patch right where you were planning to drop the hook. Why does that change your plan?
Why you can trust this guide
. We build each guide from public seamanship and safety sources, then teach the universal principle before any local difference.