Chart your course
Cardinal Marks Explained: The Compass System That Points You to Safety
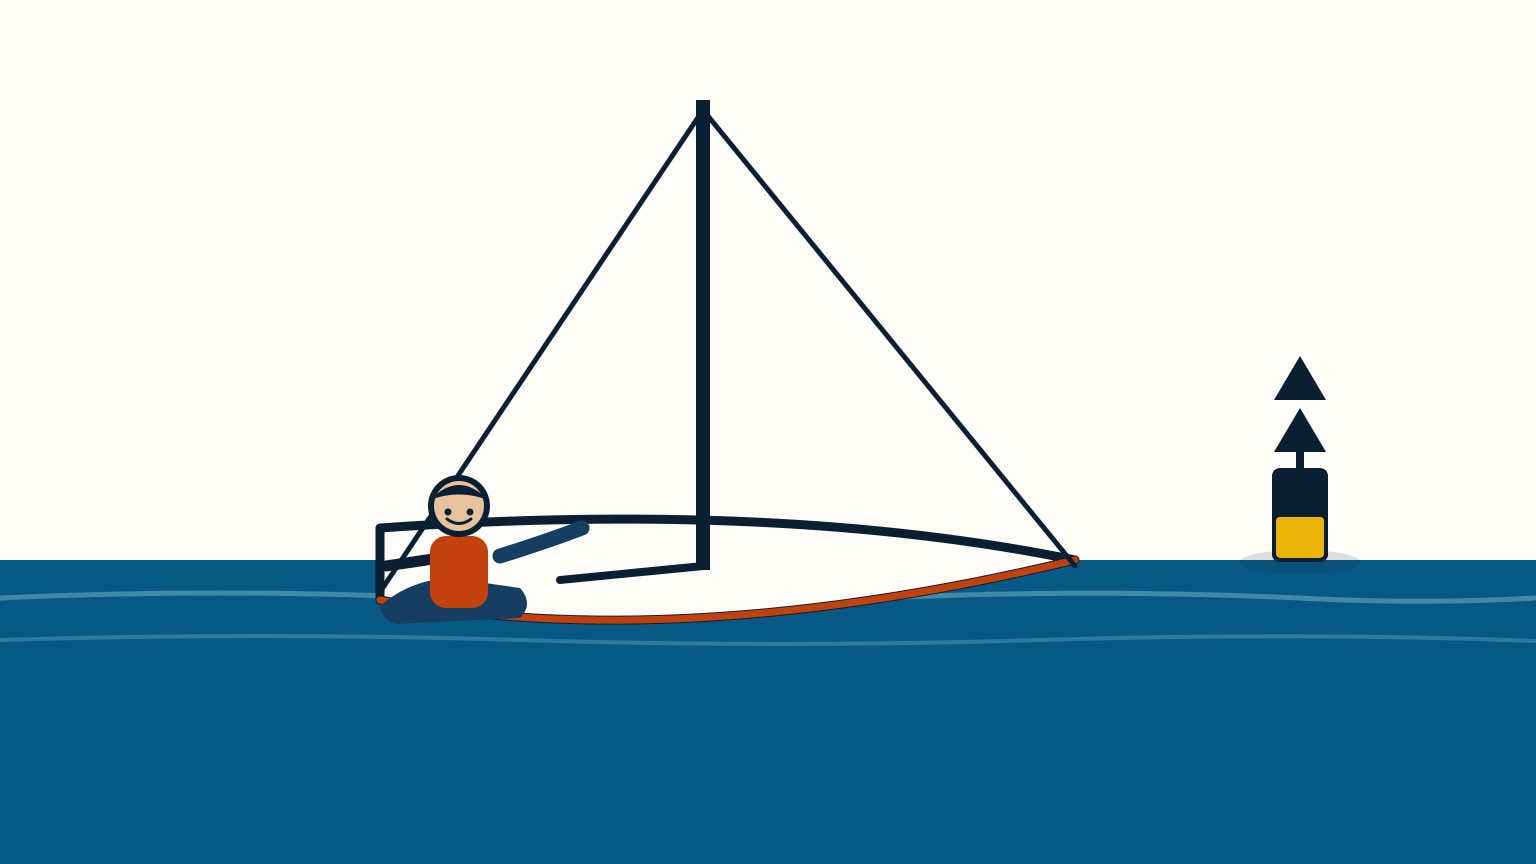
Quick answer
The short version
A cardinal mark is a buoy or beacon named for the compass direction of the safe water it sits on, relative to a danger: a north mark means safe water lies to its north, so you pass north of it, and the same logic holds for south, east, and west marks. Unlike red and green lateral buoys, which flip meaning between world regions, cardinal marks are IALA-uniform everywhere, so this one system works on any coast you sail, from a home harbour to a country you have never chartered in before. Read the two black cone-shaped topmarks: both point up for north, both down for south, base to base for east, tip to tip for west. At night, or whenever the topmark is too far off to make out, each direction flashes on its own clock-face rhythm, confirming what the topmark already told you by day, so you are never relying on a single cue alone.
If you've just gotten comfortable with red and green lateral buoys, cardinal marks bring a genuine relief: the confusion of lateral buoyage flipping between world regions doesn't apply here at all. A cardinal mark's shape, colour bands, and light rhythm mean exactly the same thing whether you're sailing off Portugal or New Zealand, with no region check required first. Instead of marking a channel side, a cardinal mark stands beside a real hazard, a rock, a shoal, a wreck, and tells you which compass direction has the deep water around it. Learn the topmark logic once, and you can read any cardinal mark you meet, anywhere, day or night, without relearning the system each time you sail somewhere new. That logic carries through to the light rhythms that back it up after dark, and to the other IALA mark families you'll meet alongside cardinals on any chart.
Named for the Side You Pass
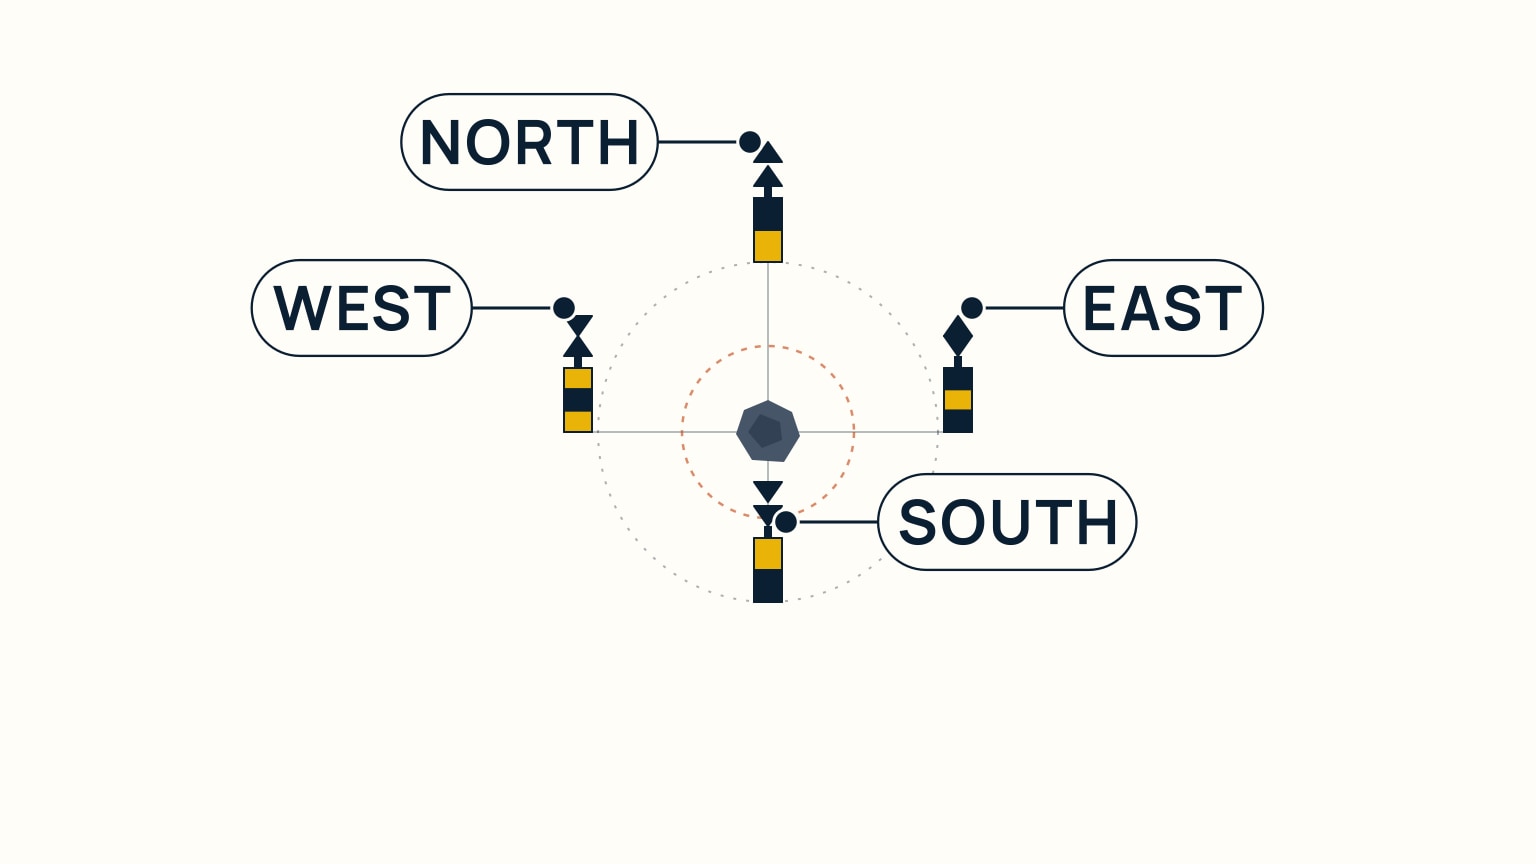
A cardinal mark takes its name from the side of the danger where the water is safe, not from where it happens to sit relative to you at the moment you spot it. A north cardinal mark sits on the north side of a hazard, and safe water lies to its north, so you keep the mark on your way, passing north of it, between the mark and open water on its named side. The same reading applies to south, east, and west marks: find the mark's compass name, and you immediately know which side of it holds clear water, without needing to work out anything else first. Picture four cardinal marks ringing a single rock, one on each compass bearing from the danger: north, east, south, and west, each doing the same job from its own side. Whichever one you're approaching, the rule doesn't change with your heading or your own position: the mark's name is fixed to the hazard, not to you, which is exactly what makes it reliable from any direction you sail in on.
That fixed relationship is worth holding onto, because it is easy to instinctively read a mark relative to your own boat instead. If you approach a west cardinal mark from the south, it can look, for a moment, like it should be passed to your south simply because that is the direction you are already travelling. The name overrides that instinct every time: a west mark always means safe water lies to its west, regardless of the course you happen to be sailing when you meet it. Get into the habit of naming the mark first and only then deciding your own track around it, and the rest of the system becomes far easier to apply under pressure.
Topmarks and Bands Tell You Which One
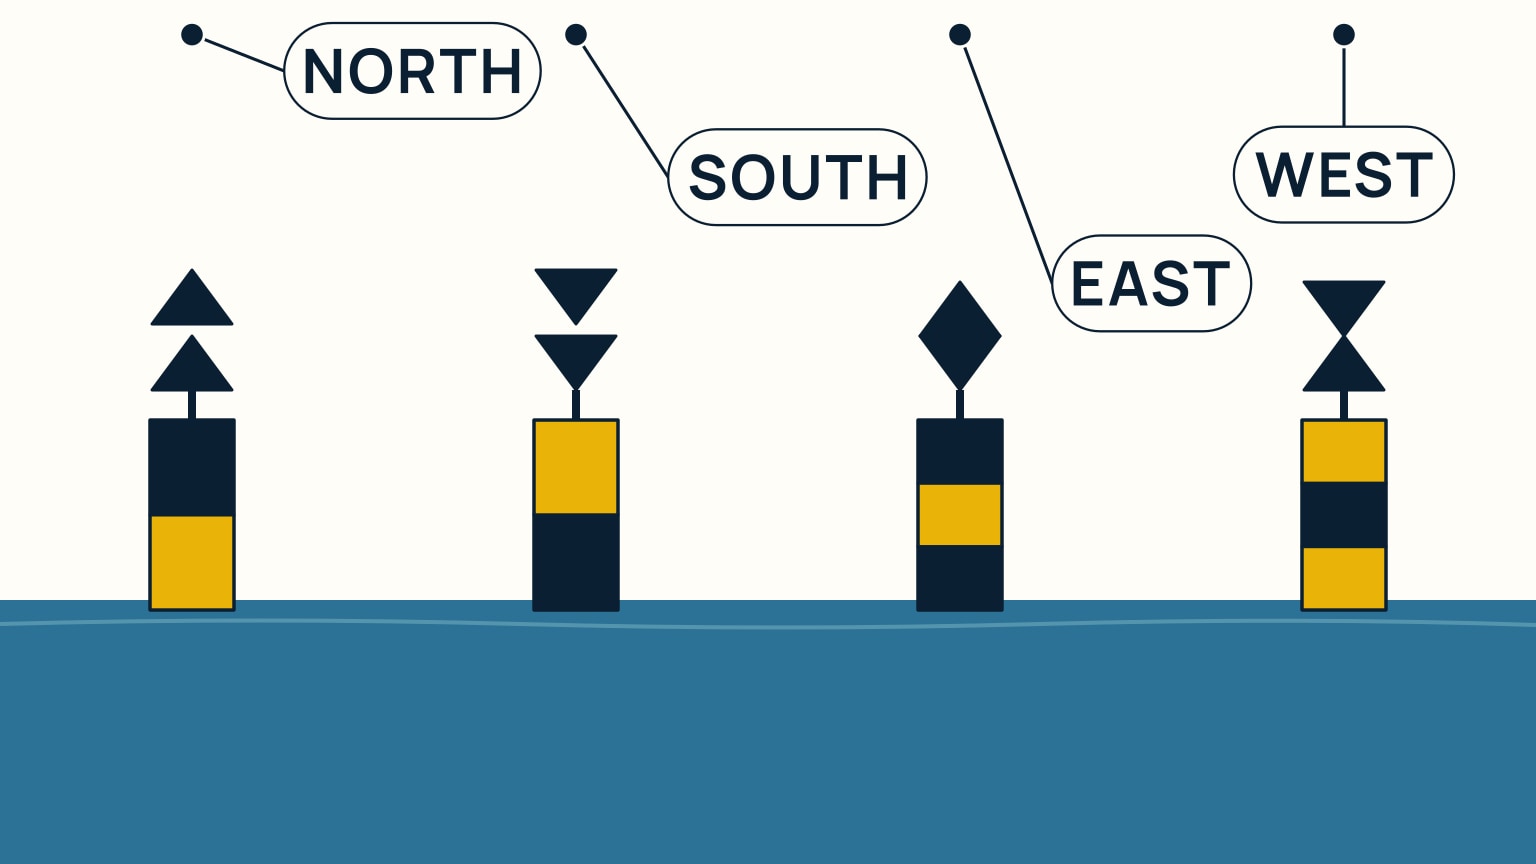
Every cardinal mark carries two black cone-shaped topmarks, and their orientation is the fastest way to read one at a distance, often before you can make out anything else about it. North: both cones point up. South: both point down. East: the cones point away from each other, base to base, which draws a diamond shape between them. West: the cones point toward each other, tip to tip, drawing a shape closer to a wineglass or an hourglass. The black-and-yellow bands on the body follow the same underlying logic, because the two cones always point toward the black part of the mark: north is black over yellow, south is yellow over black, east is black-yellow-black, and west is yellow-black-yellow. Once that pattern is familiar, you don't need to work out a compass bearing at all. The topmark's shape alone tells you which mark you're looking at, well before you're close enough to read the colour bands or anything else painted on it.
That "cones point to black" rule is worth memorising on its own, because it works even when you can only make out the topmark silhouette against the sky and the hull colour is still hard to judge in low light or at a distance. If both cones point the same way, you already know it is north or south; up means north, down means south. If the cones point apart or together, you already know it is east or west; base to base means east, tip to tip means west. That two-step check, same direction or opposite, then which way, is faster under pressure than trying to recall four separate shapes from scratch every time.
Light Rhythms Follow the Clock
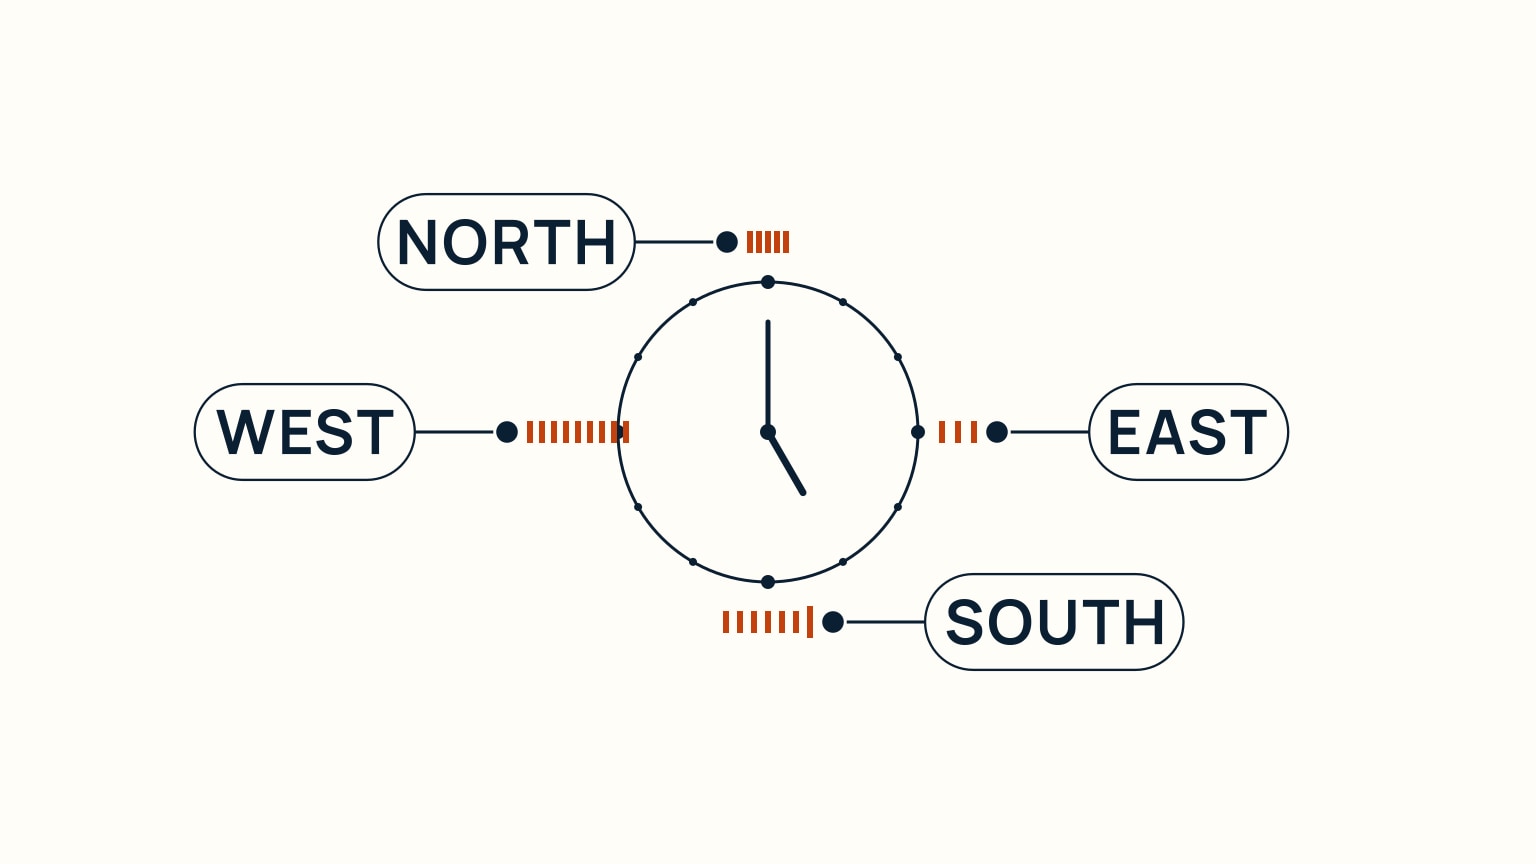
At night, or from far enough off that a topmark is hard to make out, each cardinal mark's white light follows its own rhythm, and the pattern maps directly onto a clock face. A north mark flashes continuously, quick or very quick, with no real gap between groups, like the top of the clock never pausing. An east mark flashes three times, the three-o'clock analogy. A south mark flashes six times plus one extra long flash, at six o'clock. A west mark flashes nine times, at nine o'clock. Once you have the clock picture fixed, counting the flashes in a dark cockpit becomes a simple, calm task instead of a guessing game.
A chart prints this as a short code rather than plain language, and it is worth being able to read that code directly rather than translating it every time. Fl means flashing, Q and VQ mean quick and very quick, Iso means equal light and dark in each cycle, and Oc means occulting, on longer than off. The number after the rhythm is the period in seconds, so a light labelled Q(3) 10s is a quick light flashing three times every ten seconds, an east mark, exactly as the clock face predicts. Reading the chart symbol and counting the real flashes should always agree; if they don't, that mismatch itself is useful information, not something to dismiss.
The Other Marks You'll Meet on a Chart
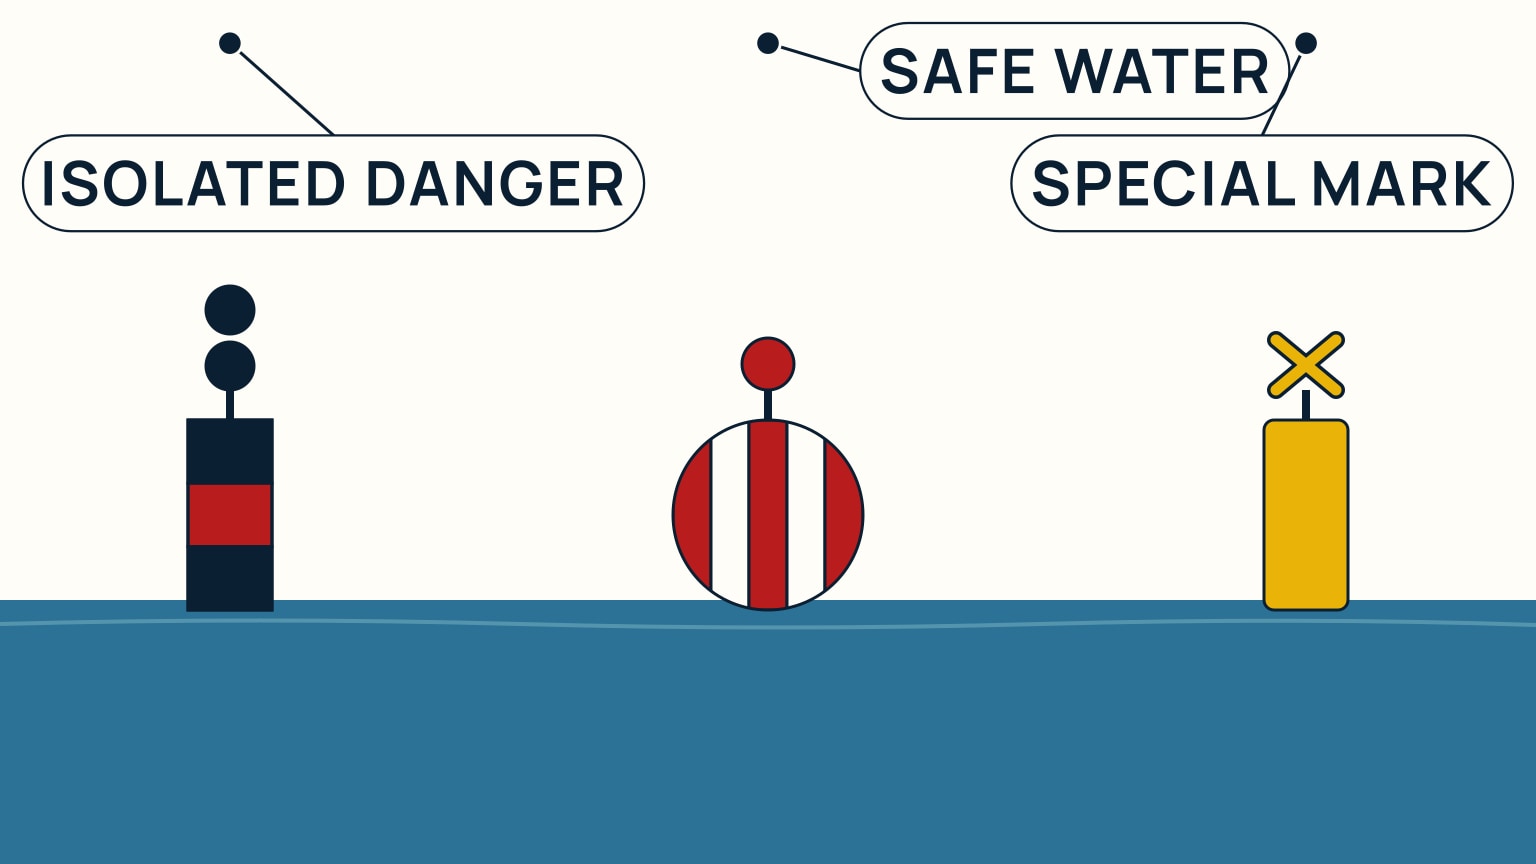
Cardinal marks share the water with three other IALA mark families, and telling them apart matters as much as reading a cardinal correctly, since each one tells you to behave differently. An isolated danger mark is black with a red band and two black spheres on top, and it sits directly on a hazard with navigable water all around it rather than to one named side. You can pass it on any side, at a safe distance, since there's no single safe direction to aim for the way there is with a cardinal. A safe water mark has red-and-white vertical stripes and a single red sphere topmark; it marks a landfall or the centre of a channel, with safe water all around it rather than to one named side, and its light typically shows a long flash or an even rhythm rather than the counted groups a cardinal uses. A special mark is yellow with a single yellow X-shaped topmark, and it doesn't mark a danger at all. It flags a feature or a zone, like a cable, a pipeline, or a swimming area, so there's no side to keep to in the first place, only an area to be aware of as you pass.
Keeping these four families straight comes down to one habit: identify the topmark shape first, cones, spheres, or an X, before you try to work out colour or light. The topmark narrows you to a family instantly, and only then do the bands and the light rhythm tell you exactly which mark within that family you are looking at. Once you read charts and plan routes regularly, as covered in how to read a nautical chart, these four families become second nature alongside the lateral buoys you already know.
None of this replaces the chart. A cardinal mark can drift slightly off its charted position, and a light can occasionally fail to show its correct rhythm, so the chart, not the buoy alone, is what you trust when something in front of you doesn't quite match what you expected to see. When a mark's meaning isn't obvious, or its position doesn't line up with the chart, that's the moment to slow down and check rather than guess, and rechecking costs you a few minutes against a mistake that could cost far more. SailStarter's lessons work through this same logic step by step, alongside the rest of what it takes to read a chart and hold a course with confidence. If cardinal marks still feel like a memory trick rather than something you'd trust on open water, that's exactly the gap the lessons are built to close.
Try it from the lesson
Can you spot the next move?
A chart shows a shoal with a cardinal mark on its west side. Which side do you pass the mark on?
Why you can trust this guide
. We build each guide from public seamanship and safety sources, then teach the universal principle before any local difference.