Chart your course
Deck Hatch Leak Diagnosis: Find the Path

Quick answer
The short version
A drip below a deck hatch does not prove that the lid seal has failed. Water can cross the lid seal, lens bond, frame bedding, fasteners, or nearby deck before it appears inside. Find the entry path before choosing sealant or taking the hatch apart. Start with a dry interior, a helper, and a controlled low-volume water test that begins away from the suspected joint and moves upward. Once you know the route, use the manual for the actual hatch model to decide what can be checked or repaired safely.
This order saves time and avoids a common mess: re-bedding a frame when water was entering through the lens, or replacing a seal while a nearby deck fitting was feeding the drip. The hatch is a system of moving, bonded, bedded, and fastened parts. Diagnosis works best when you test one path at a time and write down what the water does.
Make the inside ready to reveal the path
Begin on a dry day if you can. Remove loose gear below the hatch, dry the liner and surrounding surface, and place clean absorbent material where a first drop will be easy to see. Ask one person to watch inside while another controls water above. Agree on a simple signal to stop. The purpose is to observe an entry point, not to overwhelm every joint at once.
Look beyond the hatch opening. A drip can travel along a liner, deck core, fastener, or frame before it appears at the place you notice it. Trace any stain or damp path as far as you can without dismantling. Then list possible routes: lid seal, lens, frame-to-deck bedding, fasteners, and nearby deck. This is the starting map for the test. Finding rainwater leaks on a sailboat gives a wider troubleshooting approach when more than one fitting may be involved.

Use a controlled low-volume water test
Use a gentle low-volume flow, not a high-pressure spray. Start at the lowest plausible path and let the observer report any water before moving higher. West Marine's hatch-inspection guidance supports a controlled hose test because it separates routes rather than flooding the whole area. Give each test point a moment. Water can travel before it reveals itself, so rushing from one point to the next erases the useful clue.
Keep a simple note: where water was applied, whether it entered, and where it first appeared below. If the hatch begins leaking immediately at one location, stop and document it before trying another. A failed seal, fastener, or deck joint needs a different repair plan. The test is complete when you can describe the route with confidence, not when the entire hatch has been soaked.

Check the lid seal and closure evenly
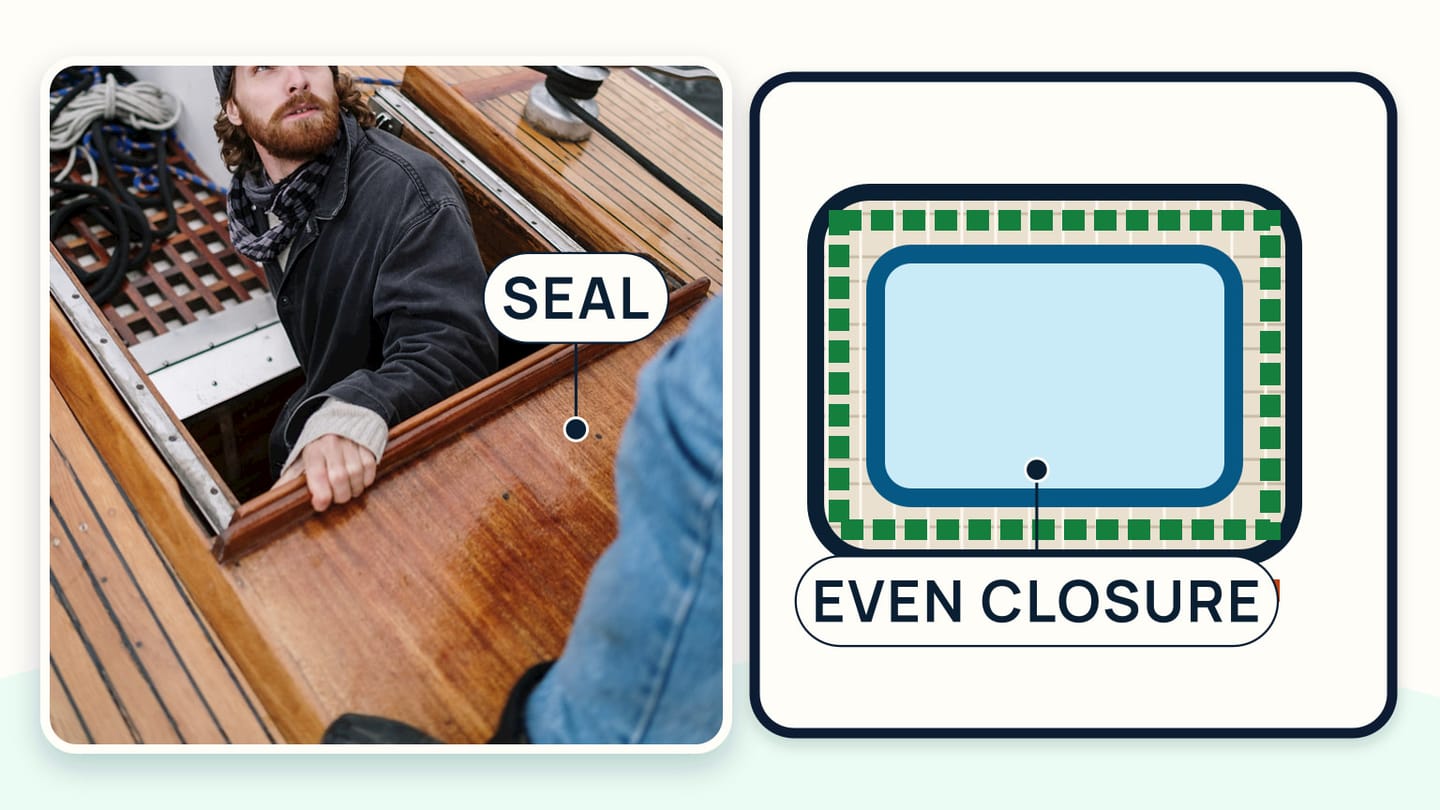
If the controlled test points to the lid edge, inspect the seal and the way the hatch closes. Lewmar's seal guidance makes two relevant points: use the correct seal size for the hatch and avoid solvents that can damage acrylic or frame material. A replacement seal is not a generic strip of rubber. The hatch maker's documentation identifies the correct profile and fitting process.
Check whether the lid closes evenly and whether anything prevents full contact. Dirt, damage, an incorrect seal, or misadjusted closure can all leave a path. Do not stretch, glue, trim, or lubricate a seal from general advice. Find the model and follow its instructions. The right result is a hatch that closes as its maker intended, not one that merely looks sealed after a heavy application of product.
Distinguish the lens from the frame bedding
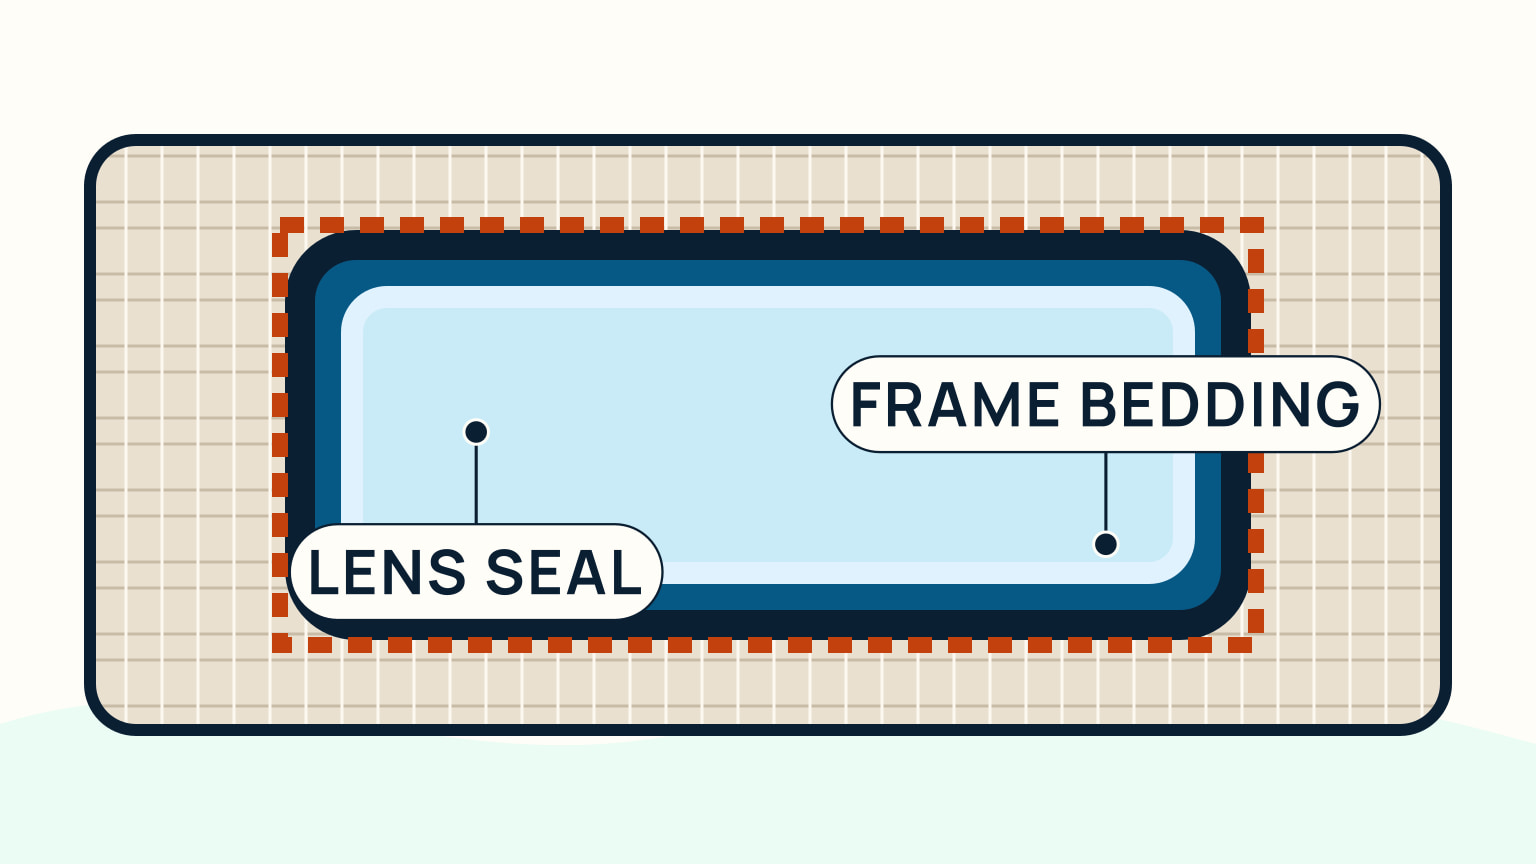
Water at the hatch does not necessarily pass through the lid seal. The lens bond and frame-to-deck bedding are separate paths. Look for the exact point where water appears during the controlled test, then keep your repair scope narrow. A lens issue belongs to the hatch's glazing and bonding instructions. A frame-bedding issue belongs to its fitting instructions and the deck interface. Mixing the two can make a later diagnosis harder.
Lewmar's fitting guide calls for test-fitting the hatch before applying bedding compound and calls for bedding around the frame where it contacts the deck. That describes a specific installation process, not permission to inject sealant around every edge. If you suspect a failed frame bed, confirm the model, deck material, fastener method, and guide before removal. A hatch can be structural enough in its location that an uncertain repair deserves professional advice.
Trace fasteners before choosing the repair
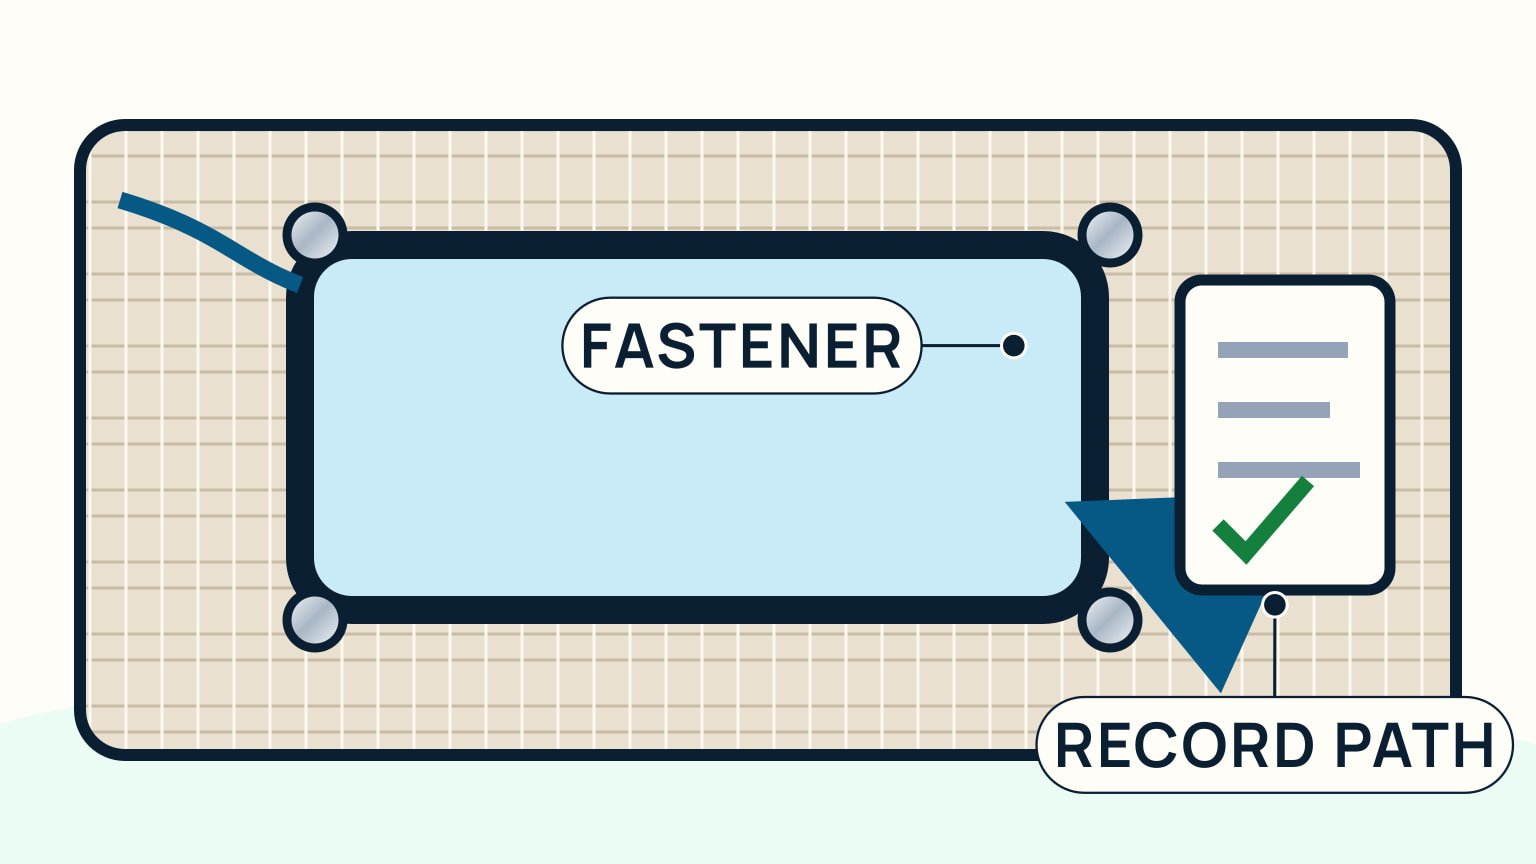
Fasteners deserve their own check. Lewmar's guide specifies sealant on both sides of frame fastener holes and distinguishes the hinge-area through-bolting for the hatch it documents. That is a useful reminder that holes through the deck are potential water paths, but the exact method belongs to the model. Do not turn a drawing for one hatch into a universal fastener rule.
Test fastener areas and nearby fittings separately. Water entering outside the hatch can follow structure and show up at the frame, which makes the hatch look guilty. If the test points to a deck path, expand your inspection carefully and avoid filling the evidence with sealant before you know which joint needs attention. How to rebed sailboat deck hardware provides related context for hardware bedding, while the hatch maker's guide controls the hatch work.
Finish by matching the repair to the proven path. Record the hatch brand and model, the water-test location, first inside appearance, and any seal or frame condition you observed. Then read the maker's current instructions. A correct seal, lens repair, frame re-bed, fastener treatment, or deck repair may involve different materials and preparation. The evidence you collected makes it easier to choose the right one.
If the deck is soft, the hatch opening is damaged, fasteners are corroded, or the route is still uncertain, stop and get an experienced marine professional involved. SailStarter's above-deck lesson helps you recognize fittings and rigging around you. It does not replace the product instructions or repair experience needed to make a deck opening watertight.
SailStarter teaches the vocabulary that makes a boat problem easier to describe. Use that to set up a careful test and ask good questions. Once you know the entry route, rely on the correct hatch manual and a qualified repairer where the structure, materials, or scope are beyond a simple documented check.
Do not confuse a dry result immediately after repair with a complete answer. Repeat the same controlled test once the relevant product instructions say the work is ready to test. Keep the test gentle and inspect the inside again after the boat has moved through ordinary rain or spray. If the path changes, return to the evidence rather than layering more product over the last attempt. A clean, documented diagnosis makes later professional help faster and less expensive than a hatch surrounded by several unproven sealants.
Photograph the test locations and the first water path if you can do so safely. A clear image, date, and note about the test order help you compare results after a repair or explain the problem to a yard. This is useful evidence, not a substitute for identifying the model and following its instructions.
Take care of the surrounding cabin while the work is open. Keep water-sensitive items away, provide sensible temporary protection from rain, and avoid leaving tools or loose fasteners where they can damage acrylic or disappear into the boat. The repair should leave the boat easier to inspect, not create a second problem below deck.
Keep the test narrow enough that the result means something. Start with a dry interior, use one controlled water path, and have the inside observer watch for the first sign of entry. Record where water was applied, where it appeared inside, and whether the hatch was closed in its normal position. Moving the hose everywhere at once can make a leak look dramatic while hiding the route that needs attention.
If the evidence points to a lens seal, frame bedding, a fastener, or a nearby fitting, keep those possibilities separate in your notes. The correct repair depends on the installed hatch, its materials, and the maker's guidance. A useful outcome from a first test can simply be a clear record for the owner, yard, or technician. That is more reliable than applying a generic sealant to the first visible edge and hoping the next rain answers the question.
After a repair or a professional inspection, repeat the same controlled test and compare it with the first record. A dry result under the same conditions is clearer than a memory that the hatch seemed better after work was done. Keep the record with the boat's maintenance information.
Try it from the lesson
Can you spot the next move?
'Which supports the mast: the shrouds and stays, or the sheets?'
Why you can trust this guide
. We build each guide from public seamanship and safety sources, then teach the universal principle before any local difference.