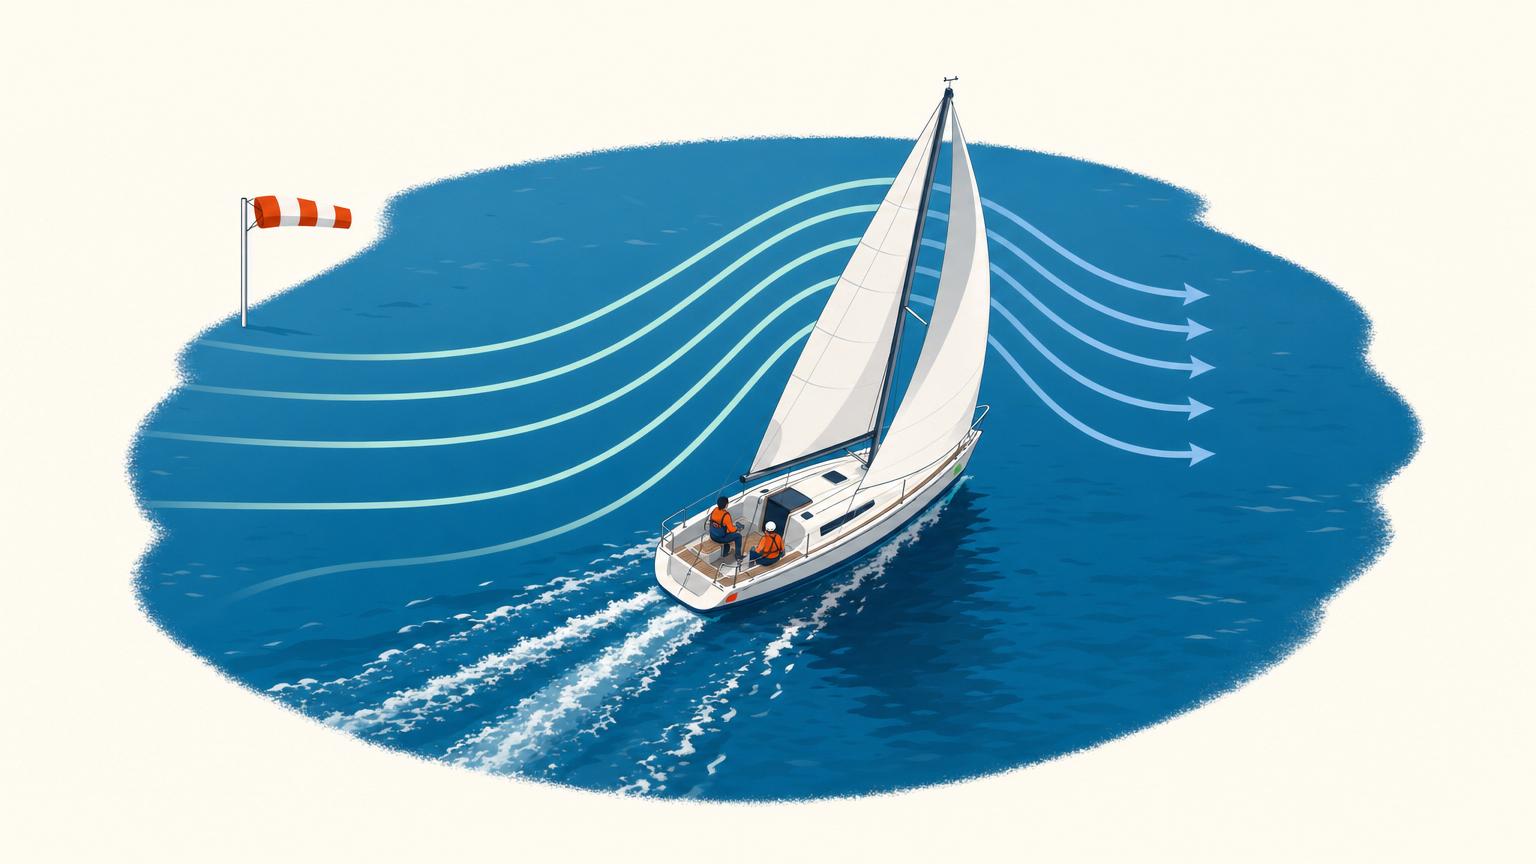
How do sails work if they do more than catch wind? When you sail across or toward the wind, the sail behaves like a flexible wing turned on its side. Its curved shape and angle bend and accelerate the airflow, creating lower pressure on one side and higher pressure on the other. That pressure difference produces lift: the same kind of force an airplane wing generates.
The sail’s total force acts roughly at right angles to its surface. Part of that force points forward and drives your boat; another part points sideways. The angle matters: too small an angle and the sail luffs, or flaps, making no useful force. Too large an angle and the airflow separates from the sail, so most lift is lost.
When you watch a sailboat cross the wind, the obvious explanation seems to be that the sail catches air like a parachute. But if the wind only shoved the cloth, why would the boat move partly forward instead of simply drifting sideways?
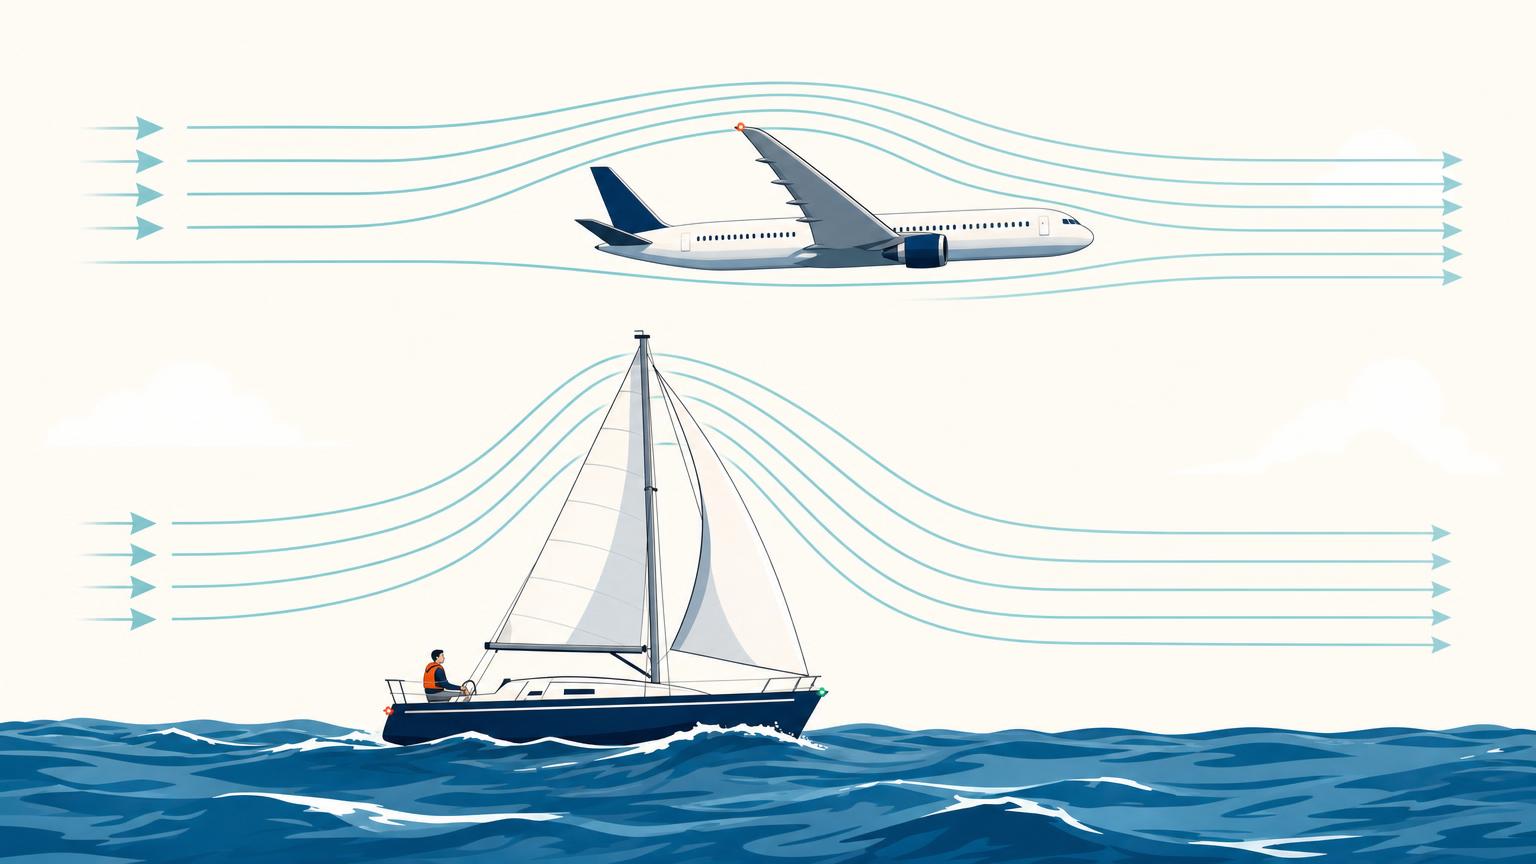
To understand how sails work, look for the wing hiding in plain sight. A sail is a flexible wing turned on its side. Its curved shape and its angle to the airflow change how air moves along each face. That creates a pressure difference called lift.
You will follow that force from moving air to moving boat. You will see why the sail’s angle matters, and how one total force can have both a forward part and a sideways part. Deep downwind, a sail can act more like an air dam. Across and toward the wind, however, the wing model explains the central idea: the sail generates force; it does not merely receive a push.
Why a Sail Is More Wing Than Parachute
To understand how a sail works, ask a simple question: why can a sailboat travel across the wind instead of just drifting downwind with it?
You might picture the sail as a parachute or loose sheet that catches a push. But across the wind, that model cannot explain the sail’s real job. A filled sail forms a smooth curve and behaves more like an airplane wing turned on its side.
The sail’s curve and its angle to the wind bend the airflow. Air speeds up along the outside of the curve and slows along the inside. This creates lower pressure on one side and higher pressure on the other. The difference produces lift: the same kind of aerodynamic force generated by an airplane wing.
Deep downwind, with the wind well behind you, the sail does work more like an air dam—but across the wind, the wing model explains what you see.
Once you see that flexible wing, a sailboat’s sideways course stops looking mysterious.
How Curved Airflow Creates Lift
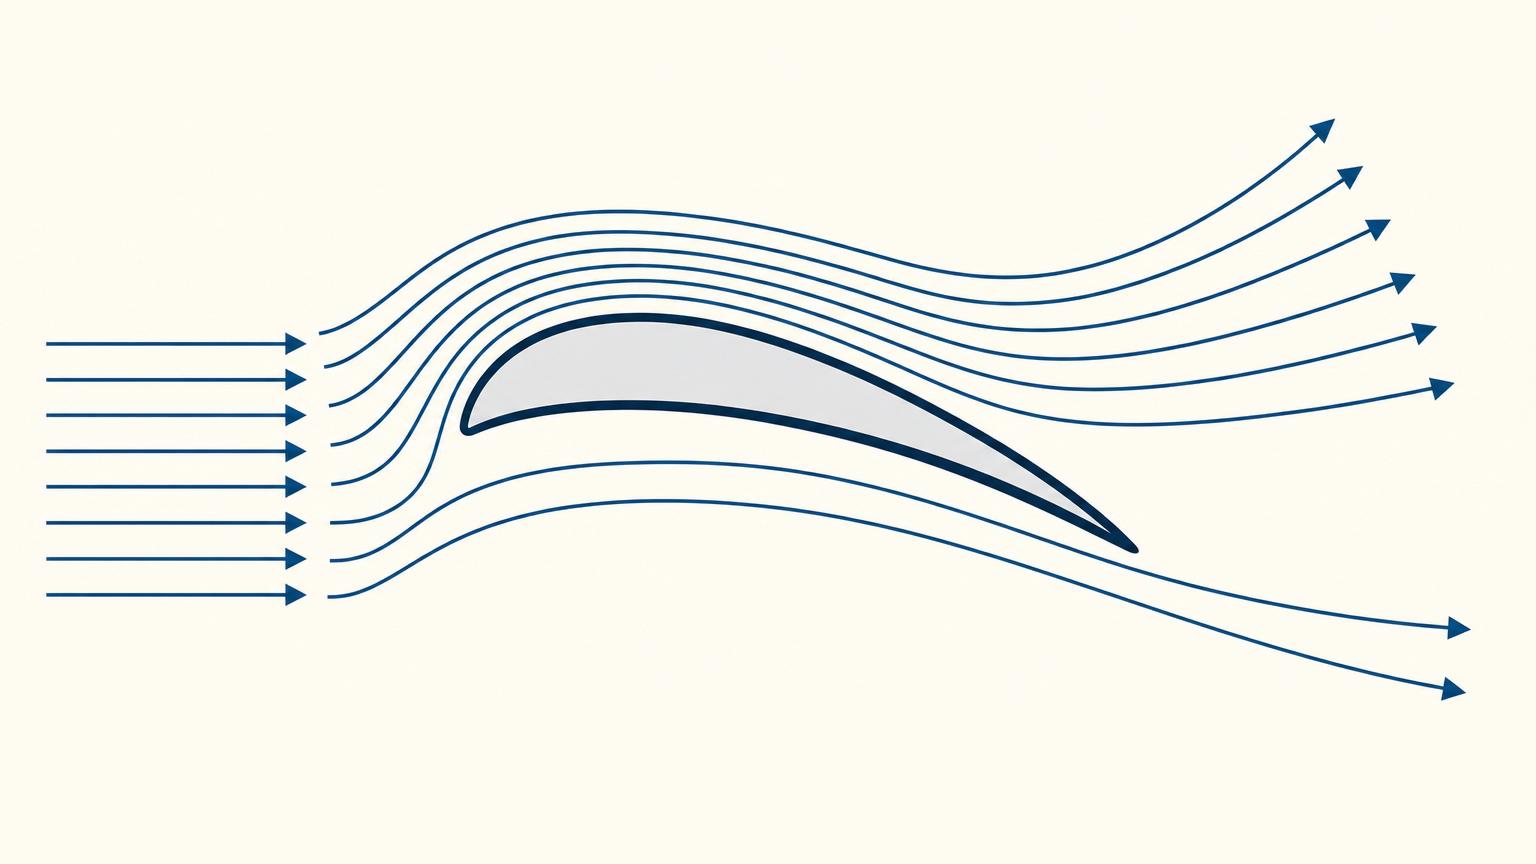
To understand how a sail works, start with its camber: a built-in curve from front edge to back edge, like the belly of a wing. The curve you put in the sail helps the air change direction smoothly as it passes each side.
Both this curve and the angle at which the sail meets the wind decide how much the airflow turns and accelerates. Air moves faster along the leeward side, the side facing away from the wind. Faster air creates lower pressure there. Air moves more slowly along the windward side, the side facing the wind, creating higher pressure.
That pressure difference produces lift—the same kind of force that holds up an airplane wing. Here, the wing is simply standing on its side.
You may have heard that air on one side must hurry to meet air from the other side at the sail’s back edge. That is not what happens. The air speeds up because the sail’s curve and its angle to the wind turn the flow. The resulting pressure difference is what gives the sail its useful force.
The Angle the Sail Presents to the Wind
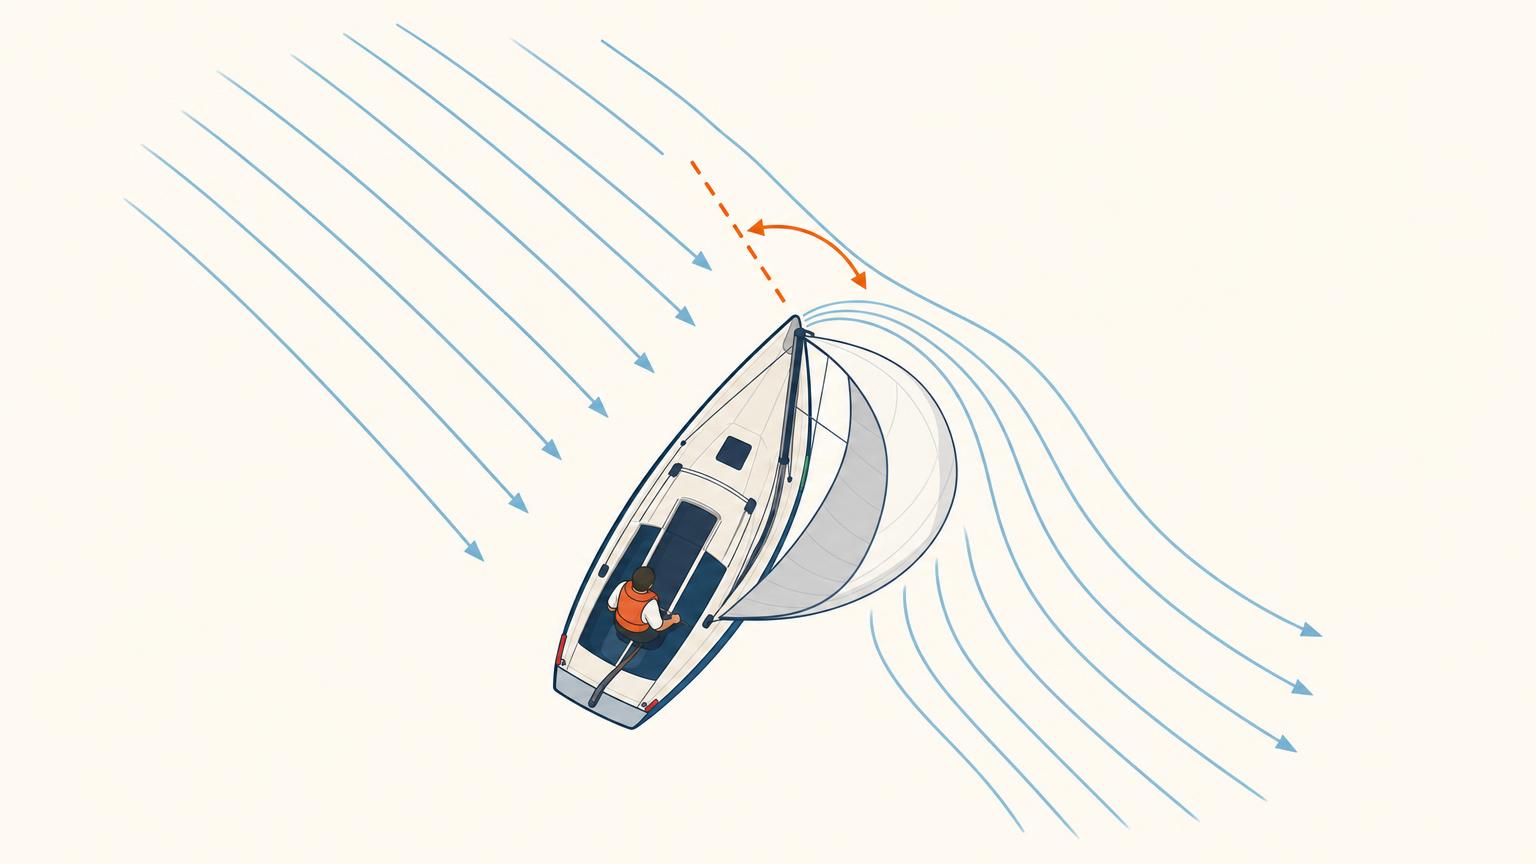
How a sail works depends on the angle it presents to the airflow it actually feels. This is the apparent wind: the combination of the true wind and the airflow created by the boat’s motion.
You describe the sail’s position with its angle of attack. This is the angle between the incoming apparent wind and an imaginary straight line joining the front and rear edges of a sail section. That angle decides whether you get useful lift or lose it.
At a useful angle, you let the sail’s curved shape turn the air while the flow stays attached, meaning it follows both surfaces. Within this useful range, a larger angle deflects more air and creates more lift—up to a point.
If you make the angle too small, the sail luffs: its airflow breaks down, and the fabric begins to flap without making useful force. If you make the angle too large, the airflow separates from the sail. The sail then stalls, meaning its lift becomes unsteady and is mostly lost.
How a Sail Works: From Sideways Force to Forward Drive
When you look at the force made by the sail, it does not point straight ahead. It acts roughly at right angles to the sail’s surface. You can split that total force into two parts: a forward part that drives the boat and a sideways part that does not move you along your course.
You keep that forward drive only while the sail meets the wind at a useful angle. This is the angle of attack: the angle between the sail and the airflow reaching it. With too small an angle, you see the sail luff, or flap, and it makes no useful force. With too large an angle, you ask the air to turn too sharply. The airflow separates from the sail, and most of the lift disappears. Between those limits, the airflow stays attached and the sail keeps producing force.
What the boat does with that sideways part—the lean, and how the boat’s design handles it—is covered in another SailStarter lesson.
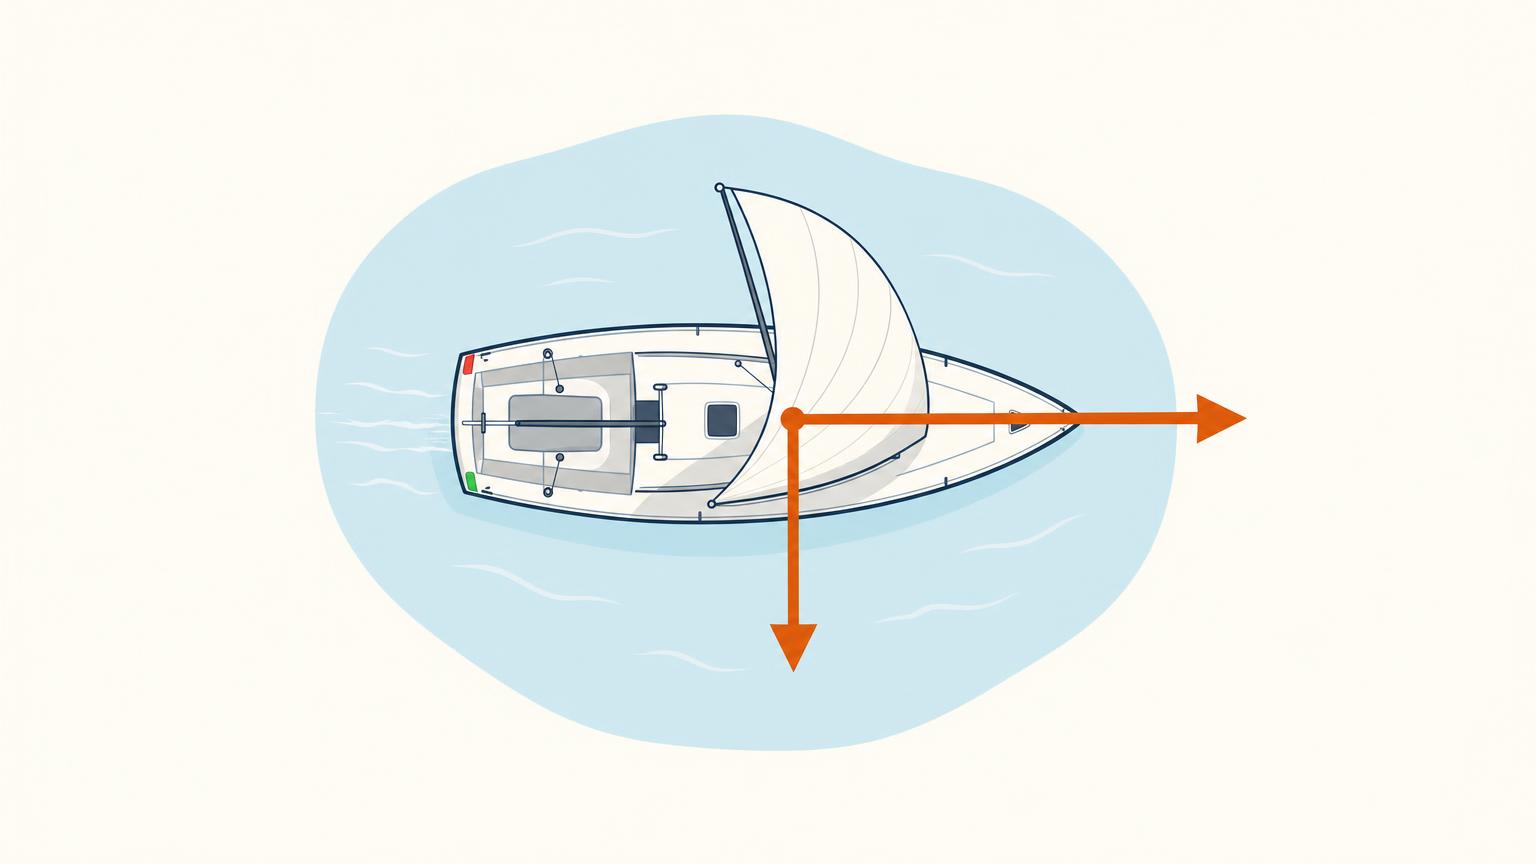
You now have the answer to how sails work: the sail is a flexible wing working on its side. As you give it a curved shape, it bends the airflow and creates the pressure difference called lift. You control that lift through the angle of attack—the angle the sail presents to the wind. Too small an angle and you see the sail luff, or flap, with no useful force; too large an angle and the airflow separates, so most lift is lost. At a useful angle, the sail’s total force acts roughly at right angles to its surface. Part drives you forward, while part pushes the boat sideways. You can see what the boat does with that sideways part—the lean, and how the boat’s design handles it—in another SailStarter lesson. Next, try SailStarter’s short beginner lesson on sail trim to learn how you set that working angle.