Chart your course
How to Calculate Anchor Swing Room
Quick answer
The short version
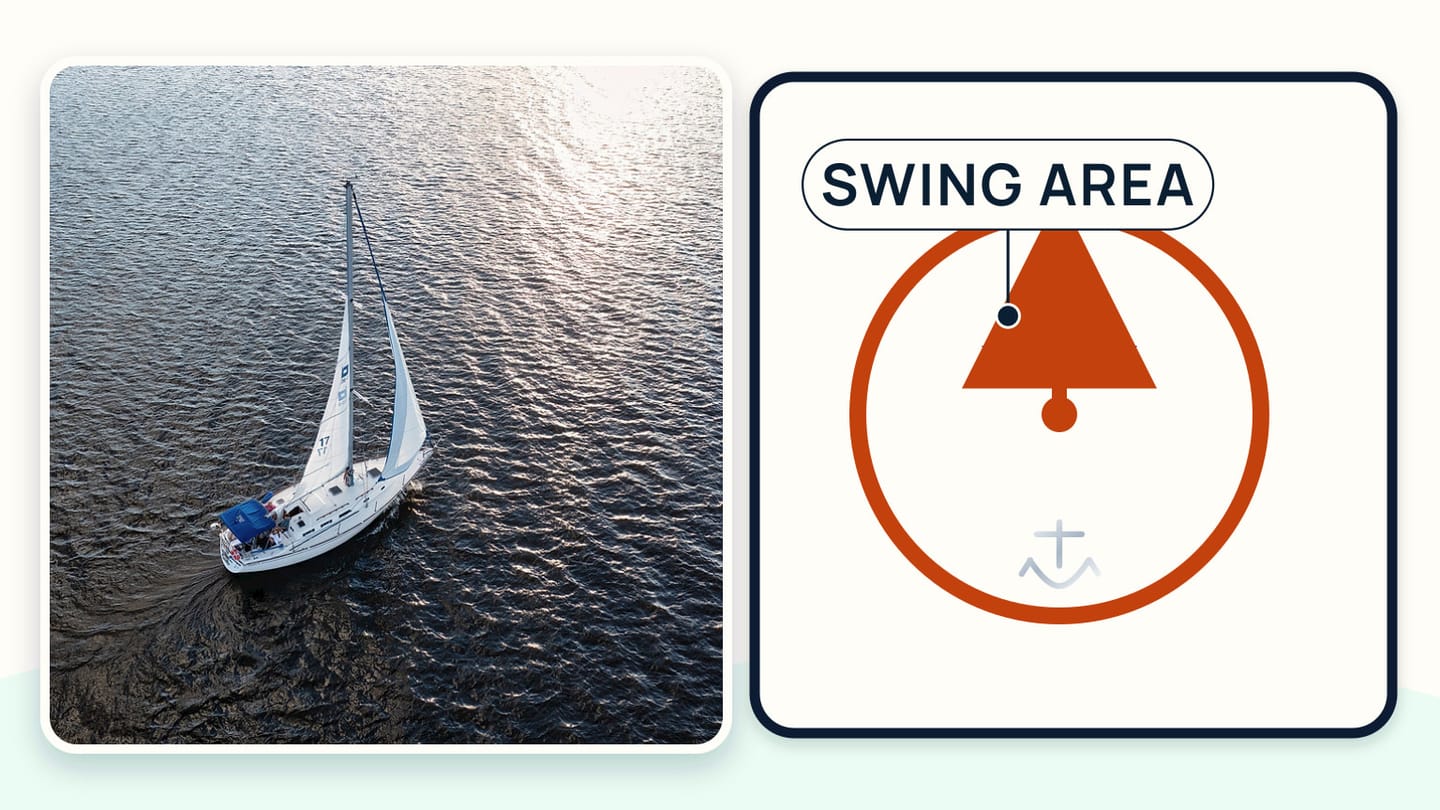
Anchor swing room is the space your boat could use as wind or current moves it around the anchor. Begin with the paid-out rode and the boat's bow-to-stern length, then draw a conservative circle around the estimated anchor position. That is only the first shape. You still need to check the whole circle for depth and hazards, allow for tide and changes in scope, notice how neighbouring boats may move, and keep an honest margin for uncertainty. If the circle is not clear, choose another place or another plan.
The point of a swing calculation is to make a decision before you are committed. It is not to prove that a narrow gap is safe. An anchored boat can swing through all directions. A tidy line of boats now may look quite different after a wind shift or current change. Build the geometry, then try to disprove the place from every direction.
Mark the anchor position you are using
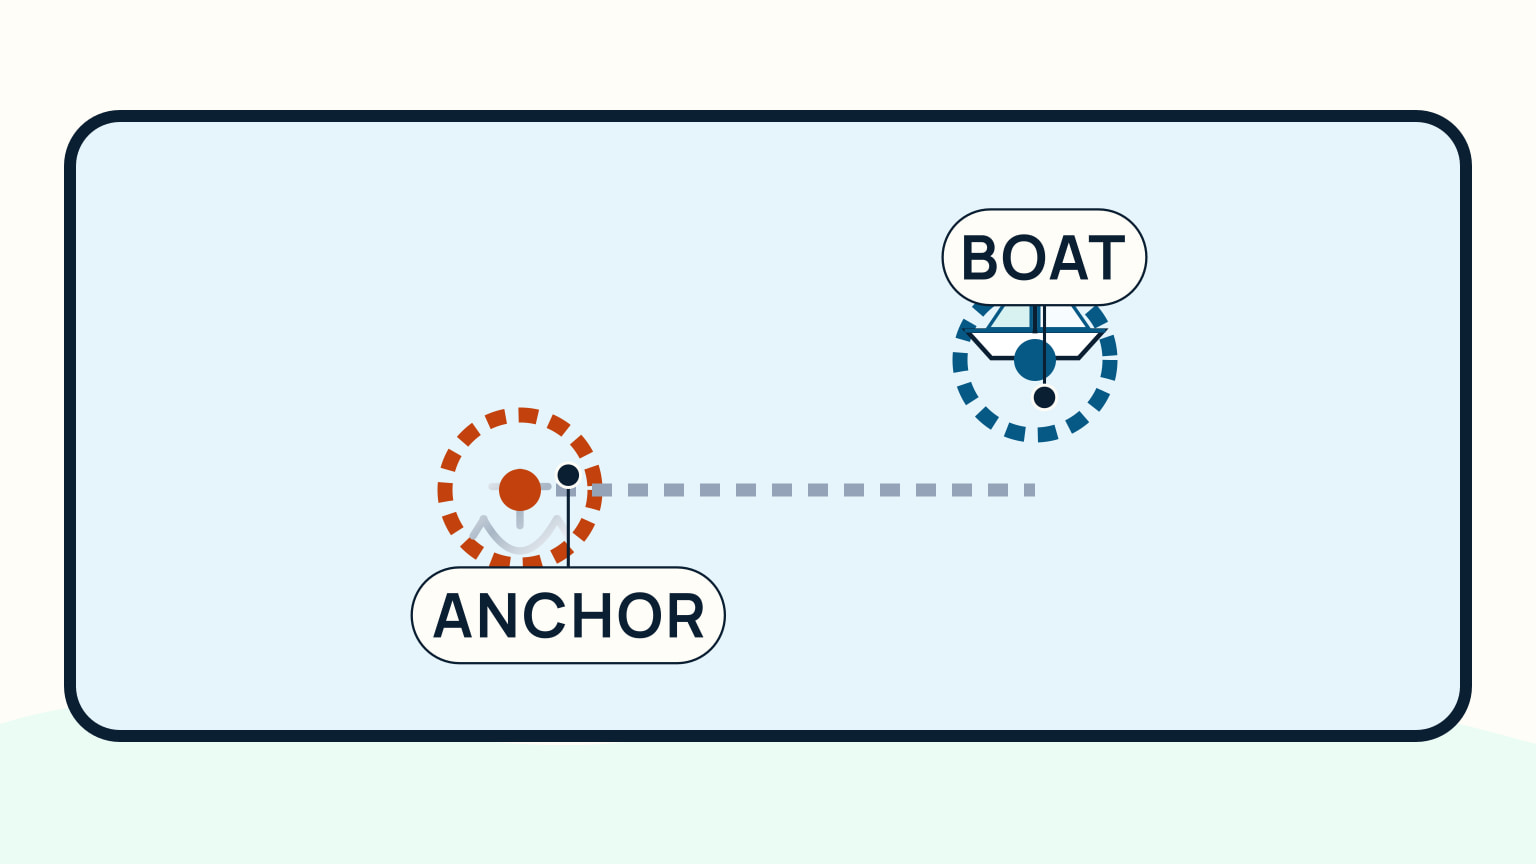
Start by deciding where the anchor is, as accurately as you can reasonably know. The boat's position after setting is not the same point as the anchor. The rode runs from the bow to the seabed, and the anchor lies some distance away. Mark the intended drop point while planning, then revise that estimate from the set and the rode you actually paid out. Do not quietly replace uncertainty with a sharper-looking dot on a screen.
Charts can show hazards and depth information that help with this first mark. Use the responsible local chart for your trip and keep it current. A GPS position also has uncertainty. GPS.gov describes accuracy as a performance measure, not a guarantee of an exact point, so leave room for both where the anchor may be and where your displayed position may be. The margin is not wasted space. It is the part that keeps a calculation honest.
Build a conservative radius from the rode
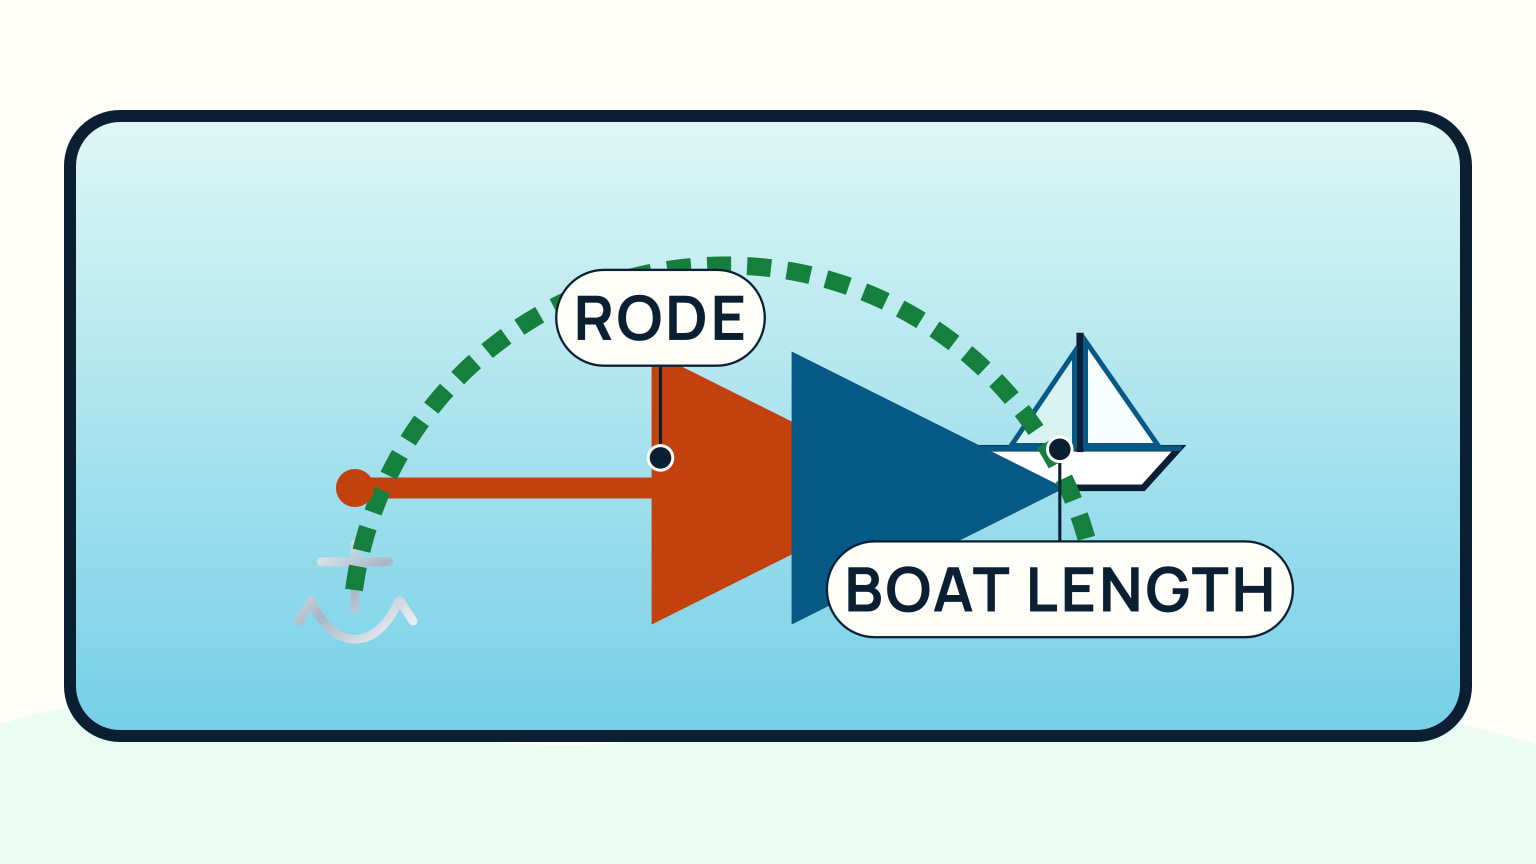
Your radius starts with the rode you have paid out. Scope is measured against the vertical distance from the boat's anchor point to the seabed, not water depth alone. For a planning circle, include the paid-out rode and the boat's horizontal bow-to-stern length. This creates a usable first estimate of how far the stern can lie from the anchor as the boat turns.
Keep the arithmetic visible. Write down the rode length, the boat length, and the resulting planning radius. Then add a chosen margin for position and anchor uncertainty rather than pretending those errors do not exist. The result should be large enough to be useful, not so finely measured that it invites false confidence. Anchor scope explained covers the separate question of how scope is chosen. This calculation asks what area that choice occupies.
Test every part of the circle, not the centre
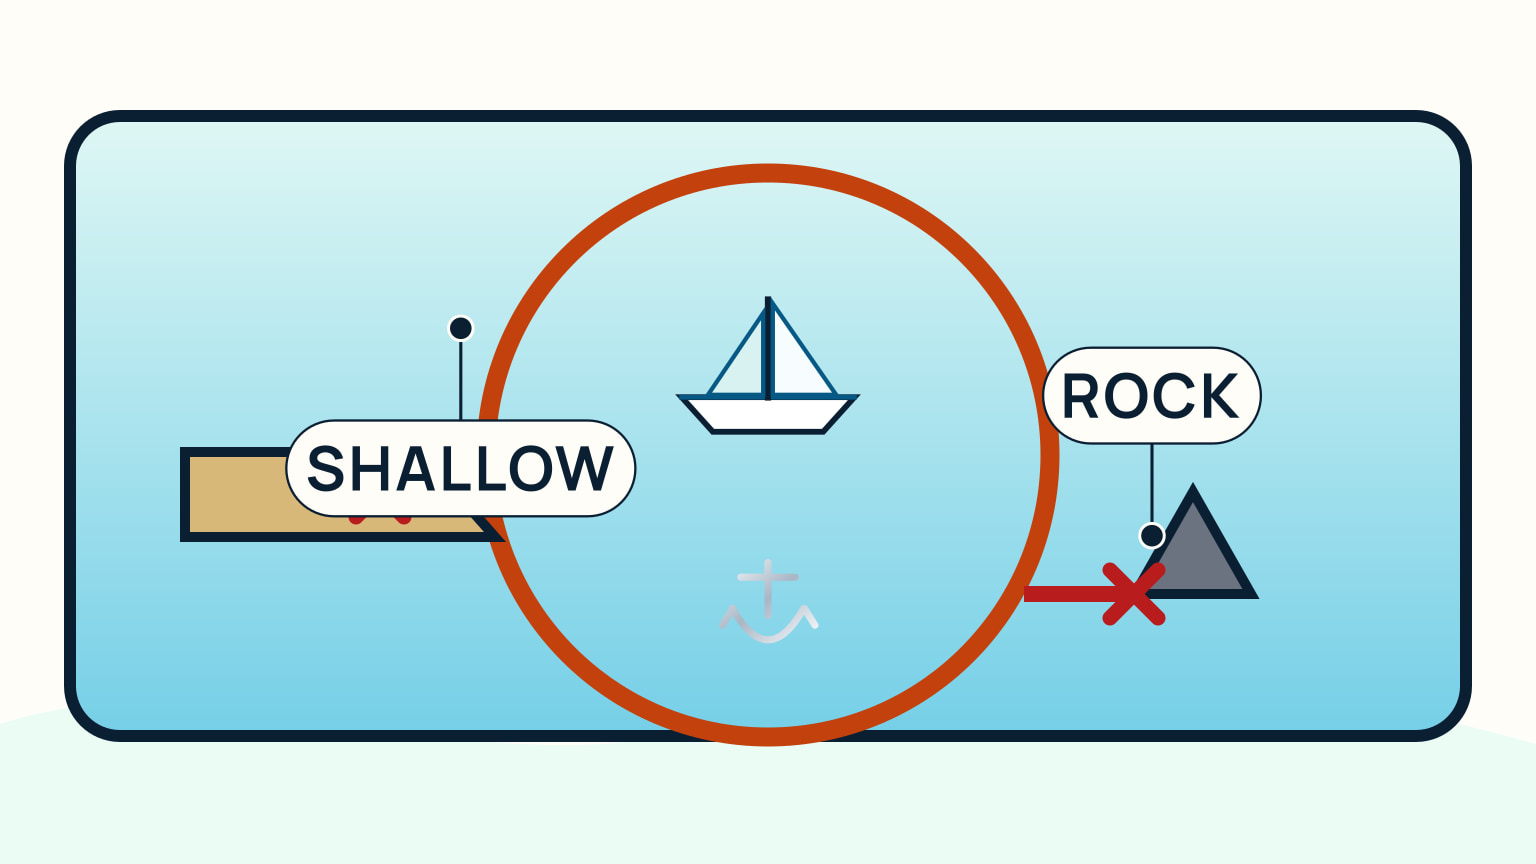
Once you have a radius, inspect the full circle. A clear spot at the centre is not enough. Look for charted hazards, restricted depth, shore, moorings, and any route where the boat could end up after a change. Do the same for the depth you expect through the whole stay. A useful swing area has room at every point the boat can reach, not simply at the place where the anchor first went down.
This is where a simple drawing earns its keep. Rotate your attention around the circle and ask the same question repeatedly: if the bow faces this way, where is the stern, and is the water and clearance still acceptable? If one sector fails, the anchorage has failed for the plan you drew. Choosing an anchorage helps you weigh shelter and other site questions before you settle in.
Recalculate for tide, wind, and current changes
The radius is not permanently fixed. Tide can change the depth, which can change the scope you need for the same target ratio. Letting out more rode makes the boat's possible circle larger. Wind and current can also move the boat through different parts of that circle. BoatUS reminds skippers that an anchored boat may swing through 360 degrees as conditions change.
Run at least a change-case before you decide. What happens at the deepest water you expect? What happens if you need more rode? What does the circle look like with the boat on the other side of the anchor? This is not a forecast contest. It is a way to choose a place that still has room when ordinary conditions move on. If the available water is too tight for a larger circle, stay mobile while you seek a better option.
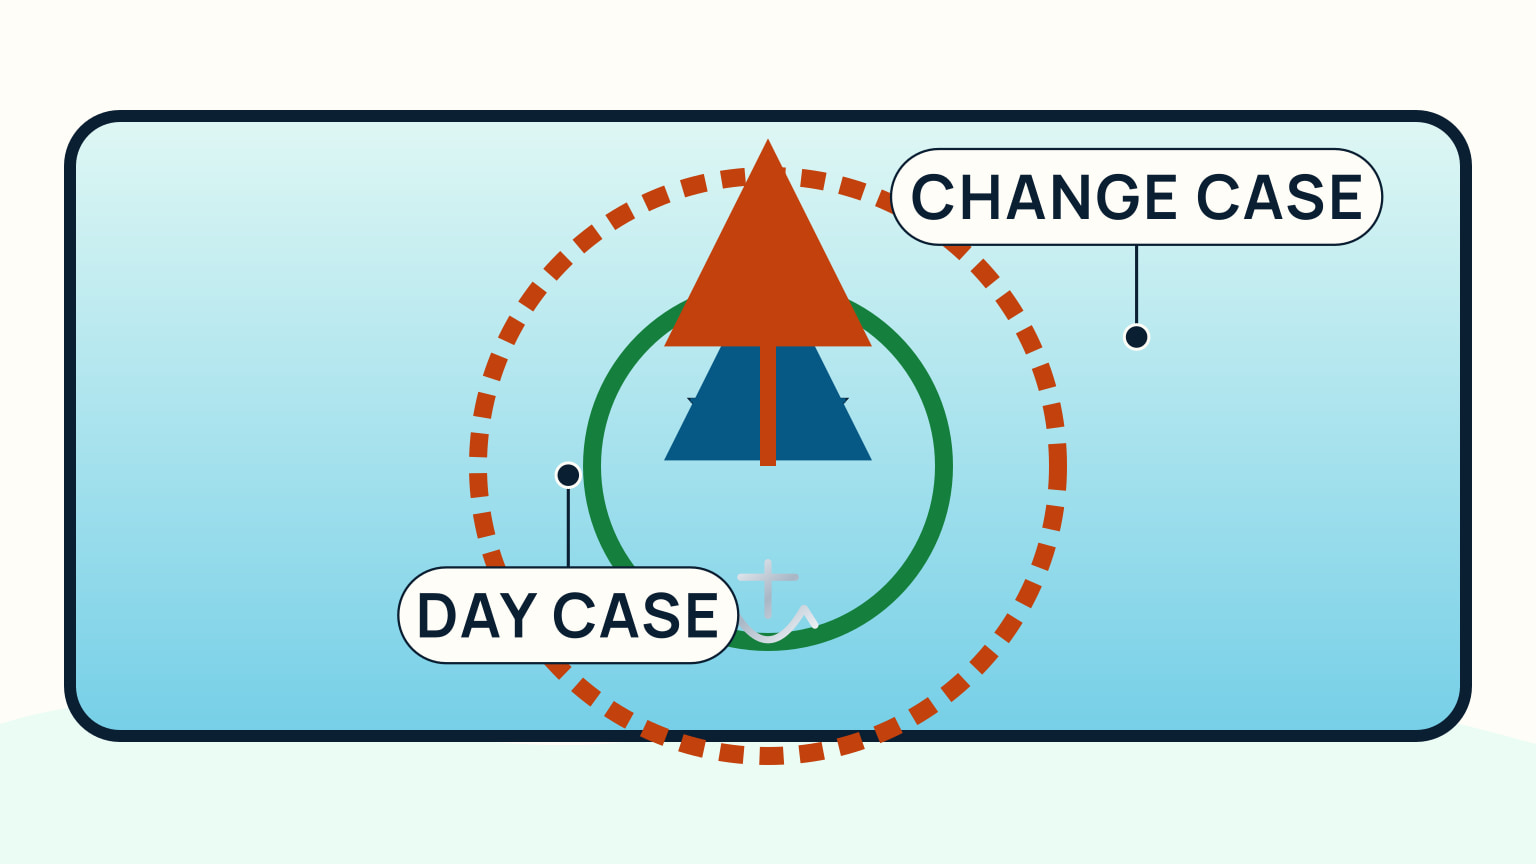
Treat nearby boats as separate moving systems
Another boat's anchor is not a fixed fence. It may have a different rode type, paid-out length, hull shape, or response to wind and current. That means its movement may not match yours. A gap that looks generous while both boats point the same way can shrink when their headings change. Use conversation and observation, not an assumption that every boat will trace the same circle.
If you arrive among anchored boats, estimate each system conservatively and leave room to move again if the setup does not work. Avoid crowding an area that gives no escape from a poor calculation. How to set an anchor alarm can help you notice movement after you anchor, but it is not a substitute for checking room before you commit. SailStarter's anchorage lesson makes the site-selection sequence visual and easy to rehearse.
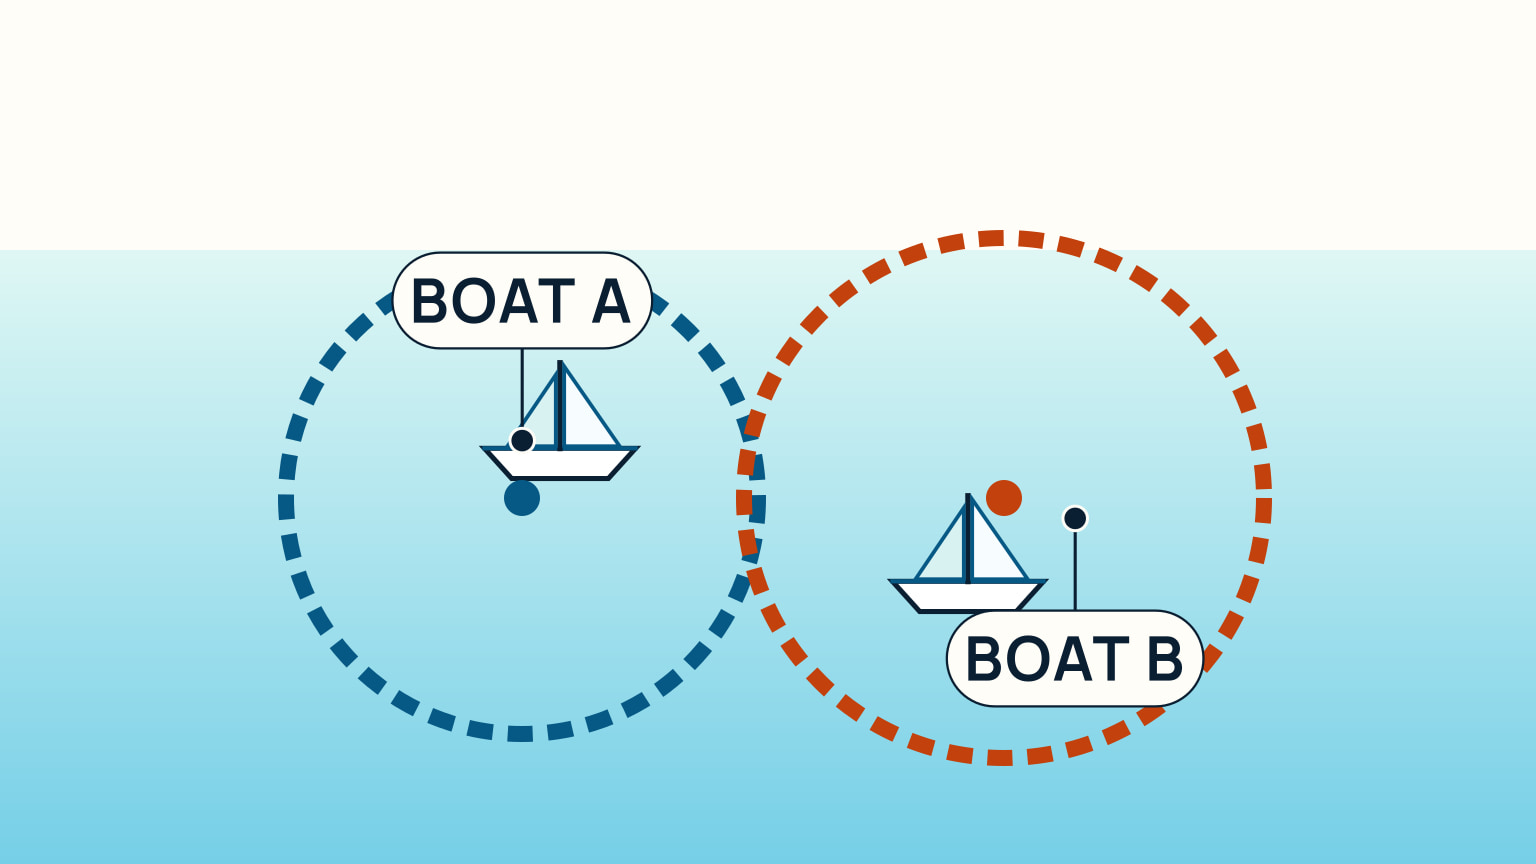
SailStarter helps you see the anchorage as a whole system rather than a single pin on a chart. Use that preparation with current local information, your boat's real rode, and margins large enough for the uncertain parts of the picture. When the circle does not fit, moving early is the calm decision.
Use a simple sketch if an app display feels crowded. Mark north, the estimated anchor point, the planning radius, the nearest hazards, and the location of other boats. You do not need a perfect chart drawing to notice that one direction leaves no margin. A sketch also makes it easier for the crew to understand why you chose one patch and rejected another. The point is shared awareness, not mathematical theatre.
Before darkness or a forecast change, repeat the scan from the boat. Conditions may have altered the available space, and a boat that arrived later may have set a different pattern beside you. Being willing to move while visibility and energy are good is part of using the calculation well.
Tell the crew what the margin protects. It may be a rock, a shallow sector, another boat, or simply the uncertainty in the anchor position. When people understand that the circle represents possible movement, they are more likely to notice a change and speak up before a tight situation develops.
An unexplained margin is a signal to review the inputs while the crew still has time and room to move.
This approach makes the calculation a living plan. Recheck it whenever one of its inputs changes rather than assuming the first circle lasts unchanged until departure.
If nobody can explain the margin, it is probably too small or based on a calculation that needs revisiting before the boat settles for the night.
Keep the plan conservative when you cannot verify a part of it. An unclear anchor point, an incomplete chart view, or uncertain room beyond another boat are reasons to choose more space, not reasons to draw a tighter circle. A simple model earns trust when it is used to reveal uncertainty rather than hide it.
Write the inputs down before treating the circle as a decision. Record the anchor position you are using, the boat position, the rode already out, the boat length allowance, and the depth or tide change that could alter the result. A sketch is often enough. Its value is that another crew member can see what the radius represents and can challenge an assumption before the boat is committed to a crowded patch.
Revisit the sketch when the situation changes. More rode, a different depth, a different anchor position, or a neighbouring boat behaving differently can change the space that needs checking. Look at the whole possible sweep, not only the point where the boat is lying while you make the note. If a hazard, another boat, or an exclusion area reaches that outer path, move or choose a different plan rather than treating the centre of the circle as proof of clearance.
Try it from the lesson
Can you spot the next move?
The chart shows a kelp patch right where you were planning to drop the hook. Why does that change your plan?
Why you can trust this guide
. We build each guide from public seamanship and safety sources, then teach the universal principle before any local difference.