Chart your course
Jib Car Position Explained

Quick answer
The short version
A jib car changes the direction from which the sheet pulls on the jib clew, the lower aft corner of the sail. Move the lead forward and the sheet pulls more downward. Move it aft and the sheet pulls more along the foot. That changes the balance of tension between the foot and the leech, the sail's trailing edge. The track position is therefore not a permanent setting to copy from another boat. It is a way to tune the jib for its size, the course, the wind, and the shape you can see.
Begin with the car at the boat's ordinary marked setting, if it has one. Trim the jib enough for its telltales to give a useful reading. Then move one thing at a time. A small car adjustment can change the whole sail, so an enormous shift followed by a hard sheet pull teaches very little.
Follow the sheet from clew to car
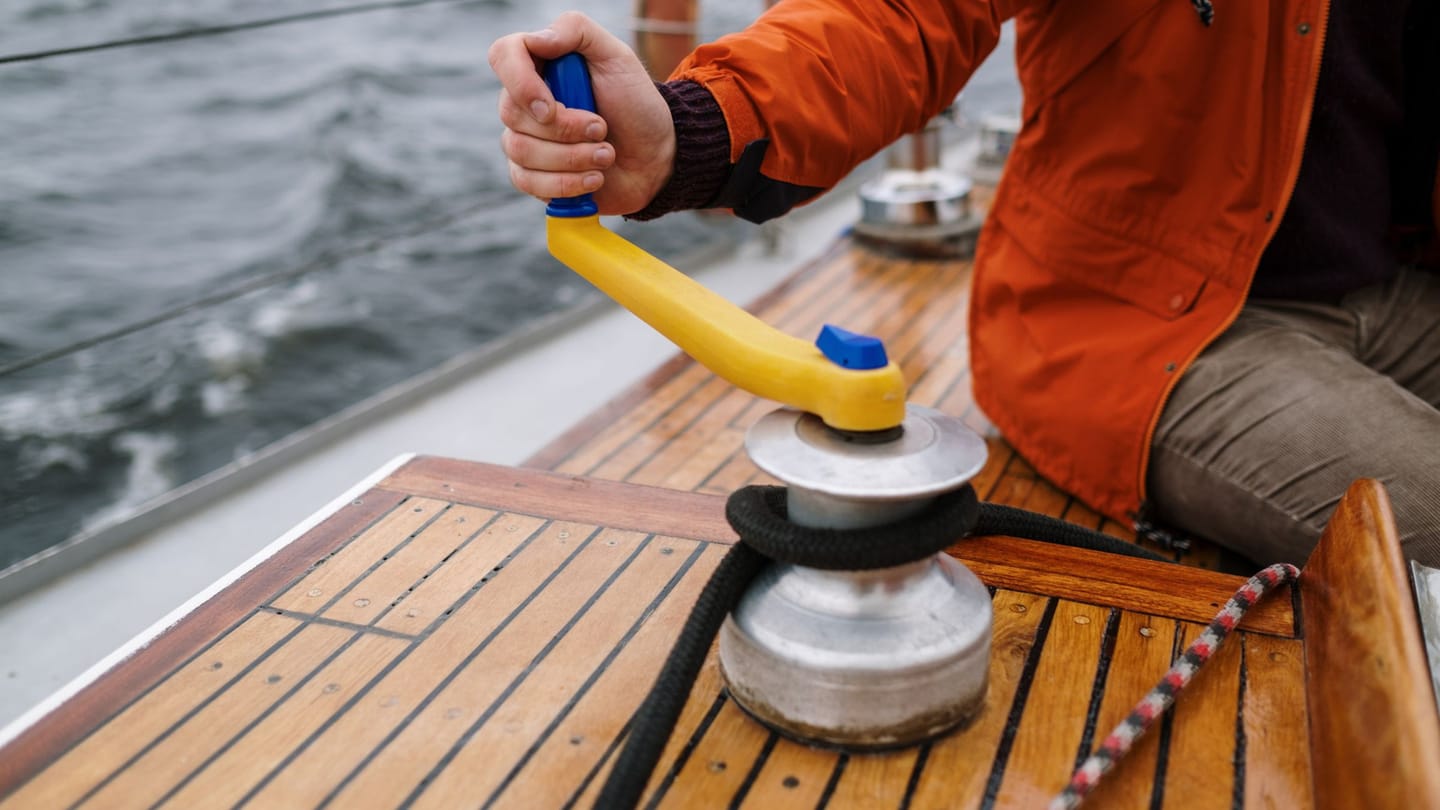
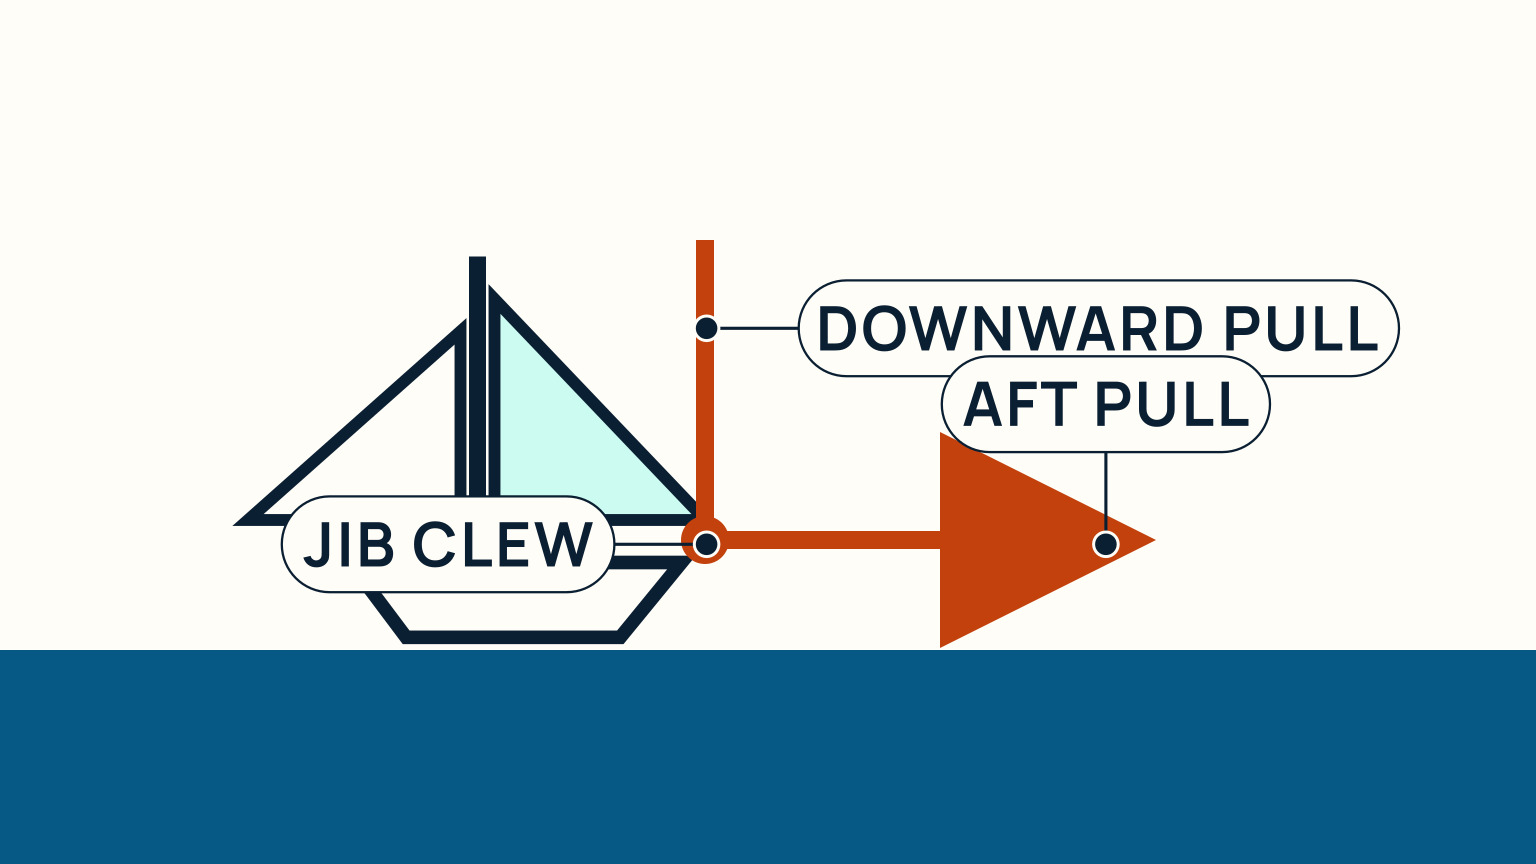
Stand where you can see the sheet leave the clew and run down to the car or block. Imagine the sheet as a line of pull. When the car is forward, that line points more toward the deck. When the car goes aft, it points more toward the stern. The sail cannot tell the car's number. It only feels that different direction at its clew.
This is why two jibs can need different settings on the same track. A larger overlapping genoa may lead to a different point from a smaller jib. A furling sail that has been partly rolled also changes shape and clew position. Even the sheet routing can differ. Markings on the track are useful starting references, but the shape of the sail and the boat's own manual remain more useful than a universal number.
Before moving hardware, check whether the load is safe to handle. Many cars use a pin, plunger, or line system. Do not pull a loaded car by hand unless the boat's method says it is safe. Ease or depower the jib as appropriate, make the adjustment, then reload it under control.
Why does the lead alter the foot and leech?
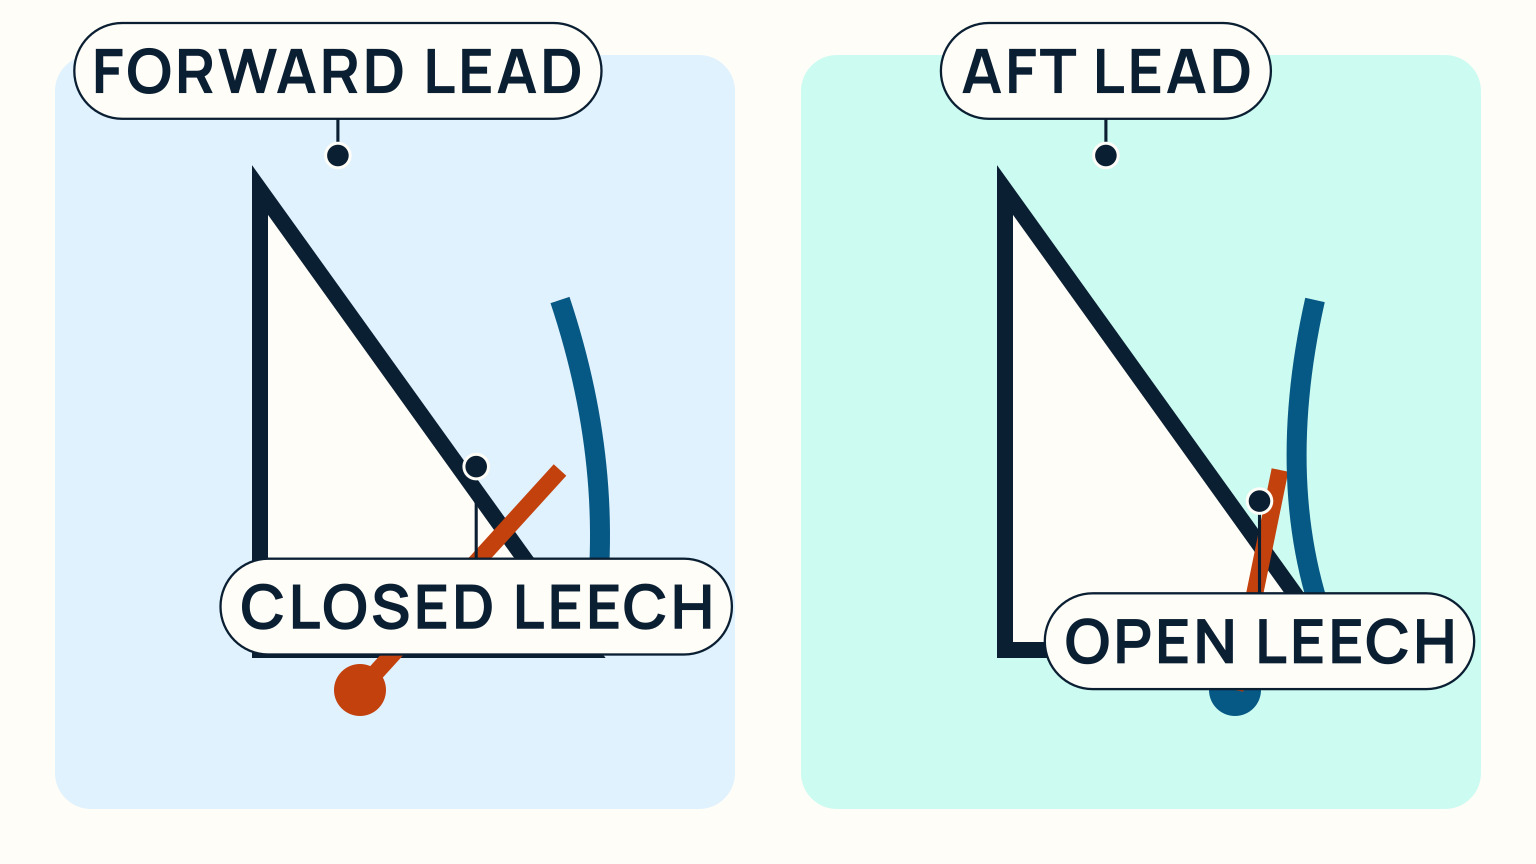
The sheet pulls from one point, but that pull affects both the bottom edge and the trailing edge of the sail. A forward lead puts more downward component into the pull. It tends to tighten the leech earlier and can leave the foot relatively fuller. An aft lead puts more pull along the foot. It tends to tighten the foot while allowing more openness higher in the leech. These are tendencies to read, not automatic verdicts. The exact result depends on the sail, the halyard, the sheet, and the course.
The useful target is an even working shape. You do not want the lower part of the jib trimmed hard while the upper part luffs first, nor the upper part hooked in while the lower part is loose. Telltales, small ribbons attached to the sail, help reveal the airflow. Watch their behaviour together as you head slightly up or down. Their order of disturbance gives a clue about whether the lead is distributing tension sensibly.
Keep the language plain aboard. Instead of saying that the car is "wrong," say what the sail shows: the top is closing too early, the foot is too tight, or the upper telltale is the first to misbehave. That gives the trimmer a visible reason for the next move.
Move the car in small, safe steps
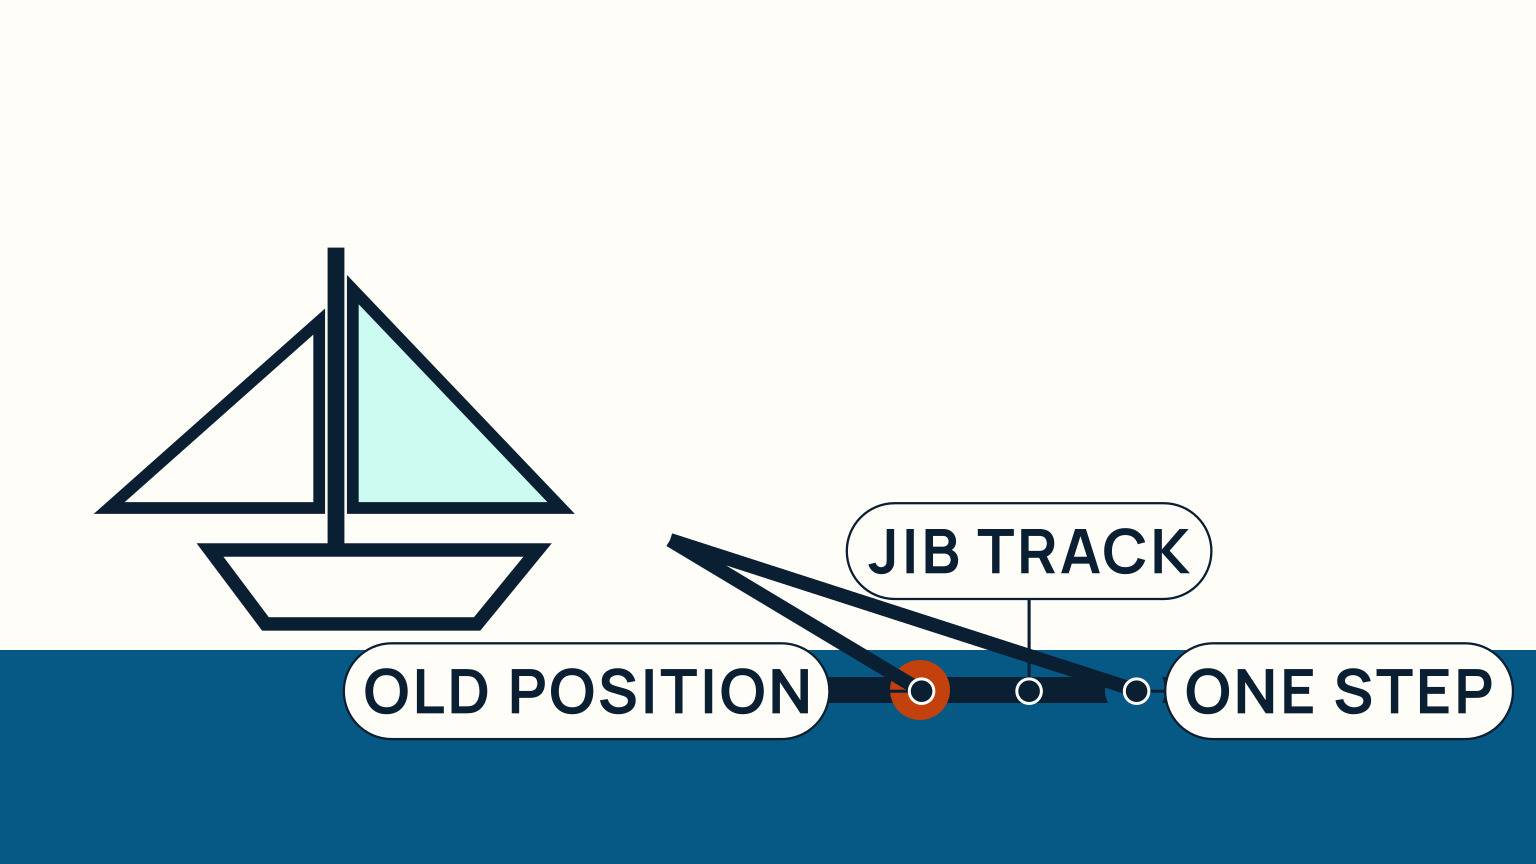
Choose a steady course and settle the boat before you adjust the lead. If the wind is changing every few seconds, you may be measuring the gust rather than the car. Ease the sheet enough for the fitting to be moved according to the boat's system. Shift one hole, one marked increment, or one small line adjustment. Re-trim the jib and give the air a moment to show the new result.
If the upper part of the sail still closes before the lower part, an aft move may be worth testing. If the lower part is tight while the upper part remains too open, a forward move may be worth testing. Make the change, then look again. Do not combine a car shift with a halyard, sheet, and steering change at the same time. You will not know which one produced the result.
The course matters. A lead that works close-hauled may be too far forward for a reach, where the sail is eased and the foot needs different support. Furling or changing the size of the jib also changes the starting point. Record useful settings for your own sail and sail plan, but treat the note as a starting point next time, not as a replacement for looking up at the cloth.
What does a lead too far forward or aft show?
A lead that is too far forward can pull the leech down hard. The upper part of the sail may close or hook while the lower part still needs attention. A lead too far aft can pull the foot tight while leaving the upper leech too open. The practical test is the same in both directions: observe which part of the sail reaches its limit first while the boat holds a steady course.
Do not turn this into a hunt for a perfectly motionless sail. Small changes in apparent wind make a jib breathe. A gust can alter the telltales for a moment without proving that the car should move. Look for a repeated pattern after the boat is settled. When the same upper or lower clue appears again and again, adjust the lead one modest step and compare.
If the sail will not respond as expected, widen the diagnosis. Check that the sheet runs freely, the halyard is appropriate, the sail is furled evenly, and the track hardware is secure. A tired sail or a damaged fitting may need a sailmaker or rigger rather than another car position. The goal is not to make every problem look like trim.
Build a repeatable trim routine
Use the same sequence whenever you return to the question. First set a steady course. Next trim the sheet until the jib begins to work. Then look at the luff, the telltales, the foot, and the leech before you touch the car. Make one safe adjustment. Re-trim and read the sail again. This routine keeps the car in its proper role: a lead-angle control, not the first answer to every slow boat.
Write down useful observations in the boat's own language. A note such as "small jib, close-hauled, car at third mark, upper telltale now matches lower" is much more useful than "car three is fast." It says what sail was used, on what course, and what visible evidence justified the position. That lets the next trimmer begin with a reason and then verify it.
Practise with room to sail a stable course and an experienced skipper who knows the deck gear. Keep a lookout and do not bury your attention in ribbons and track marks when traffic or navigation needs it. Sail trim makes the boat easier to control; it should never compete with safe watchkeeping.
The car is easiest to understand when the rest of the experiment stays calm. Hold one course long enough for the apparent wind to settle, then compare the upper and lower parts of the jib before moving the lead. If the boat accelerates or turns, apparent wind changes too, and the telltales may be reporting that change rather than the car position. A written observation is useful only when it records the sail, course, and visible shape that produced it. That is why a track mark can guide a return setting without becoming a universal prescription.
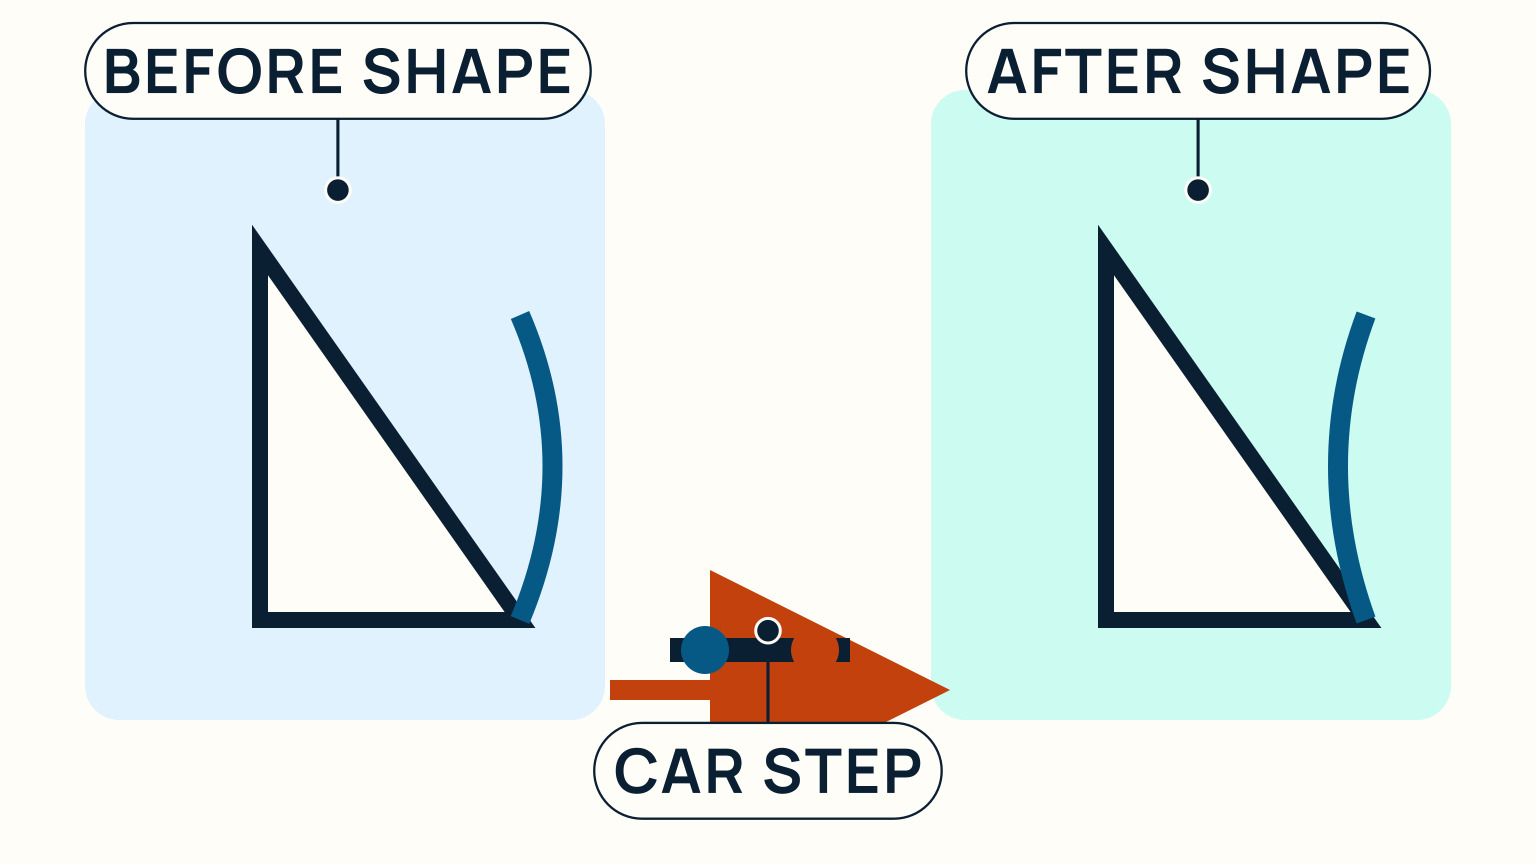
When you come back to the dock, leave the car in a known safe position and check that its pin, line, or stopper is fully engaged. A car that can move unexpectedly is a deck-hardware problem, not a trim experiment. Add any uncertainty to the maintenance list before the next sail. Inspect the track and fasteners during routine deck checks too.
For related practice, read how to use sailing telltales, trim by point of sail, and common trim mistakes. SailStarter's trim lessons help put a name to the shape you are seeing. The real lesson is overhead: adjust the lead carefully, then let the jib show whether the change was useful.
Try it from the lesson
Can you spot the next move?
You are about to load a sheet. Which way do you wrap it when looking down at the drum?
Why you can trust this guide
. We build each guide from public seamanship and safety sources, then teach the universal principle before any local difference.