Chart your course
Reef Knot vs Sheet Bend: Which Knot for Which Job?
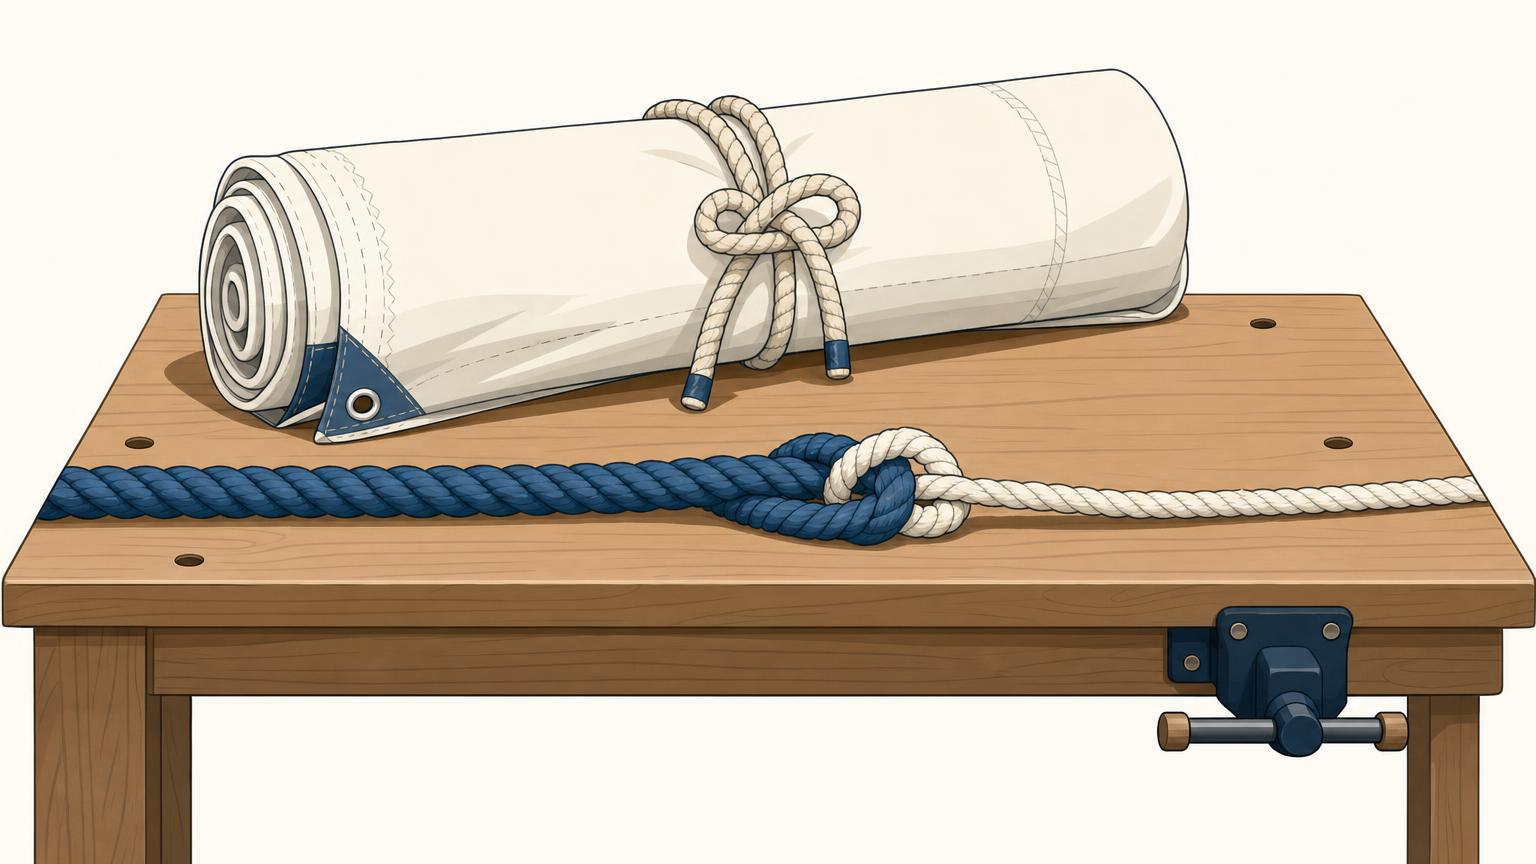
Quick answer
The short version
Use a reef knot to bind two ends of one line around something, such as bundled canvas. Tie two opposite crossings: right over left, then left over right, or the reverse. The finished knot should look flat and balanced. Do not use it to join two loaded ropes.
Use a sheet bend to join two separate lines, especially when they differ in thickness or stiffness. Make a bight, a U-shaped bend, with the thicker line. Pass the thinner line through, around the bight, then tuck it beneath itself. Both free ends should finish on the same side.
Dress each knot neatly, set it firmly, and leave generous tails. Neither knot is an approved life-safety or critical-load connection.
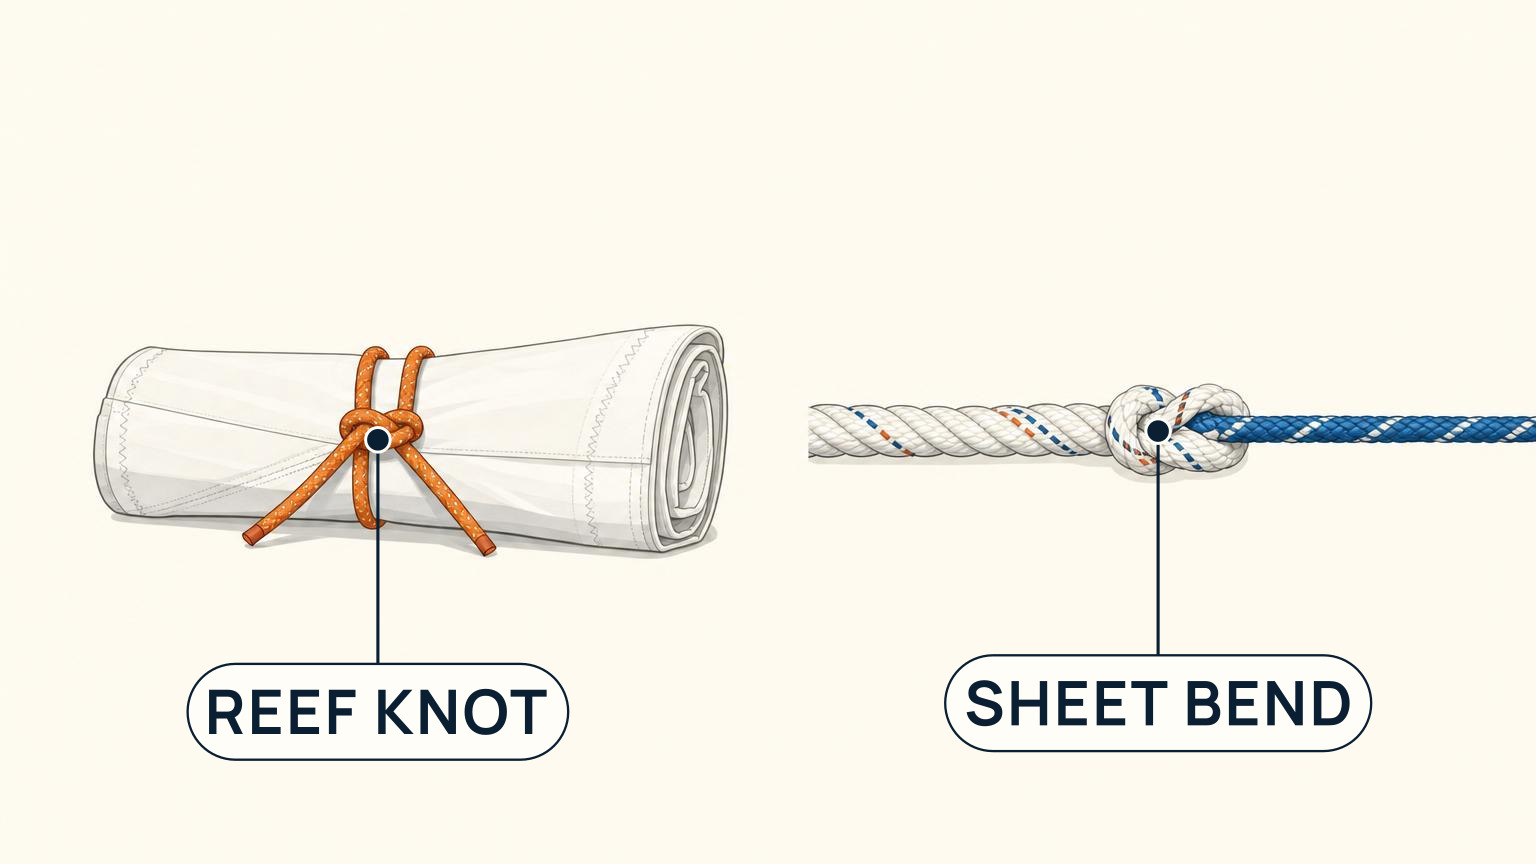
A reef knot and a sheet bend may seem to do the same job. They do not. A reef knot binds two ends of one line around something, such as folded sailcloth. A sheet bend joins two separate lines, including lines of different thickness.
You will learn to choose between them by looking at the physical job. Then you will tie each knot, arrange its parts neatly (called dressing), and check for common mistakes. You will also see how a reef knot can spill apart and how a sheet bend can work loose when it is not under load.
Neither knot should be treated as a life-safety or critical-load connection. The goal is simple: recognise each shape, tie it reliably, and understand its limits.
The two knots solve different physical jobs, and that difference shows up in how each is tied and how each fails.
| Dimension | Reef knot | Sheet bend |
|---|---|---|
| Job | Binds two ends of one line around an object | Joins two separate lines |
| Best suited to | Equal-diameter ends of one line | Lines of different thickness or stiffness |
| How it's formed | Two opposite crossings; can tighten around the object | A bight in one line, with the other tucked through — tied before any load comes on |
| Failure mode | Can capsize and spill if one end is pulled outward | Can work loose when the lines go slack |
| Correct-form check | Flat and balanced, both free ends on the same side | Both tails finish on the same side |
| Load rating | Not a life-safety or critical-load connection | Not a life-safety or critical-load connection |
Reef knot vs sheet bend: match the knot to the physical job
In the reef knot vs sheet bend choice, start by looking at the lines before you tie.
Choose a reef knot for light binding. Use it when you have two ends of one line wrapped around an object, bundle, or folded sail. A bend is a knot that joins two separate lines; the reef knot is not one.
Choose a sheet bend when you need to join two separate lines. Tie it while both lines are loose and not carrying a load. A sheet bend works when the two lines are the same size, and it is the better choice when they are not. If one line is thicker, form the folded loop, called a bight, with that line.
Neither knot is an approved life-safety or critical-load connection. A reef knot can spill if one end is pulled outward or the ends are unequal. A sheet bend can work loose when it is not under load. The article’s safety section, “Understand how these knots can fail,” includes SailStarter’s full learning disclaimer.
Tie a reef knot with opposite crossings
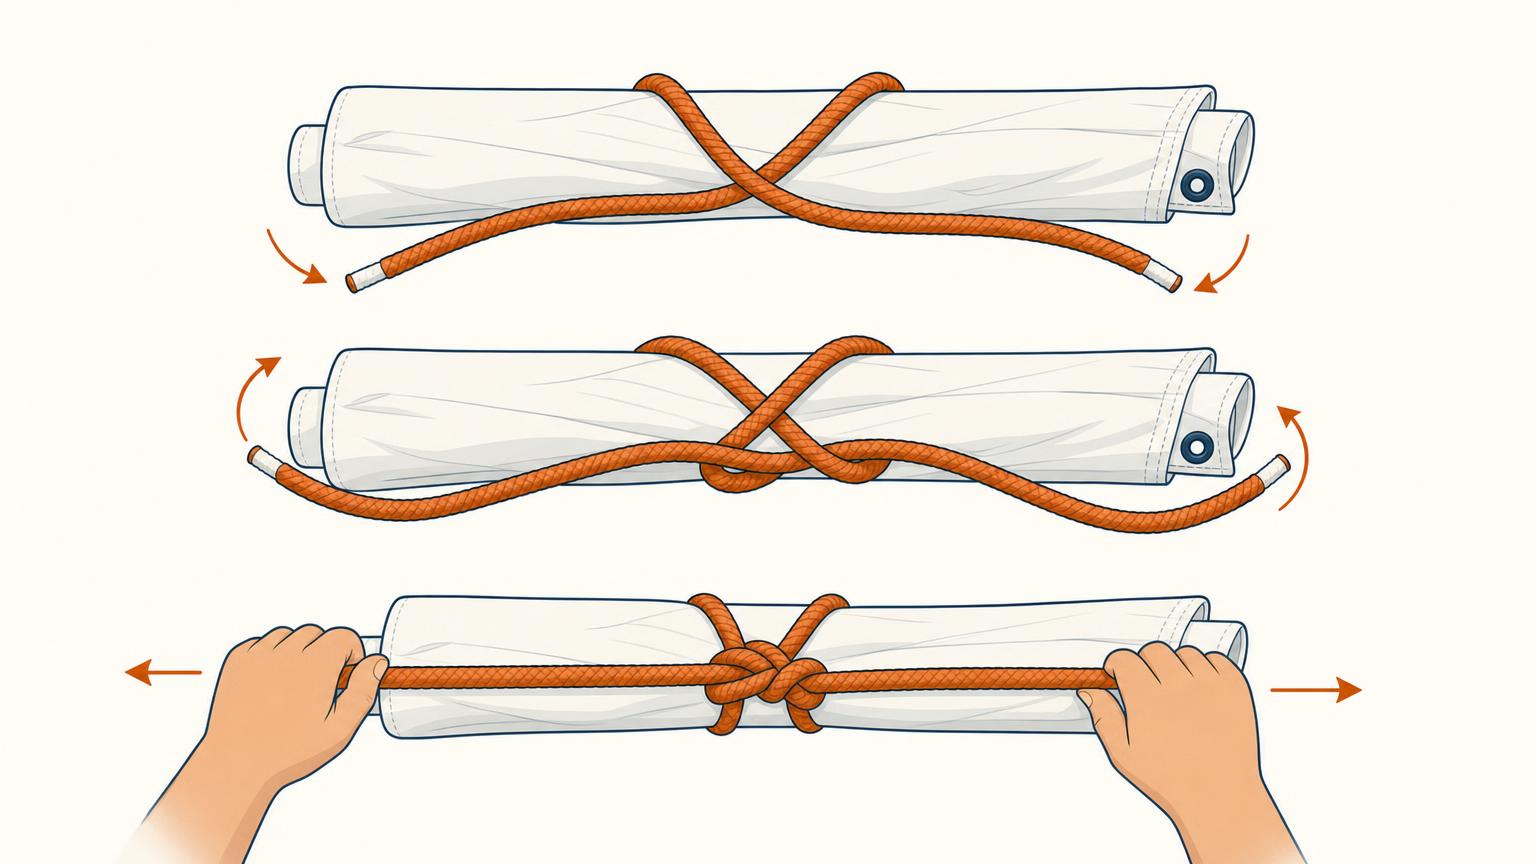
Start with one line wrapped around the object you want to bind. Bring its two ends together.
- Cross the right end over the left end. Pass it under and pull gently. You have made the first half knot.
- Reverse the crossing. Cross the end now on the left over the end now on the right. Pass it under again.
- Before tightening, dress the knot: arrange each part so it lies neatly without twists or overlaps.
- Pull both ends and both standing parts (the longer sections leading around the object) to set the knot.
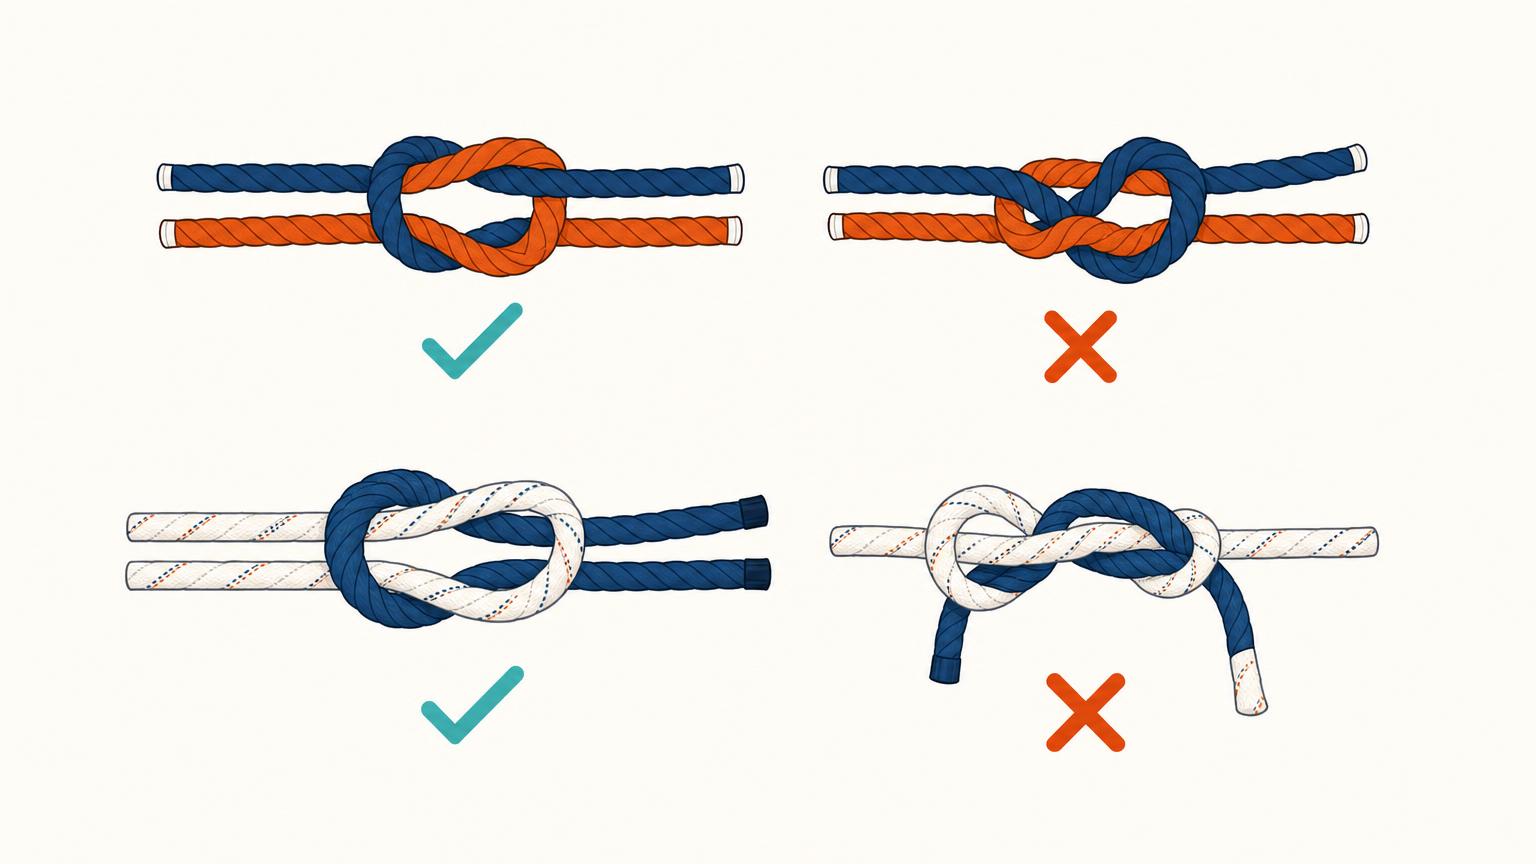
The finished reef knot should look flat and balanced, with two matching loops locked together. Both short ends should emerge together: either both above the knot or both below it.
The memory aid is “right over left; left over right.” If you repeat the same crossing twice, you make a granny knot instead. Use the reef knot as a light binding knot, not to join two separate lines or support a critical load.
Build a sheet bend around a bight
Tie this knot while both lines are loose and carrying no load. That is one useful difference in the reef knot vs sheet bend comparison: a reef knot can tighten around an object, but a sheet bend must be formed first.
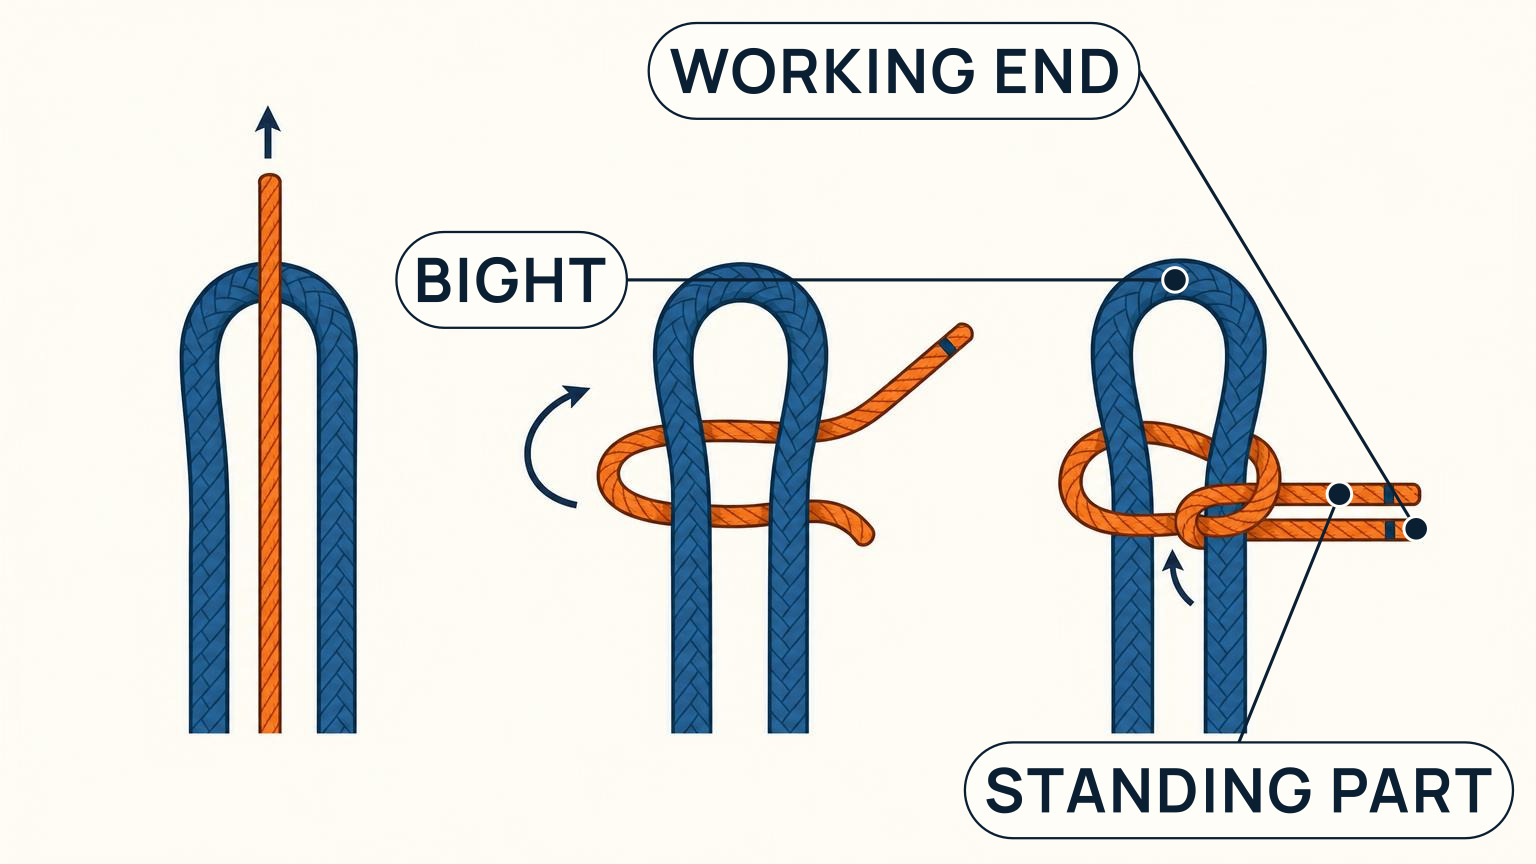
- Fold the thicker line back on itself to make a U-shaped bend, called a bight.
- Bring the thinner line’s working end up through the bight.
- Take that end around both legs of the bight.
- Tuck it under the part of the thinner line that came up through the bight.
- Pull each part gently into place so the knot sits neat and compact.
Check the two free ends, or tails. They should finish on the same side. If they finish on opposite sides, you have tied the weaker left-hand version. Undo it and retie it with both tails on the same side.
A single sheet bend usually suffices. When the lines differ in diameter or stiffness, make an extra turn with the thinner end before tucking it. This forms a double sheet bend for added security.
Neither version is presented here as a life-safety or critical-load connection.
What are common dressing errors?
When comparing a reef knot vs sheet bend, pause before you tighten. A well-dressed knot is easier to recognise and check.
- Reef knot: You should see two half knots, the single crossings made one after the other, tied in opposite directions. If both crossings turn the same way, you have tied a granny knot. Check the free ends too: both should emerge at the top or both at the bottom. If they emerge on opposite sides, the mis-tie is called a thief knot.
- Sheet bend: You dress the knot by easing each part neatly together until it looks compact. Leave generous tails rather than short ends. In a regular sheet bend, both free ends finish on the same side of the knot. Ends on opposite sides indicate an inferior form.
These checks help you identify the intended knot, but neither is a life-safety or critical-load connection. A reef knot can spill when one free end is pulled outward, while a sheet bend can work loose when the lines are unloaded.
How can these knots fail?
In a reef knot vs sheet bend comparison, neither knot is a life-safety connection. Neither should hold a critical load, where failure could harm someone or damage equipment.
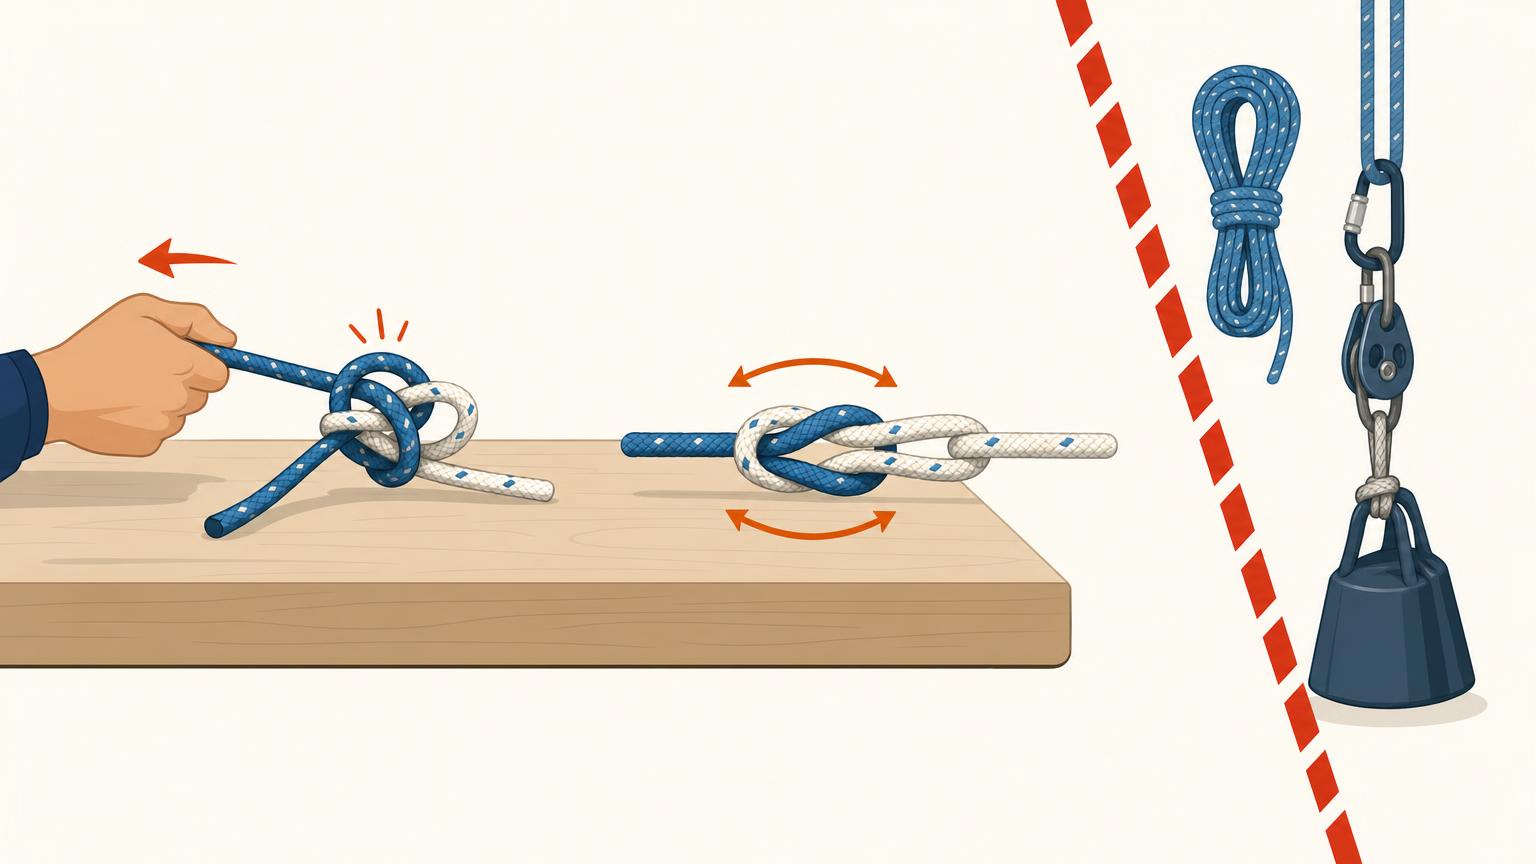
A reef knot can capsize, or turn into a different shape, when you pull one free end outward across the knot. It may then spill apart. This is why you use it for light binding, not for joining two loaded lines.
A sheet bend has a different limit. It can work loose when the lines are not under load. Slack gives the knot room to open.
Build good habits with every knot. Follow Tie-Dress-Set: tie it, arrange each part into the correct shape, then pull on the loaded parts of both lines to snug it. Leave generous free ends, called tails, while tying. Finally, inspect the shape and tails before use and after the load changes.
For loaded lines, choose a proper bend suited to the job, such as a double fisherman’s knot. For lines of unequal diameter or stiffness, a double sheet bend adds security.
Inspect the job and the dressed knot
Before tying, state whether you are binding one bundle or joining two line ends. Use the reef knot only for its suitable binding job, with opposite crossings dressed flat. Use the sheet bend to join two ends, forming a bight in one line and leading the other around it in the correct structure.
Ask a partner to trace the finished knot and identify both tails. Test it only in a controlled, non-critical practice setup. Then unload and inspect again. The bowline guide and figure-eight guide cover different fixed-loop and stopper jobs.
Neither knot is a universal answer for life safety, shock loading, or every modern line. Follow the boat's procedure and suitable authoritative guidance for the actual load. A familiar shape should never replace checking what the knot must physically do.
When you compare a reef knot vs sheet bend, start with the job. Use a reef knot to bind two ends of one line around something. Use a sheet bend to join two separate lines; if they differ in size, the thicker line forms the bight. Then tie, dress, and set the knot. Check that each part lies neatly, the tails are generous, and the finished shape matches what you intended. Remember the limits: a reef knot is not a loaded bend, and a sheet bend can work loose when unloaded. Treat neither as a life-safety or critical-load connection. The best knot is one that fits the job and that you can inspect with confidence. Try SailStarter’s short, visual lessons to practise both knots step by step.
Try it from the lesson
Can you spot the next move?
You need to gather loose sailcloth with a sail tie. Which knot's job is that?
Why you can trust this guide
. We build each guide from public seamanship and safety sources, then teach the universal principle before any local difference.