Chart your course
How Much Does Seacock Replacement Cost?
Quick answer
The short version
The valve on a chandlery shelf is easy to price. Replacing it safely may involve the boatyard, two sides of the hull, old hose that will not come off cleanly, a backing block hidden under sealant, and a launch slot that cannot be missed. That is why two quotes for "one seacock" can describe very different jobs.
Quick answer: There is no reliable universal seacock replacement price. Ask for an itemized local quote that covers haul-out or an approved lift plan, protected access, removal of the old through-hull and valve, inspection of the hull opening and backing, a compatible flanged seacock system, hose and clamps, surface preparation and sealant cure, exterior finishing, launch, and leak and operation checks. The quote should state what is included, what is an allowance, and which discoveries require your approval before work continues. A low figure that covers only the valve and installation labour cannot be compared with a price that includes haul days, joinery, damaged laminate, or hose replacement.
This is one of the places where a price range can mislead more than it helps. Currency, yard rules, labour rates, storage charges, fitting size, and boat construction all vary. A better answer is a cost map you can hand to two yards so both are pricing the same work. If the existing valve is stiff, corroded, leaking, unsupported, or uncertain, start with the seacock inspection guide and keep the boat's flooding risk separate from the budget discussion.
Price the water path, not the valve
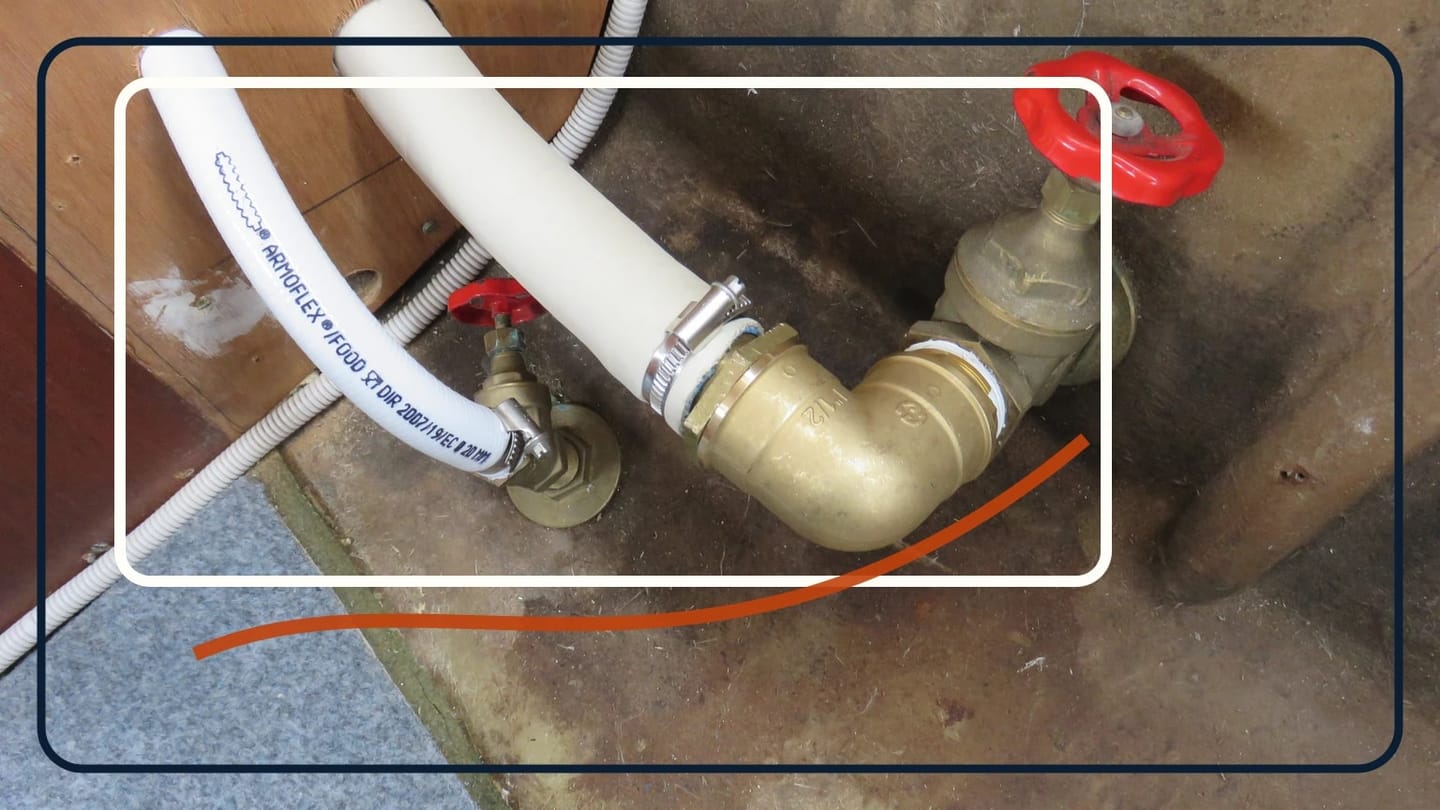
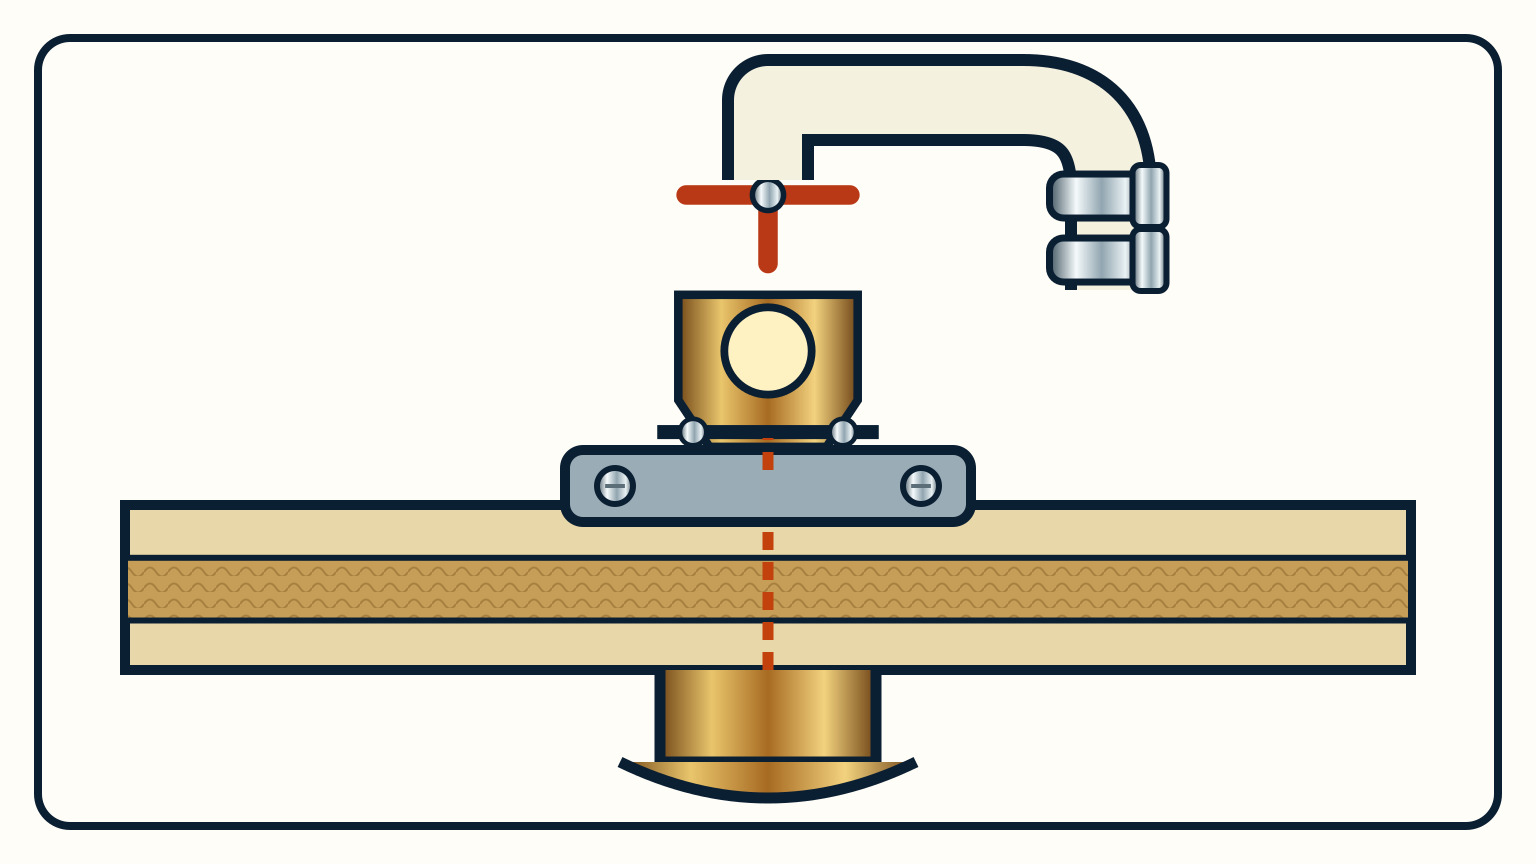
A flanged seacock sits in a chain of parts. Outside the hull is the head of the through-hull. Its threaded neck passes through the hull and prepared backing structure into the seacock. Above the valve may be a straight or angled tailpiece, hose, clamps, and sometimes a strainer or other separately supported equipment. Every interface has to fit the installed system.
Your quote should identify the complete assembly, not a generic valve size. GROCO warns that ordinary tapered pipe threads and the straight threads used on many through-hulls are not automatically compatible. A valve that happens to screw on a few turns is not proof of a correct match. Forespar likewise publishes product-specific thread, backing, sealant, and installation instructions for its systems.
Count the tasks before counting money. The yard may need to disconnect hose, remove a seized valve and exterior fitting, clean away old bedding, inspect the hole, fabricate or replace backing, dry-fit and orient the new parts, prepare surfaces, apply the specified sealants, wait for cure, reconnect the hose, finish the exterior, and test after launch. Each missing task is either an exclusion or a surprise waiting to become extra labour.
Ask what will be reused. Reusing hose, tailpieces, clamps, bonding conductors, strainers, or backing only makes sense after condition and compatibility are confirmed. The answer may differ from one seacock to the next on the same boat.
Why can access dominate the bill?
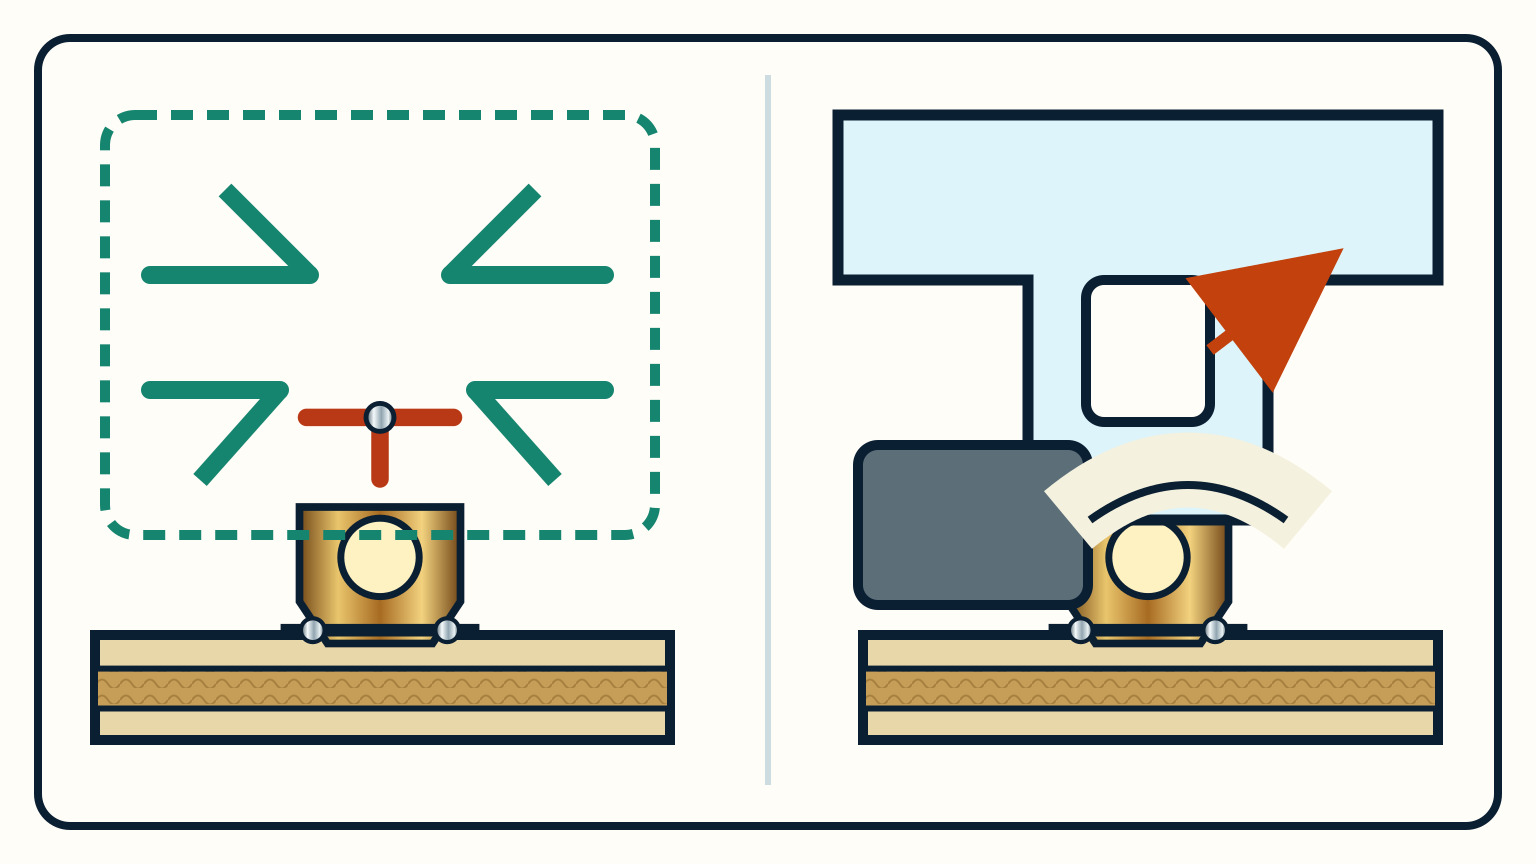
Because hands and tools need room on both sides of the installation. One worker must hold or index the exterior through-hull while another works inside for many flanged-seacock installations. Inside, the valve must be reachable for removal, dry fitting, flange fastening, hose connection, final operation, and later emergency closure. A small hatch that lets you see the red handle may still be too narrow for the actual job.
Walk the route with the yard estimator. Which panels are designed to come out? Does a battery box, tank, sole board, locker liner, engine part, or fixed cabinet block the valve? Can the hose be removed without cutting it? Can a drill, wrench, sealant nozzle, and torque tool reach the fasteners squarely? Outside, can the through-hull be removed without damaging adjacent paint or a strainer scoop?
Access labour should produce a durable result. If a panel has to be cut, the scope should describe its finished edge, removable cover, fasteners, and protection from water. Reinstalling permanent trim over a valve that must be operated and inspected preserves the original problem. Forespar's maintenance guidance stresses that hard-to-reach valves still need regular operation and service.
Photographs make this part of the quote concrete. Include a wide view that locates the compartment, a close view of the valve and hose, the exterior fitting, and measurements of the opening and clear working space. A yard can then separate known disassembly from an allowance for access it cannot yet see. In a larger refit, place this work beside the access and contingency lines in your sailboat refit budget rather than hiding it under "plumbing."
When does removal uncover hull work?
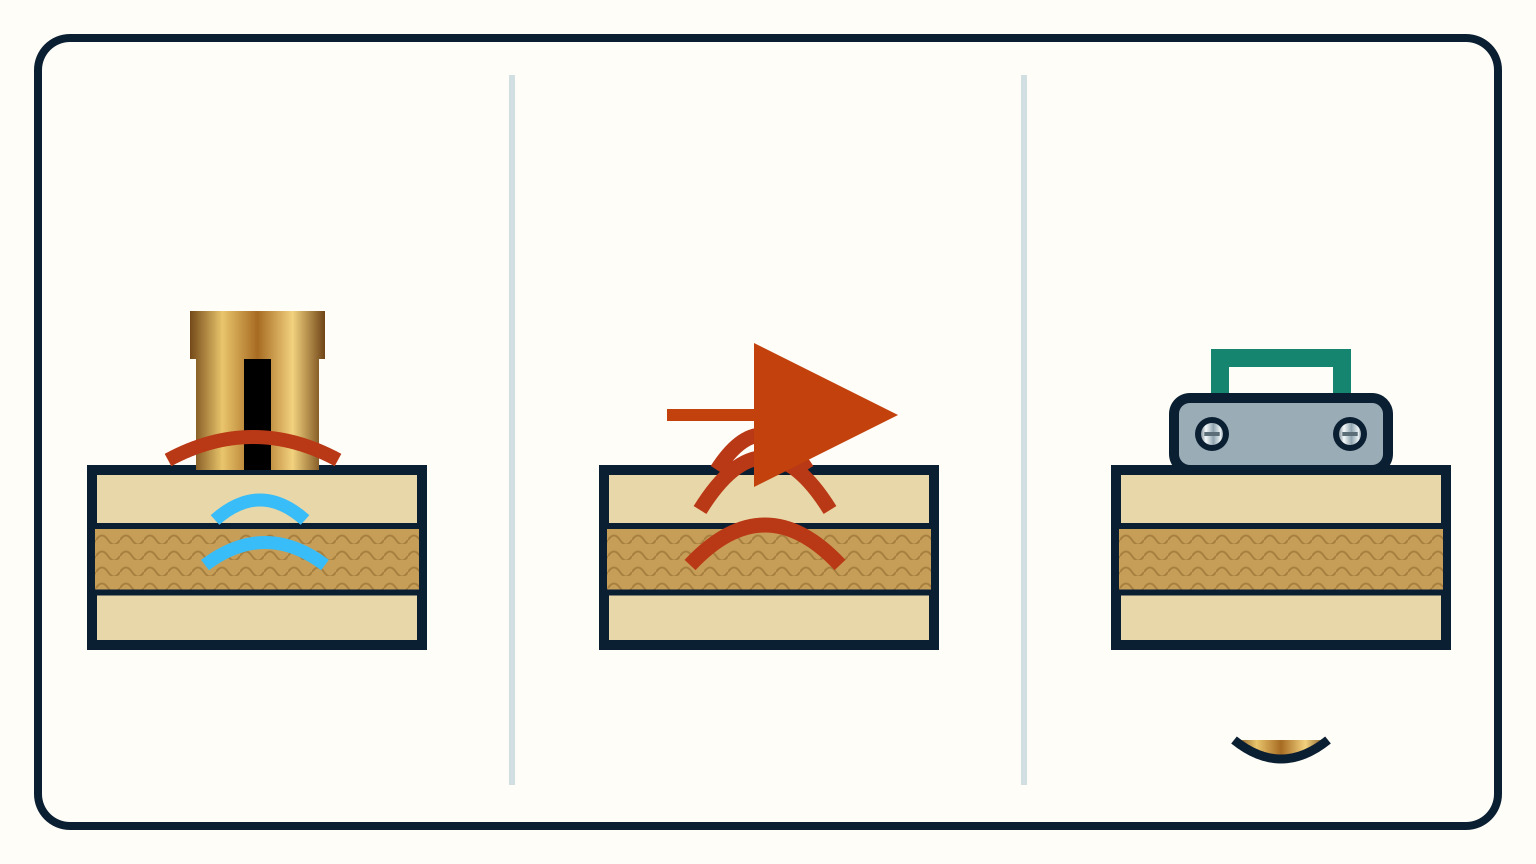
When the old parts were hiding a damaged opening or weak support. Once the exterior fitting and valve are out, the yard can see residual sealant, ragged laminate, crushed or wet core, an enlarged hole, corrosion staining, a loose backing block, or a surface that is not flat enough for the new flange. The quote should say how that inspection is documented and where the original scope stops.
Forespar instructs installers to remove old sealant, clean and prepare the opening, dry-fit the assembly, and use a flat backing surface. Its instructions for a new opening call for sealing exposed laminate or core with resin before installation. GROCO's backing-block guide matches the block to the valve, sets the insert pattern and orientation, then bonds or glasses the block to the hull before the seacock is installed.
Those are different trades and time blocks from simply changing a valve. Grinding, drying, laminate repair, backing fabrication, coating, and cure can affect both labour and the launch schedule. A yard cannot price concealed damage exactly before removal, but it can define an inspection allowance, hourly rate, material basis, photographs required, and the approval point before repair begins.
Do not let a contingency line become permission for an unspecified rebuild. Ask what condition the allowance assumes and what evidence triggers a revised scope. If several fittings show the same weak backing or wet core, pause and decide whether the boat needs a broader survey. Marine survey scope and reporting can help you frame that question without asking the installer to make a whole-boat judgment from one hole.
What belongs in an itemized quote?
Enough detail to tell whether another yard is offering the same finished system. Start with logistics: haul, launch, blocking or lift, pressure wash if required, lay days, movement within the yard, and any owner-supplied-parts policy. Then identify the exact seacock, through-hull, tailpiece or elbow, hose, clamps, backing material, fasteners, bedding and thread sealant, plus exterior coating work.
Separate removal from installation. Old bronze, composite, sealant, hose, and fasteners do not all release the same way, and a destructive removal may be the safest path for a part that will not be reused. The quote should state whether disposal, cleaning, protection of nearby equipment, and making good the access panel are included.
Give hidden conditions their own section. Useful allowances name the assumed hours or task, material basis, and stop point. The authorization clause should tell the yard whom to contact, what photographs or measurements to provide, and whether work pauses if that person cannot be reached. "Additional work as needed" is not a scope.
Finish with acceptance. The manufacturer defines cure and assembly details. The yard should identify the planned checks before launch, immediately after launch, with the valve open and closed, and after connected equipment is run where applicable. Record the final handle clearance, hose support, clamps, backing and flange fastening, exterior bedding, and dry bilge. These records give the next inspection a baseline.
Compare quotes on the same scope
Normalize the paperwork before comparing totals. Put each quote beside the same list of fittings and mark included, excluded, allowance, or unknown for every task. One yard may include haul and lay days; another may assume the boat is already ashore. One may replace hose to the next sound connection; another may reconnect whatever is present. The cheaper total can disappear as soon as those differences are corrected.
Ask the estimator to identify dependencies. A longer tailpiece or changed elbow may require new hose geometry. A new backing block may change the through-hull length. Cure time may add a yard day. Difficult exterior removal may disturb antifouling around the fitting. None of these automatically means a large bill, but each belongs somewhere visible in the scope.
Keep urgent safety and optional improvement in separate columns. Restoring a sound, operable, supported water shutoff is different from adding remote operators, reorganizing a locker, replacing unrelated fittings, or changing an entire plumbing system. This separation also makes the project easier to place in the wider maintenance-cost plan.
Before authorizing, write down the finished state you expect: the specified compatible assembly, accessible handle, supported hose and equipment, completed hull and backing repair, cured sealants, exterior finish, successful launch check, photographs, and parts record. That sentence is more useful than a borrowed online price range because it tells the yard what "done" means on your boat.
SailStarter's lessons practise the same habit in a different setting: identify the full system, name the evidence you can see, and make the handoff specific. Start with the free first module if you want a clearer way to brief maintenance findings before the next yard conversation.

Try it from the lesson
Can you spot the next move?
Water is rising and several crew can act. How should the first jobs be shared?
Why you can trust this guide
. We build each guide from public seamanship and safety sources, then teach the universal principle before any local difference.