Chart your course
Spring Lines Explained: How to Tie Up a Boat So It Stays Put
Quick answer
The short version
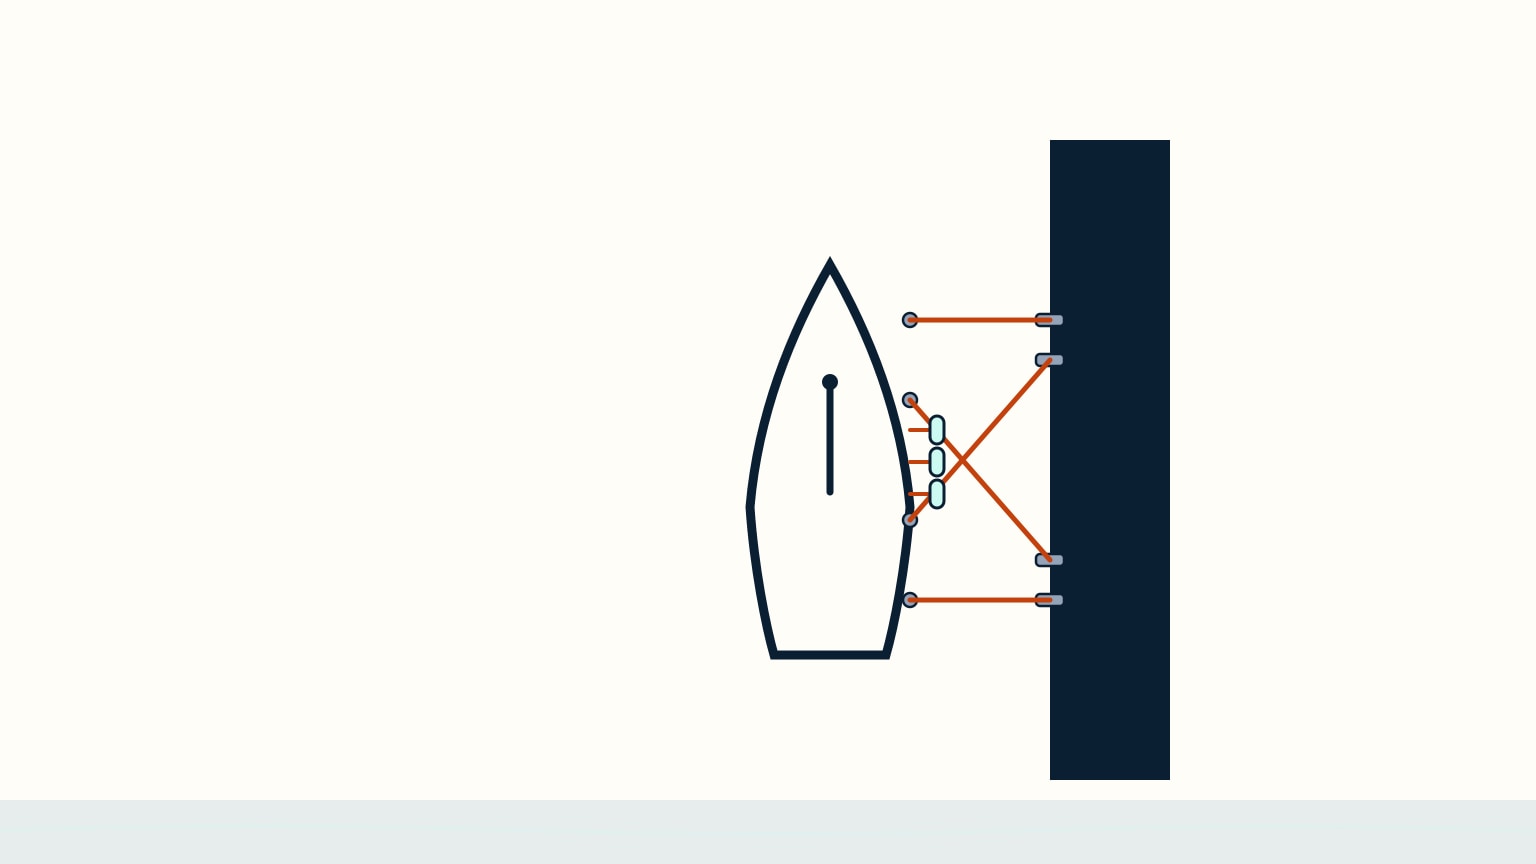
A boat tied up with just a bow line and a stern line can still surge forward and back on every gust and wake, because those two lines only hold each end in against the dock. They don't run fore-and-aft. Spring lines are the fix: a bow spring, led aft from a cleat near the bow, stops the boat driving forward; a stern spring, led forward from a cleat near the stern, stops it dropping back. Together with the bow and stern lines, that's the standard four-line plan. Beyond rigging those four, tying up well means leaving the right slack for tide and wakes, protecting any spot a line chafes, and knowing how to heave a line ashore in the first place.
Tying a boat up looks like it should be simple (a couple of ropes to a couple of cleats) right up until a boat with only two lines starts grinding its fenders against the dock all night. The two lines most people reach for first, a bow line and a stern line, only ever do half the job: they hold the ends of the boat in, not the middle of it still. The other half of the job belongs to a pair of lines that run diagonally along most of the boat's length, and to a few habits (slack, chafe protection, and a decent throw) that keep the whole plan working once it's rigged. This guide walks through all of it.
The Four-Line Plan
A bow line runs from a cleat near the bow, short and close to square across, to a cleat on the dock; a stern line does the same job at the other end. Both hold that end of the boat in against the dock, but neither one resists the boat surging forward or back. A short, square-across line can't. The two lines that do that job run diagonally instead, each along much of the boat's length: a bow spring, led from a cleat near the bow aft to a fixed point on the dock, stops the boat surging forward, because the bow can't advance past where that taut line meets the dock. A stern spring, led from a cleat near the stern forward to the dock, stops the boat surging aft the same way, in the opposite direction. Rigged together, the two springs cross roughly amidships and hold the boat in both directions while it still rises and falls with the water.
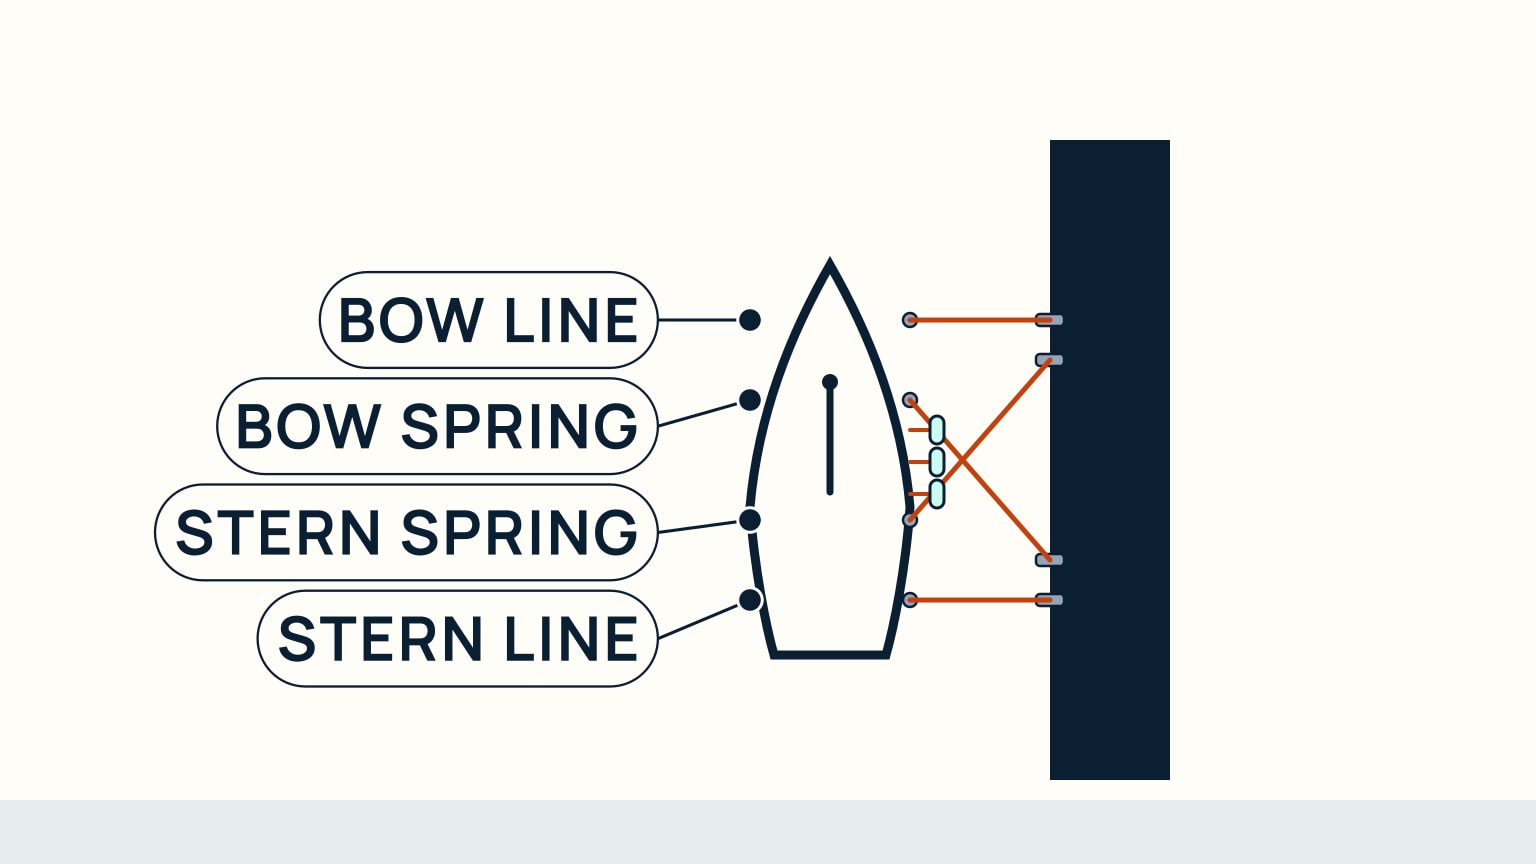
Sailors don't all agree on what to call these two diagonal lines: some call the bow-tied, aft-leading line the "aft spring," others call that exact same line the "forward spring," because one group names it for which way the rope runs and the other names it for which way it stops the boat. Rather than pick a side, this guide names springs by which end of the boat they're tied to (bow spring, stern spring) and always says which way each one leads and what it stops. A breast line is a different line again: short, roughly straight across like a bow or stern line, but rigged separately (often from a midship cleat) just to snug the boat in tight. It isn't one of the four.
Leave Enough Slack for Tide and Wakes
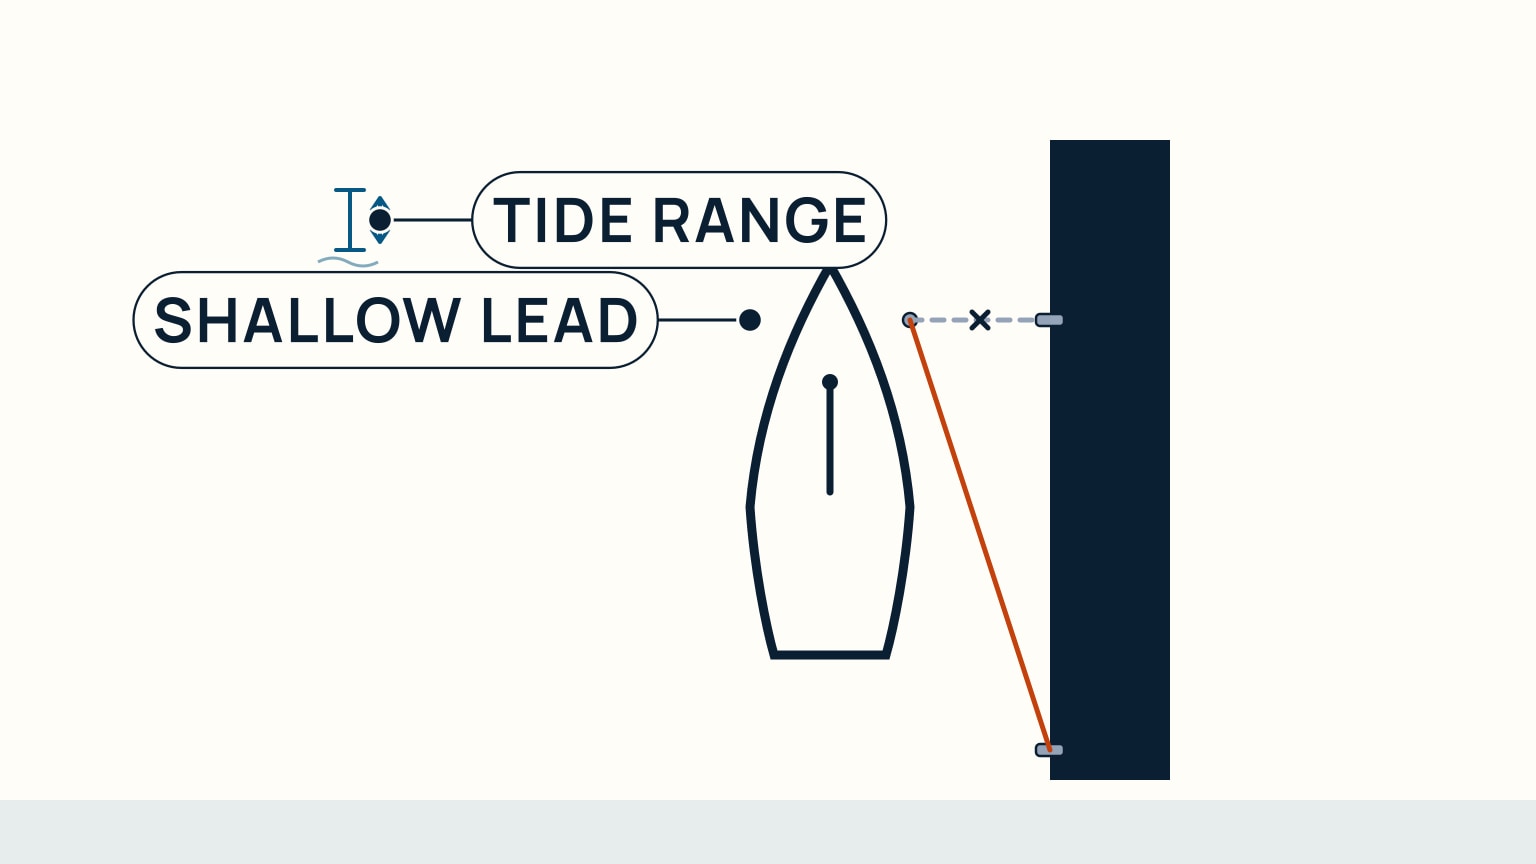
Every one of these four lines needs enough slack that the boat can ride up and down with the tide, or lift on a wake, without coming up hard against the dock. Too little, and a falling tide can leave the boat hanging on its own lines or scraping as the water drops. But slack cuts both ways: too much of it, and the boat can drift far enough off the dock to come up short later and snap taut, or swing more than the berth allows. One good way to buy that room without piling on loose line is a longer, shallower-angled lead down the dock rather than a short, steep one. It absorbs the boat's rise and fall with far less slack to manage.
Protect the Spot Where a Line Chafes
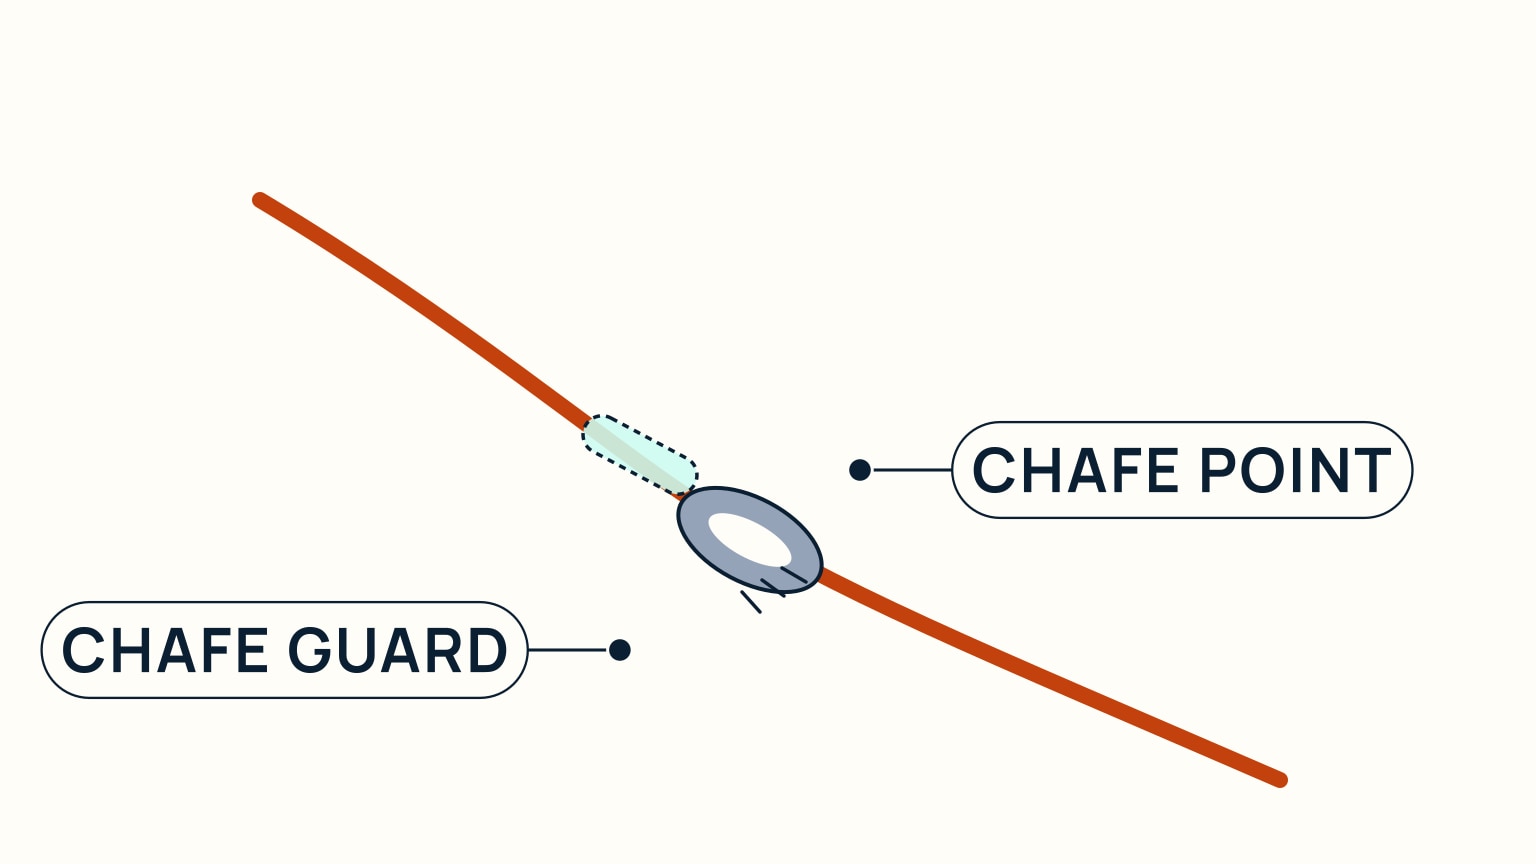
Wherever a line bends sharply over hard hardware and works back and forth under load (a cleat, a fairlead, a chock, the dock's own edge), it chafes, because the fibers on the outside of that bend take more stress than the rest of the rope. Chafe gear (a sleeve or wrap at that point) protects the line, but it doesn't stay put on its own: it tends to bunch and work its way out of a chock over time, so it needs checking again rather than a one-time fit, especially after a blow, since a boat left tied up is usually unattended for exactly the weather that loads a line hardest.
Heaving a Line to the Dock
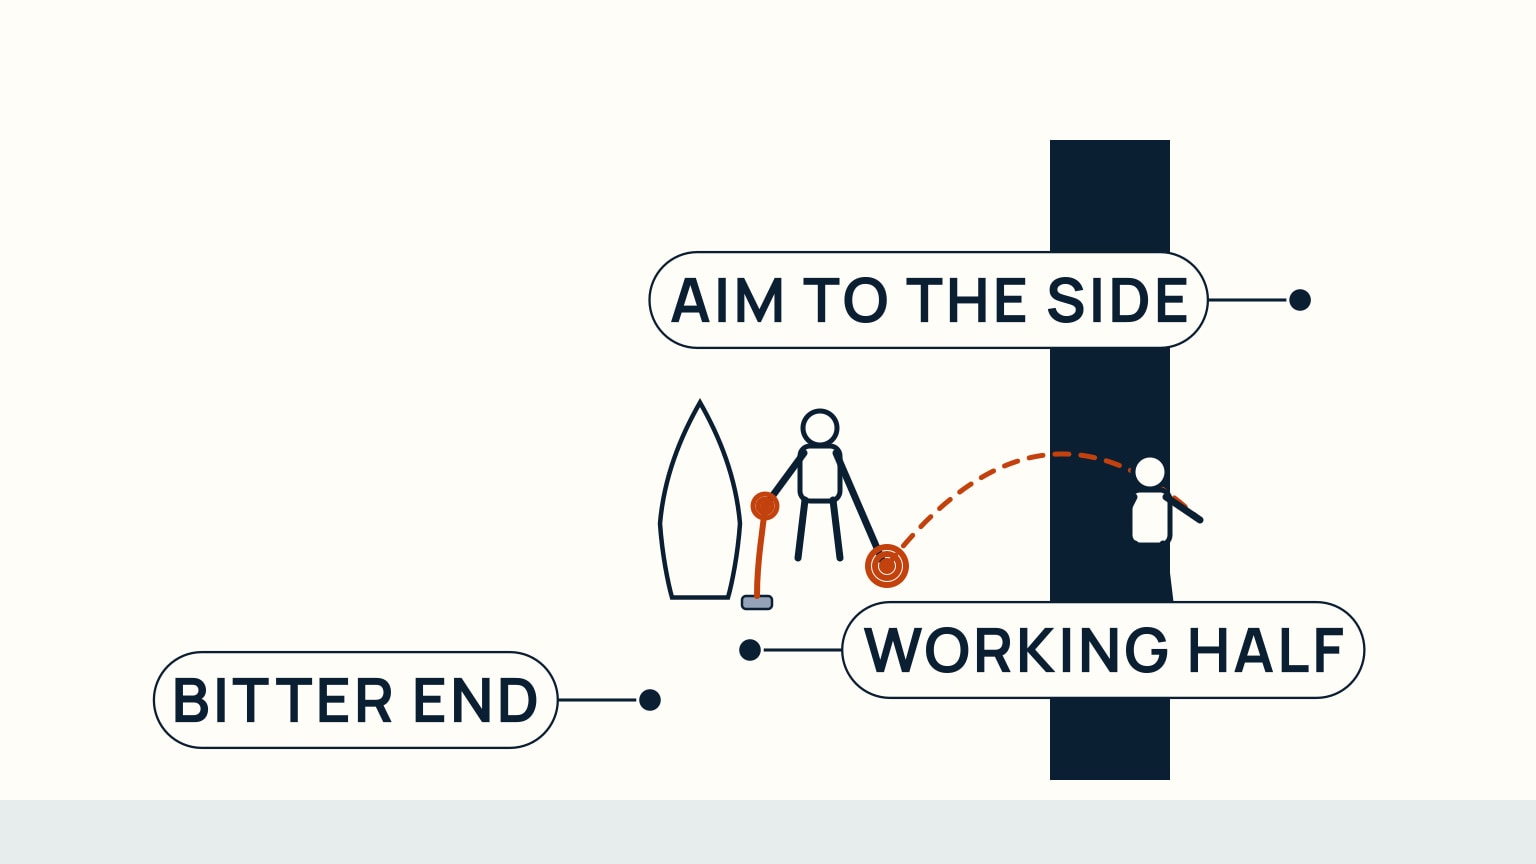
Getting any of these four lines ashore in the first place often means heaving it. Start with a clean coil, no twists worked into it. Split that coil in two before you throw: most of it, the working half, stays in your throwing hand to carry the momentum, while the rest feeds out smoothly from your other hand as the line pays out. Throw underhand or sidearm, never overarm, aiming high enough that the line arcs down onto the receiver's arm. Aim to their side, never at their head. Keep the bitter end made fast to a cleat aboard before you throw, so you are still holding the line no matter what happens to the thrown end.
Name the movement you need to stop
Before choosing a line, stand in the cockpit and point toward the direction the bow or stern is moving. A forward spring leads from the boat toward a point farther forward and limits movement astern. An aft spring leads toward a point farther aft and limits movement ahead. Use the boat's terminology and actual cleat layout in the crew brief.
Pair springs with breast and bow or stern lines as the berth requires. One line rarely controls every direction. The docking guide shows how a first line can support a slow approach while the rest are handled.
Rig for load and chafe
Lead the line from a suitable strong point, through the intended fairlead, to an appropriate shore point. Keep it clear of sharp edges, moving machinery, propellers, and places where people step. Add chafe protection where the line works against a surface, and inspect it as wind, tide, and wake change the load.
Do not wrap a loaded line around a hand or stand inside a bight. Adjust from a safe position using the boat's fittings and procedure. A line under heavy load can move suddenly even when the boat appears still.
Use the engine only with a clear brief
On some boats, a spring can be used with gentle propulsion to hold the boat against fenders or move one end. This is a boat-handling manoeuvre that needs suitable strong points, correct line direction, a clear propeller area, and one person in command. Practise with an experienced skipper.
State which line is loaded, which way propulsion will act, who tends the line, and the stop command. If the effect differs from the plan, return to neutral. More power should not be the first correction.
Pass a line without losing the end
Keep the working end secured aboard when appropriate, split the coil into manageable parts, and throw toward a safe clear area near the receiver rather than at their head. Tell them whether to place the eye, take turns, or return the end. A successful throw is only useful when both people know the next action.
After mooring, check every lead from boat to shore and imagine the boat moving ahead, astern, and away from the dock. Adjust the set so the lines share the intended jobs without crushing fenders or creating a trip hazard.
Four lines, each with one job, cover the whole plan: bow and stern lines hold the ends in, bow and stern springs stop the surge, and slack, chafe checks, and a decent throw are what keep the setup solid once it's tied. None of it is complicated on its own. It's just a few habits worth having down cold before you're doing it dockside in a crosswind.
If you'd like to build that muscle memory before you need it for real, SailStarter's beginner lessons cover this exact plan step by step, alongside the rest of docking under power. Try a lesson and see how quickly the four-line habit becomes automatic.
Review port and starboard if side names still slow the crew brief.
Try it from the lesson
Can you spot the next move?
The dock only has a ring, not a cleat. How do you make your line fast?
Why you can trust this guide
. We build each guide from public seamanship and safety sources, then teach the universal principle before any local difference.