Chart your course
How Much Solar Power Does a Sailboat Need?
Quick answer
The short version
No single solar wattage suits every sailboat. Start with recorded daily electricity use, then judge the sun and shade where the boat will actually operate. Identify panel space that remains useful around sails, rigging, access, and normal work. Match the array, solar charger, and house battery through the manufacturers' limits; array open-circuit voltage must remain within the selected controller limit. After installation, monitor solar input, boat use, and battery trend so measured results can replace the assumptions in the first estimate.
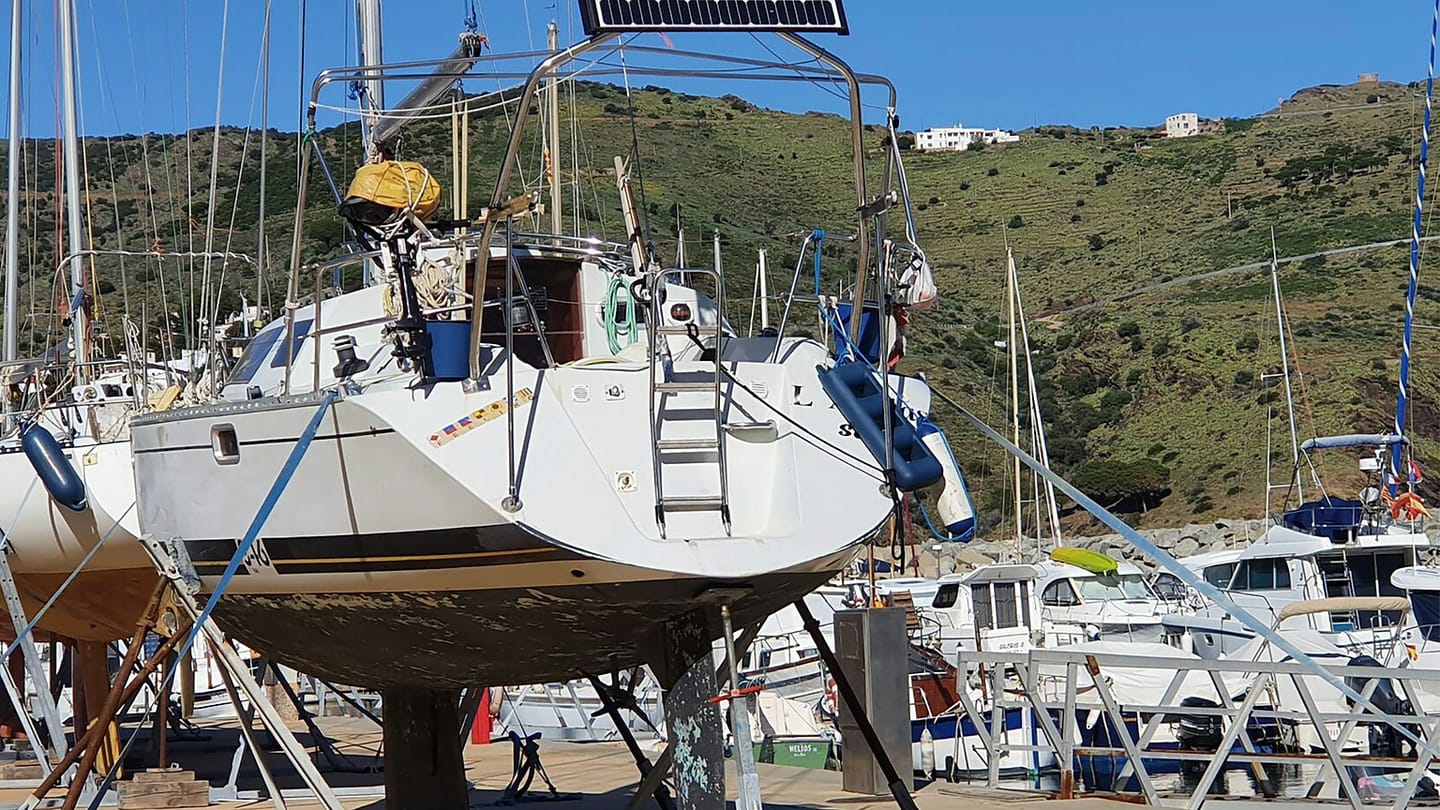
Solar performance depends on array details, location, battery voltage, controller limits, and the marine environment. A large nameplate number cannot promise a daily harvest when a mast, boom, sail, or nearby structure shades part of the array. Likewise, a low-energy boat may need less charging than an online example built around refrigeration and continuous electronics. Make the sizing question specific: which loads must run, in which season, and what other charging sources are available?
Measure The Daily Load
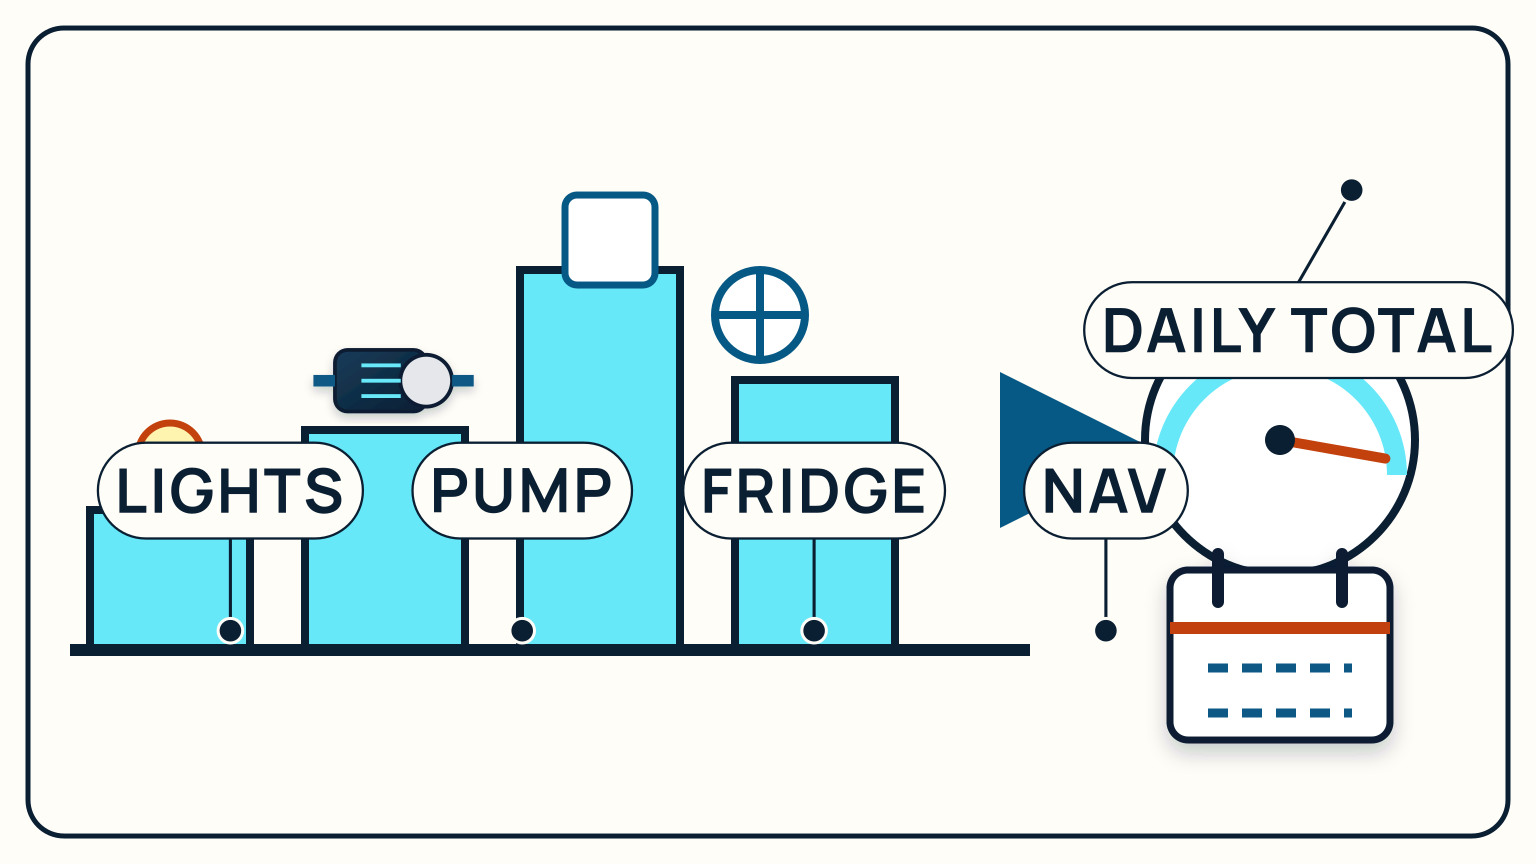
Create an inventory of the DC loads that matter during the intended trip. Include equipment that cycles automatically as well as items switched on by the crew. For each one, record observed use over a representative day from the boat's available monitoring and manuals. Keep occasional heavy loads visible instead of hiding them in a vague average.
Separate essential and optional use. Navigation, communications, pumps, lighting, and refrigeration may have different importance on your boat. A laptop, entertainment equipment, or convenience appliance may be easy to defer when charging is poor. This distinction does not change the energy already consumed, but it gives the crew a clear response when actual harvest falls below the plan.
Add the recorded uses into a daily total and note the conditions. A quiet day at the berth may not resemble a sailing day with instruments active. A cool week may not represent warmer conditions for a cycling load. Keep more than one profile if the boat has distinct modes. The purpose is not false precision. It is a traceable starting point that can be compared with later solar and battery monitoring.
Check the total against direct battery observations where the installed monitor allows it. The individual appliance estimates and the whole-boat change should tell a compatible story. A large mismatch is a reason to look for an omitted cycling load, another charging source, or an assumption about run time. Keep the discrepancy visible. Adjusting one number until the worksheet looks tidy would remove the most useful evidence in the exercise.
Map The Real Solar Window
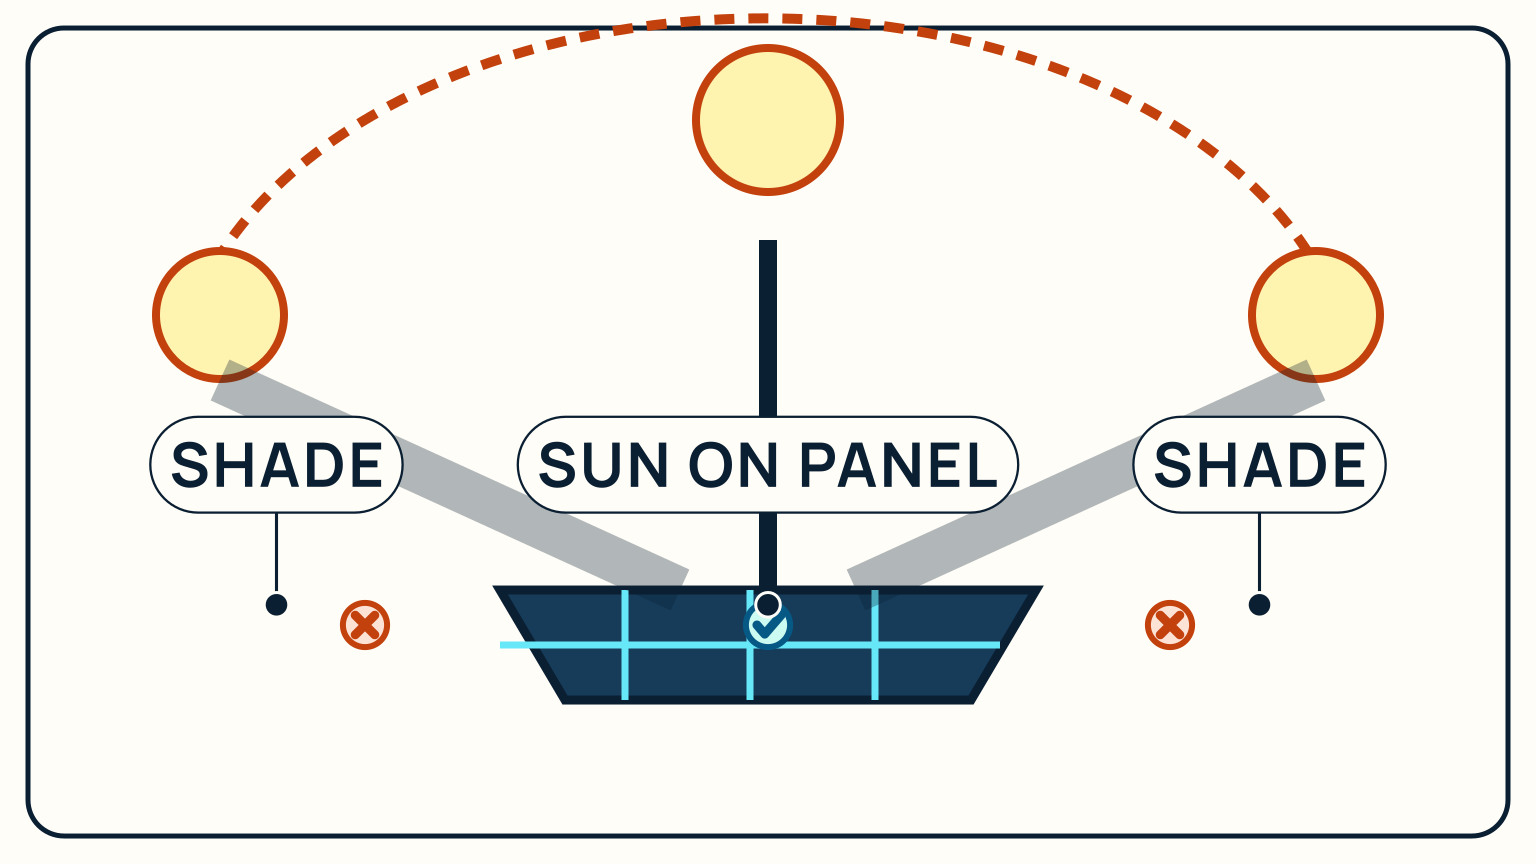
Study the proposed panel area from morning through afternoon. Note when the mast, boom, standing rigging, sails, radar equipment, or nearby boats cast shade. Repeat the observation when the berth, season, or sailing configuration changes. A location that looks clear at noon can spend long periods under moving shadow.
Treat usable panel space and rated panel area as different things. A panel must also coexist with deck access, lines, hatches, steering, and safe movement. Do not create a new obstruction to gain a better nameplate total. Sketch the sun path and recurring shadows over the exact mounting area, as the figure does, then discuss the result with the installer or equipment supplier.
Weather and location make daily yield variable, so avoid converting one bright observation into a guarantee. Build the plan around the conditions that matter for the intended use and retain another charging or load-reduction option where needed. If the boat moves between a shaded berth and open water, record those as separate operating cases. The honest solar window is the period in which the real array can receive useful light, not the number of daylight hours on a calendar.
Photograph the mounting area at several times with the same framing. Mark mast, boom, and equipment shadows on a plan so you can compare them without standing in exactly the same place. Include likely sailing states: a deployed sail or shifted boom can change the pattern from the one seen at rest. The observation does not calculate yield by itself, but it prevents a supplier from sizing against an imaginary unshaded surface.
Match Panels Controller And Battery
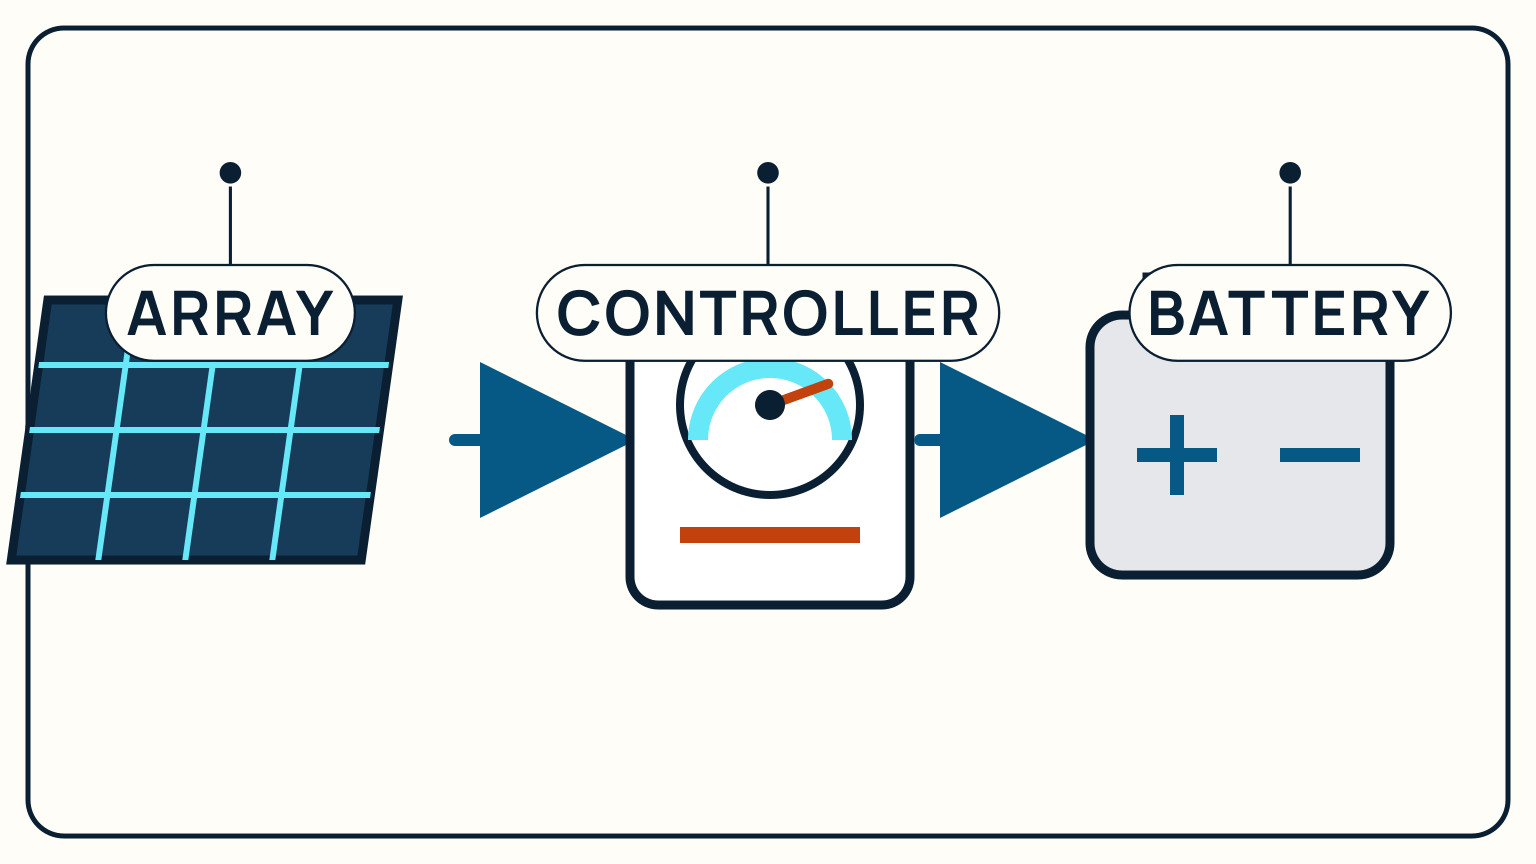
The energy path runs from array to solar charger and then to the house battery. Choose those parts as a system. Gather the panel electrical specifications, the way panels will be connected, the battery voltage and type, and the controller's published limits. Use the manufacturers' selection tools and manuals rather than matching parts by brand appearance or connector shape.
Array open-circuit voltage must remain below the selected controller limit under the conditions covered by its manual. Other array and controller limits matter as well, so have the complete design checked by a competent installer. Do not identify a bank of battery switches as a solar controller. The charger should be a recognizable device in the documented charging path, with its input, battery connection, protection, and settings understood.
Match charging behavior to the battery system instead of assuming every battery accepts the same profile. Existing alternator or shore charging also belongs in the design because solar does not operate alone. Keep the final equipment specifications, wiring diagram, settings, and installer record aboard. If a later owner changes panels or batteries, those records reveal which controller assumptions must be reviewed before the system is used.
Make installation constraints part of the selection brief. The installer needs the proposed cable route, distance, protection, ventilation, access, and the other equipment sharing the space. Do not buy the controller first and ask whether it fits later. A technically compatible rating still needs a sound marine installation. Ask the installer to identify which published limits control the design and where those values appear in the retained documentation.
Verify With Monitoring
Use monitoring to compare three things: solar input, boat consumption, and the battery's direction over time. A brief high input reading does not show the day's harvest, and a battery reading without the current loads can be misleading. Review trends under the same operating profiles used for the original load estimate.
Start with a known period. Record weather, shading, major loads, other charging sources, and the beginning and ending battery condition shown by the installed monitor. Repeat the observation on several representative days. If use consistently exceeds solar contribution, decide whether to reduce loads, improve the solar window, change the correctly engineered array, or rely more on another charging source.
Treat unexpected results as evidence rather than immediate proof of a failed panel. New shade, a changed load, settings, connections, battery condition, and the controller can all affect what you observe. Compare the result with the manuals and installation record, then give a technician a focused description. The monitoring goal is not to watch numbers continually; it is to verify that the complete charging plan supports the boat's real use.
Review performance after a meaningful change. A new refrigerator, altered battery bank, additional panel, different berth, or extended sailing season can invalidate the original balance without creating a fault. Update the load profile and shade map first, then decide whether equipment work is justified. This preserves the distinction between a healthy system facing a larger job and a system that no longer behaves as its design and records predict.
Keep a short seasonal summary rather than hundreds of disconnected screenshots. Record the operating profile, typical shade, solar contribution shown by the installed monitor, other charging, and the battery trend. The summary makes year-to-year comparison possible and shows whether the original sizing case still resembles actual use. Store detailed logs only when they help investigate a specific change.
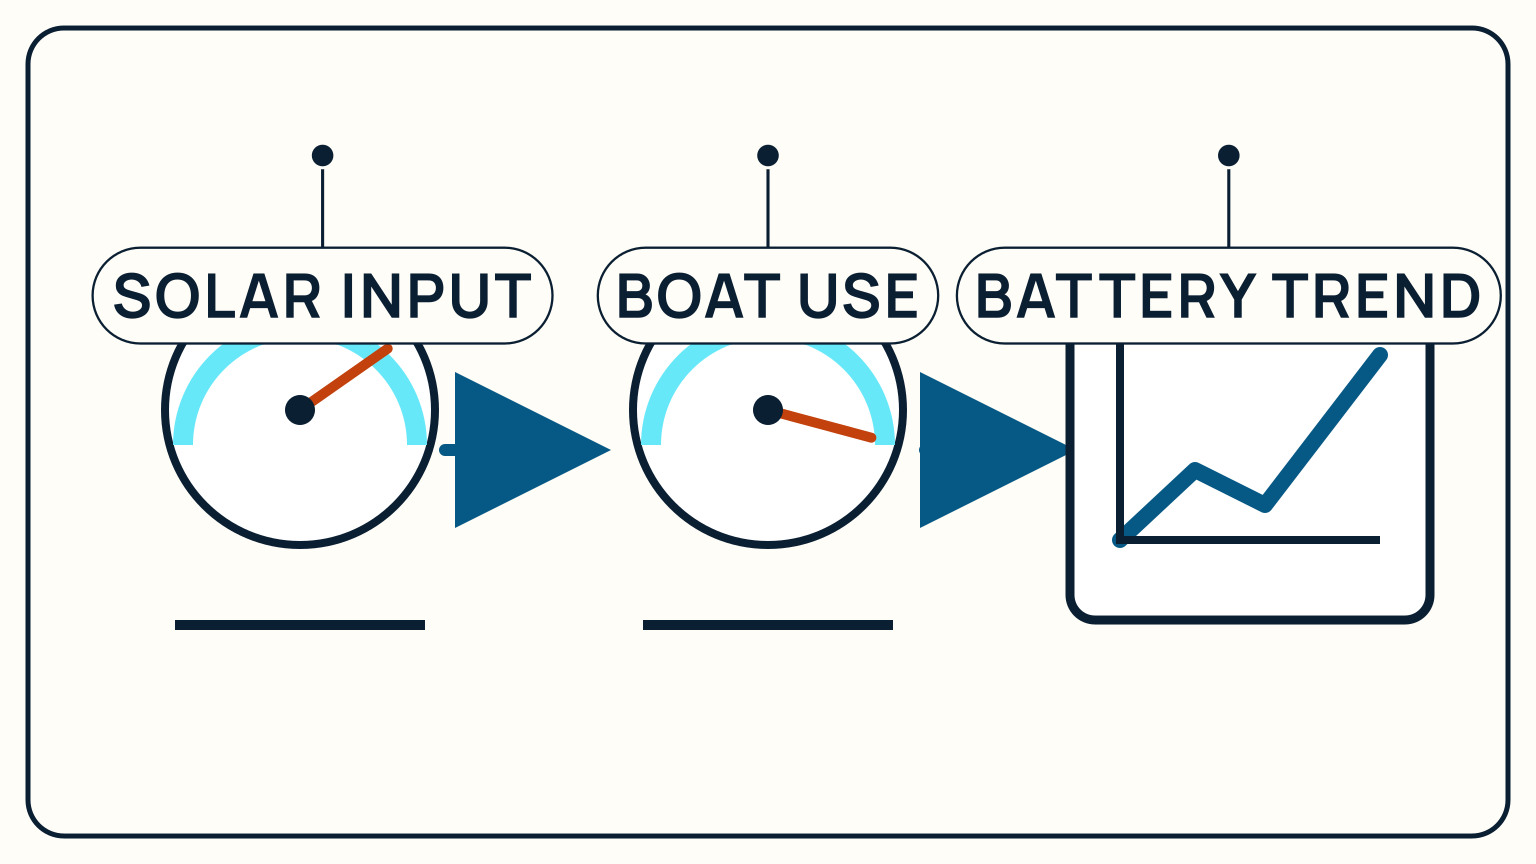
Solar sizing becomes much easier when it is treated as a measurement loop rather than a shopping target. Record use, map shade, select compatible equipment within every published limit, and verify the result. SailStarter's electrical lessons can help you trace the onboard system. Equipment manufacturers and a competent marine installer should confirm the design and any changes to the array, controller, battery, or protection.
If the measured result cannot support the intended loads, change the plan explicitly. Reduce use, add another charging source, alter the correctly engineered solar installation, or shorten the unsupported operating period. Naming that tradeoff is more useful than buying another panel without revisiting shade, controller capacity, and battery compatibility.
Date the revised load case carefully and keep the earlier original one. The measured difference helps show whether changed use or changed system behavior created the new shortfall.
Try it from the lesson
Can you spot the next move?
The engine is idling, the boat is safely secured and the propeller area is clear. What should you confirm before departure?
Why you can trust this guide
. We build each guide from public seamanship and safety sources, then teach the universal principle before any local difference.