Chart your course
Sailboat Shore Power Basics
Quick answer
The short version
Shore power brings marina AC electricity aboard through a purpose-built path: pedestal outlet, marine cord, boat inlet, protective equipment, distribution, and AC loads. The cable includes power conductors and a green grounding conductor in an ABYC-compliant system. Water, corrosion, heat, and connection faults make this a poor place for improvisation. Learn the installed layout and follow its manuals. Keep connections dry and supported, stop when equipment is hot or damaged, and use a qualified marine electrician for faults, alterations, or anything you cannot positively identify.
Requirements and connector designs vary by installation and location. Do not use a photograph from another boat as wiring authority for yours. The immediate beginner job is recognition: know where shore electricity enters, where it is disconnected, which protection belongs to the AC side, and which outlets or appliances depend on it. A battery switch is not a shore-power inlet. If the path disappears behind panels, record that fact rather than opening energized equipment to satisfy curiosity.
Recognize The Ac System
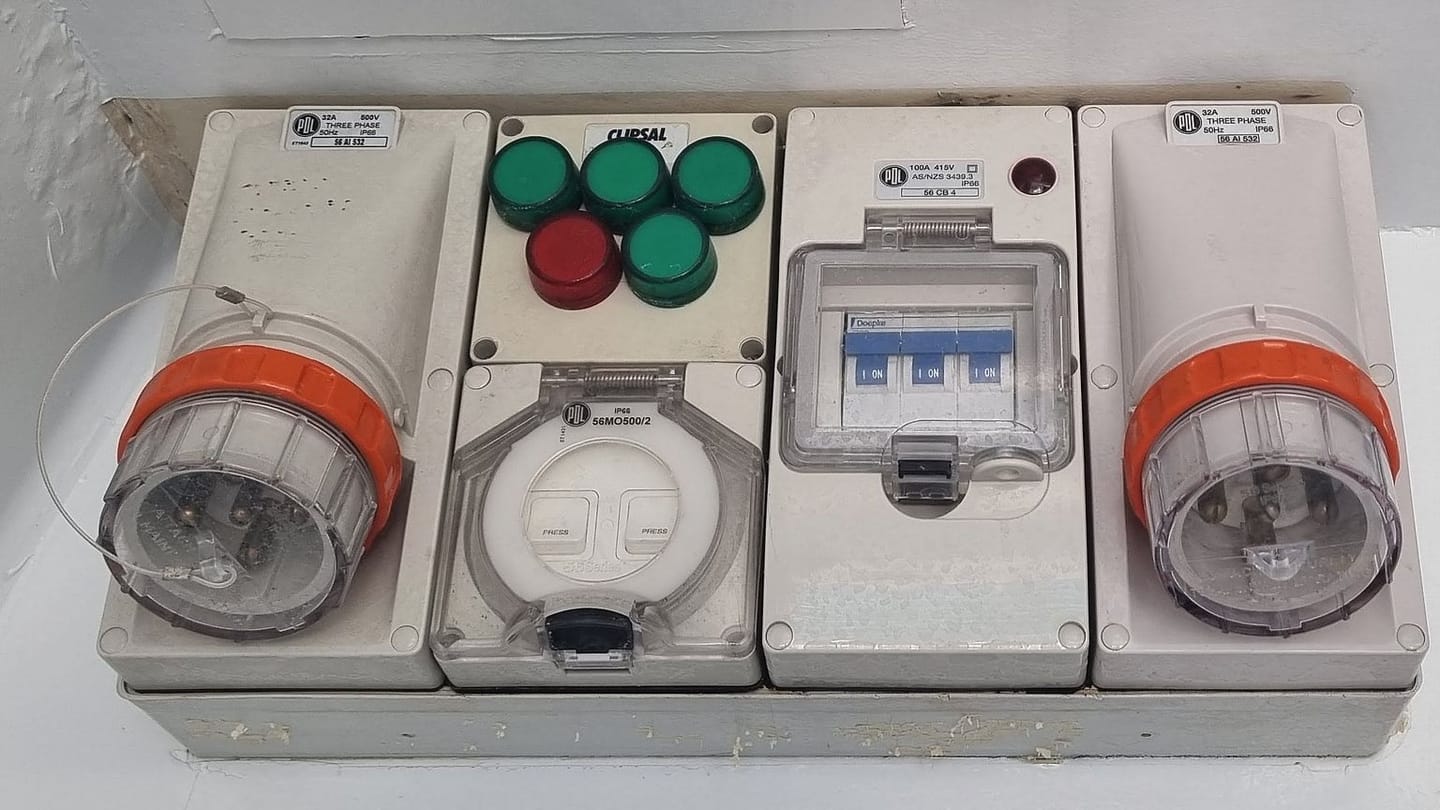
Begin at the dock pedestal with everything in a safe, de-energized state according to the marina and boat instructions. Identify the outlet intended for the berth, the matching marine cord, and the inlet fixed to the boat. Trace the route only as far as it can be followed without removing protective covers. On the boat side, locate the main shore-power disconnect and the AC distribution panel described by the installed documentation.
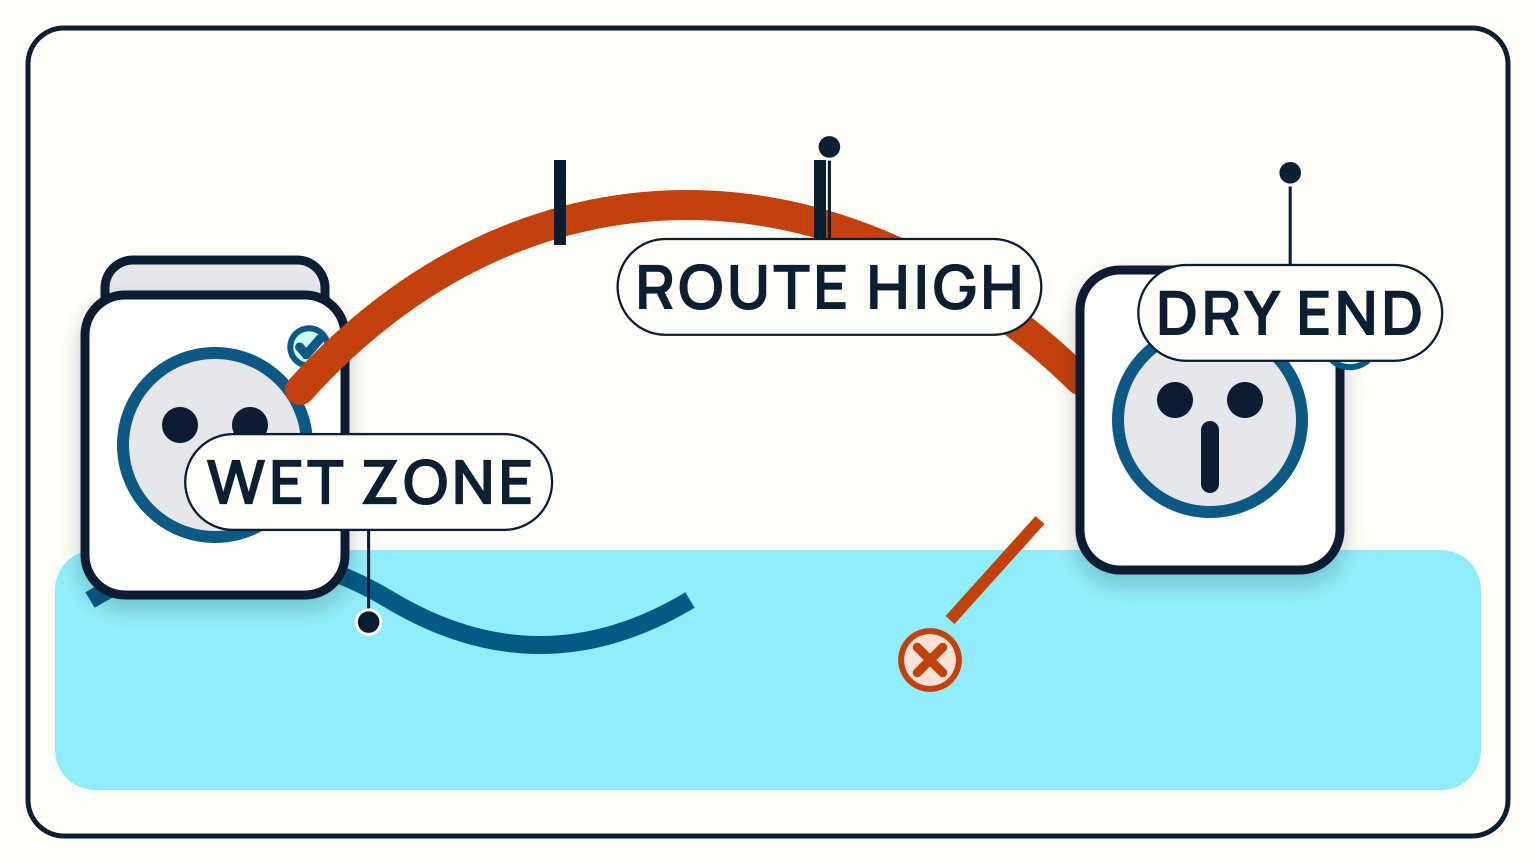
Keep AC and DC controls separate in your notes. A panel of red battery switches controls battery circuits and may sit near other electrical equipment, but its appearance does not identify the shore-power path. Look for the physical cord and inlet, then confirm the protective device and loads from labels and manuals. If two systems share a cabinet, do not assume every breaker or conductor belongs to the same supply.
Draw a simple path like the figure and add the actual equipment names from your boat. Mark anything you cannot see or verify. The drawing is a navigation aid for later conversation with a technician, not permission to test live conductors. Shore-power changes are controlled by the installed system, marine AC requirements, and qualified professional judgment. A clear map helps you report exactly where you saw heat, corrosion, looseness, or water.
Check the map against normal use. Identify which charger, water heater, outlets, or other installed AC loads are intentionally supplied, and note controls that the manual says must remain off during connection. Do not turn everything on merely to prove the branch exists. The exercise is successful when you can name the supply path and disconnect point without confusing them with battery controls or opening a protected enclosure.
Connect And Disconnect Carefully
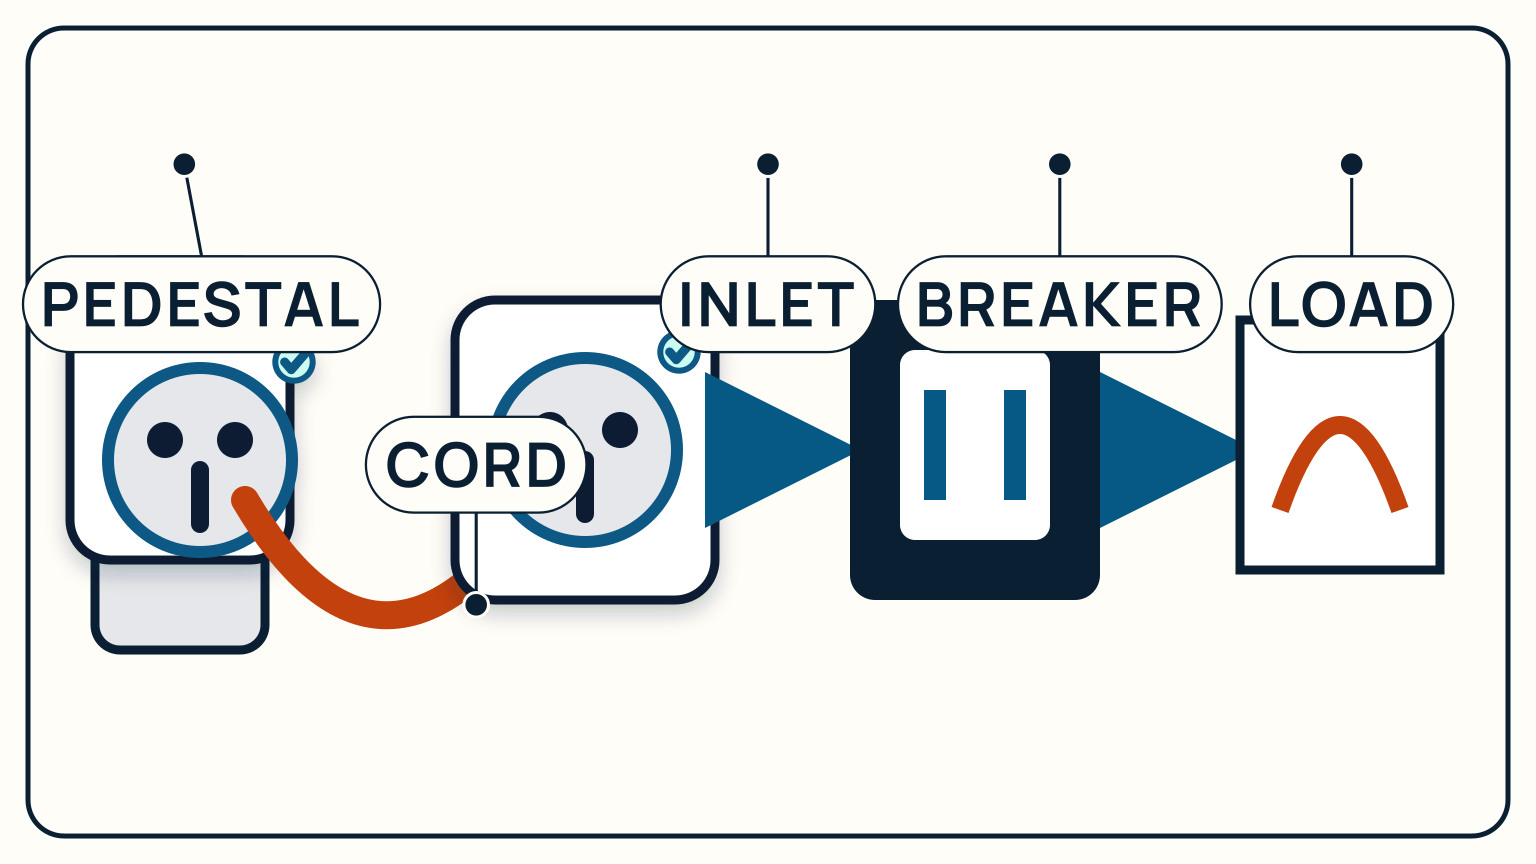
Read the boat and marina sequence before handling the cord. The connection points should be dry, undamaged, and compatible. Support the cable so its weight does not hang from a plug, and route it where normal dock movement will not pull it tight. Do not force mismatched parts or defeat a cover to make a connection fit.
The figure captures the essential state change: power is off while the dry cord and inlet are being connected, then the supply is energized only after the connection is secure. Use the exact order required by the installed instructions and reverse it when disconnecting. Keep your hands away from damaged equipment and stop if the expected switch, cover, or connection cannot be identified.
After connection, observe rather than experiment. Confirm that the intended AC panel indicates normal operation and that the loads you expect are available. Pay attention to odor, sound, warmth, looseness, or an unexpected trip. Do not repeatedly reset a protective device to see whether a fault clears. Disconnect through the instructed sequence and report what happened, including the load in use and the point where the system changed.
Before leaving the boat, decide whether shore power is meant to remain connected and which onboard loads may continue. Follow the boat, equipment, and marina instructions for that state. Confirm that the cord remains supported through expected movement and that no access gate or passing traffic will trap it. A sound connection at arrival can become unsafe after tide, wind, or another boat changes the dock geometry.
Keep Water And Power Apart
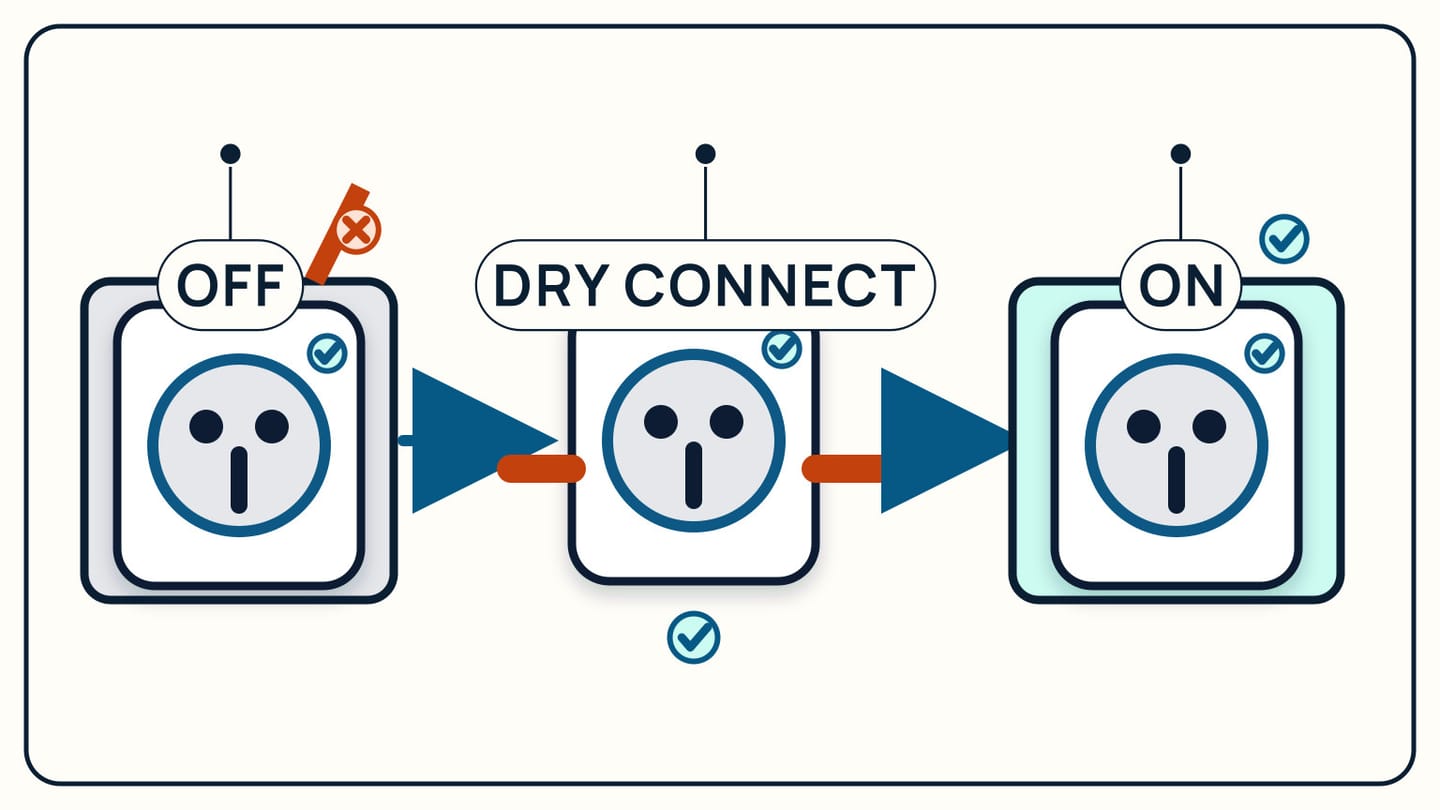
Treat the cord route as part of the system. A dry connection can become wet if the cable lies in pooled water, crosses a washdown path, or pulls a cover open. Walk the dock-to-boat route before energizing. Keep the cable clear of standing water and sharp edges, and leave enough controlled movement for the boat without dropping excess cord into a wet area.
Check both ends after rain, washdown, or a change in boat position. A connection protected yesterday may be exposed after the boat moves in the berth. Do not wrap a damaged connection in a makeshift cover or relocate energized equipment. Switch off and disconnect by the approved sequence, then have the condition assessed.
Corrosion and contamination can also change what appears to be a sound connection. Look only from the outside for discoloration, damaged covers, cracked insulation, bent parts, or deposits. Keep a dated photograph if something changes. Water and marine AC faults can have serious consequences, so external observation is the beginner boundary. Internal inspection and electrical testing belong to a qualified person with the right procedure and equipment.
Include nearby activities in the wet-zone check. Washdown hoses, leaking dock taps, rain runoff, and a wet shore lead can expose parts that looked protected in dry weather. Move the activity, not an energized connector. If the connection cannot remain dry in the available layout, disconnect safely and ask the marina or electrician for an appropriate arrangement rather than building a temporary enclosure around the problem.
Know When To Call A Pro
Disconnect and seek professional help when a plug, inlet, cord, or panel is hot, scorched, loose, cracked, wet inside, or repeatedly associated with a trip. Burning odor, visible arcing, or damage is not a maintenance exercise for a beginner. Leave the system off and prevent another person from reconnecting it until the fault has been assessed.
Give the electrician useful evidence. Record which berth supply was used, the cord and inlet involved, the loads operating at the time, the protective device that opened, and any visible heat or damage. Include clear exterior photographs without dismantling the equipment. This short history can help distinguish a connection problem from a load or installation question while keeping you out of the energized enclosure.
Ask for the repair scope and completion check in writing. Replacing one visibly damaged part may not explain why it overheated. The professional should decide what inspection and testing the installed system requires. Do not add adapters, outlets, chargers, or higher loads simply because physical space is available. Shore-power requirements vary, and every change has to remain compatible with the boat, cord, pedestal, protection, and grounding arrangement.
After repair, compare the returned system with the original fault record. Confirm which component was repaired, what cause was found, which tests were completed, and any operating restriction that remains. Update the onboard diagram and remove damaged equipment from use so it cannot return as a spare. If the same symptom appears again, disconnect and report the recurrence instead of assuming the recent repair makes continued operation safe.
Include the marina in the fault report when the pedestal or berth supply may be involved. Give staff the outlet location and observed state without opening or testing marina equipment yourself. The electrician and marina can then decide where their responsibilities meet. Do not move the same suspect cord to another pedestal as an uncontrolled experiment; that can expose a second connection without explaining the first event.
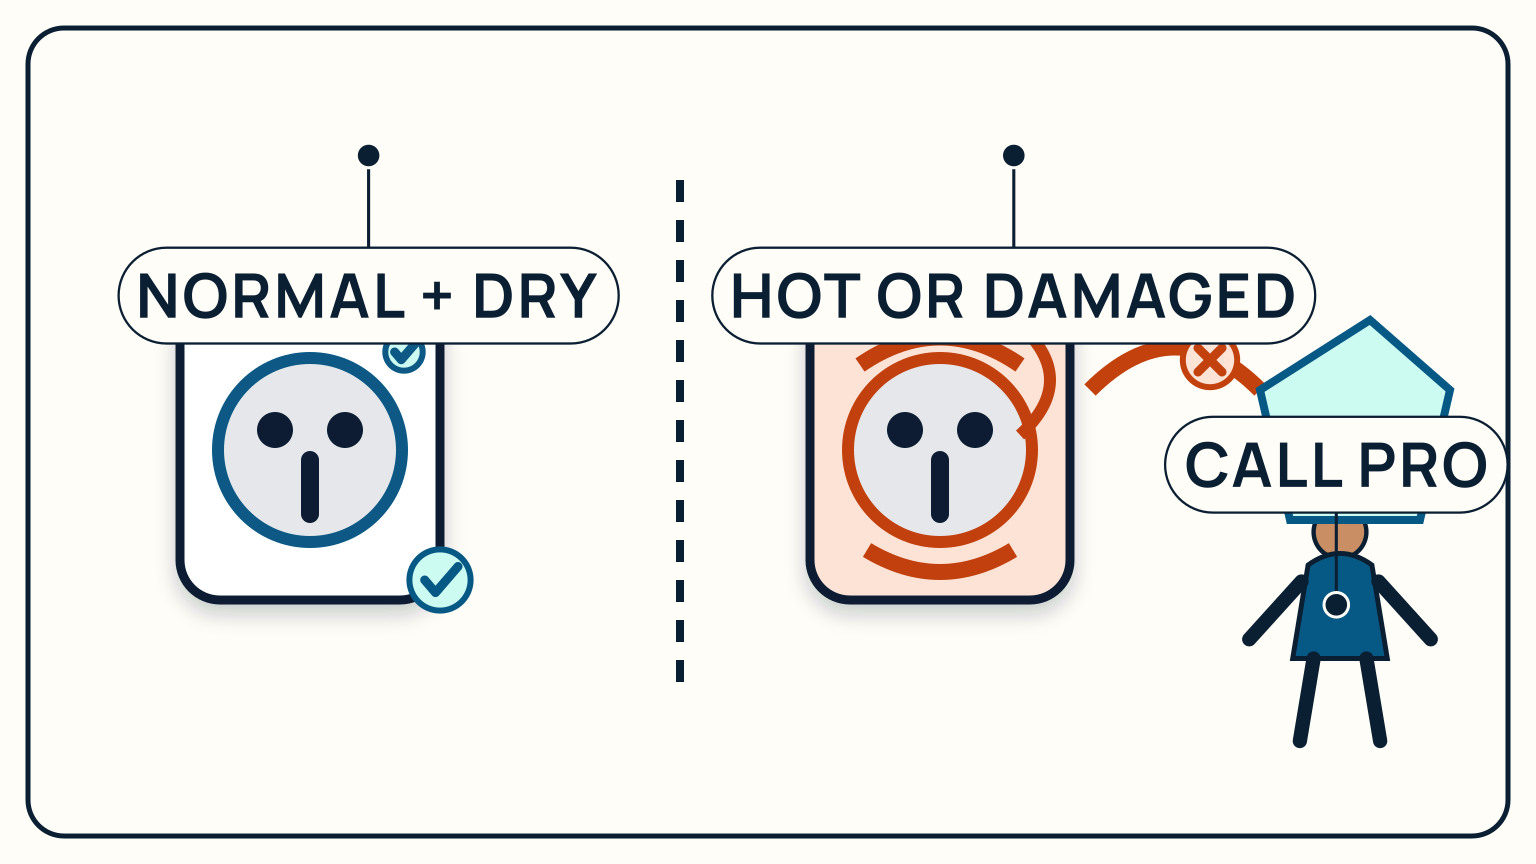
You do not need to become an electrician to use shore power responsibly. Learn the visible path, follow the boat and marina sequences, keep connections dry, and stop on abnormal evidence. SailStarter's systems lessons can help you name the components and organize an observation. The installed manuals and a qualified marine electrician control diagnosis, repair, and modification of the actual AC system.
Review the path with regular crew before a trip and after any equipment change. Everyone should recognize the disconnect, damaged-equipment warning signs, and the boundary between external observation and electrical work.
Keep the exact cord and inlet details with the diagram so a future replacement is never chosen from appearance alone.
Try it from the lesson
Can you spot the next move?
The engine is idling, the boat is safely secured and the propeller area is clear. What should you confirm before departure?
Why you can trust this guide
. We build each guide from public seamanship and safety sources, then teach the universal principle before any local difference.