Chart your course
IALA A vs IALA B Buoyage

Quick answer
The short version
IALA divides the world's charted waters into two lateral buoyage regions, Region A and Region B, and the one difference that matters most is colour. In Region A (Europe, Africa, most of Asia, Australia, and New Zealand) a red mark shows you the port side of a channel and a green mark shows you the starboard side. In Region B (the Americas, Japan, South Korea, and the Philippines) that assignment reverses: green marks port, red marks starboard. The shape carried by each mark, a flat-topped can for port and a pointed cone for starboard, does not change between regions. Before you rely on colour alone, check which region you are sailing in and read the mark's shape too.
This split causes real confusion the first time a sailor moves between regions, because the habit built in one place works backwards in the other. A UK sailor arriving in the Caribbean, or a US sailor chartering in the Mediterranean, cannot lean on memory alone. Reading a lateral mark wrong on the wrong side of a narrow channel is not a small mistake: it can put you over a shoal or a wreck that the mark exists to warn you away from. The fix is to know the system has exactly two colour variants, know which one applies to the chart in front of you, and use the mark's shape as a backup check whenever colour leaves you unsure.
Colour reverses between the two regions; shape does not.
| Dimension | Region A | Region B |
|---|---|---|
| Coverage | Europe, Africa, most of Asia, Australia, New Zealand | The Americas, Japan, South Korea, the Philippines |
| Port-hand mark colour | Red | Green |
| Starboard-hand mark colour | Green | Red |
| Port-hand shape | Flat-topped can | Flat-topped can |
| Starboard-hand shape | Pointed cone | Pointed cone |
| Light colour | Matches the mark's colour | Matches the mark's colour |
Two regions, one system
IALA, the International Association of Marine Aids to Navigation and Lighthouse Authorities, sets one buoyage system used almost everywhere boats are marked, and that system has two colour variants called Region A and Region B. Region A covers Europe, Africa, most of Asia, Australia, and New Zealand. Region B covers North, South, and Central America, Japan, South Korea, and the Philippines. Nothing about a boat's rigging or a crew's skill changes between the two. What changes is a single rule: which colour, red or green, marks the port side of a channel and which marks the starboard side.
Both regions share the same underlying idea. A channel has two sides, and each side gets its own lateral mark so an inbound vessel can see at a glance where the safe water lies between them. The marks are always named by the side of the channel they represent, port-hand or starboard-hand, not by whatever colour happens to be painted on them that day. That naming habit matters more than any colour mnemonic, because the colour is the part that flips.
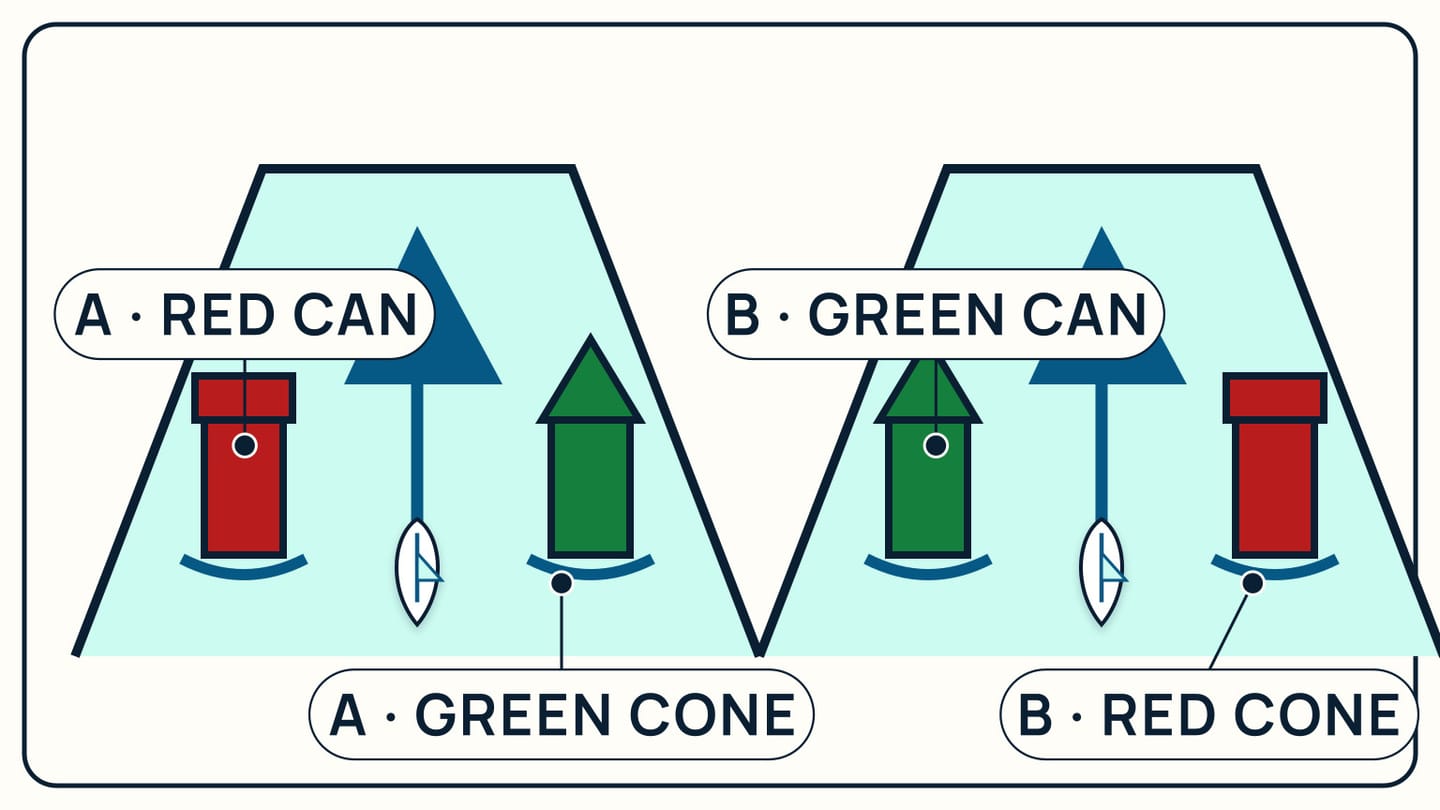
What changes between Region A and Region B?
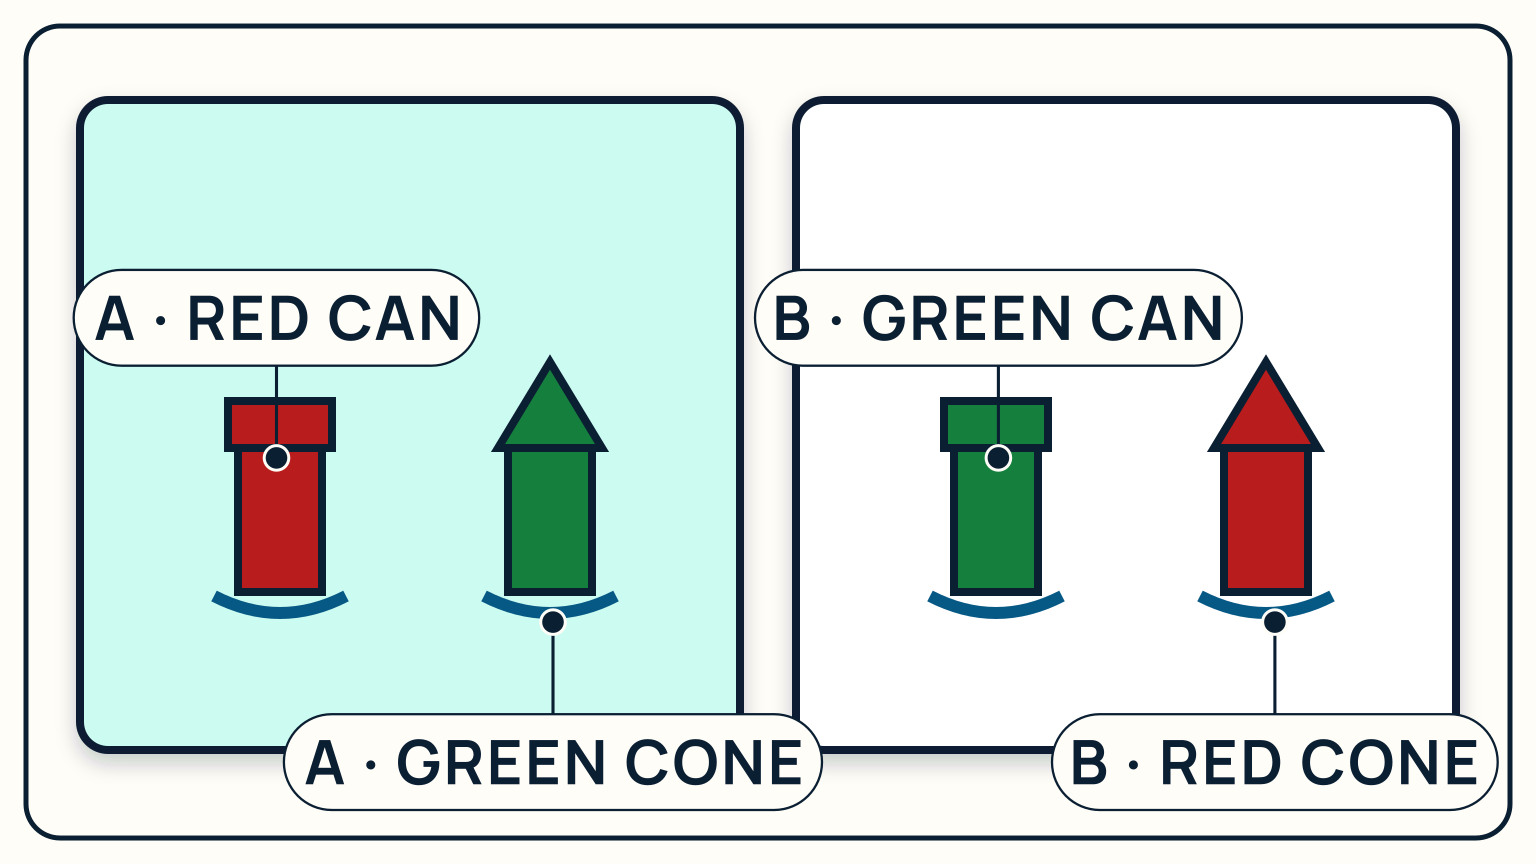
In Region A, a port-hand mark is red, shaped like a flat-topped can, and shows a red light after dark if it carries one. Its starboard-hand partner is green, shaped like a cone with the point upward, and shows a green light. In Region B every one of those pairings swaps colour: a port-hand mark is green and can-shaped, a starboard-hand mark is red and conical. Put plainly, red can mean port or it can mean starboard, depending entirely on which region you are in.
Shape is the part that never moves. A can-shaped mark, cylindrical with a flat top, always marks the port hand, in Australia as much as in the Bahamas. A cone-shaped mark, tapering to a point, always marks the starboard hand. When you're unsure which region applies, or poor light makes colour hard to judge, check the shape first. It carries the same meaning everywhere the IALA system is used, which makes it a steadier reference than colour alone.
One mark bends this rule without breaking it: where a channel splits into a preferred main route and a smaller one, a preferred-channel mark keeps the shape and main colour of an ordinary port-hand or starboard-hand mark for the main channel, then adds a single broad band in the colour that marks the smaller channel. Seeing that extra band tells you two channels exist here, and checking the chart tells you exactly which one it flags. If the mark carries a light, a rhythm of two flashes followed by one is reserved for this exact situation, so the rhythm alone can tell you a channel is dividing before you even read the colour.
What is the direction of buoyage?
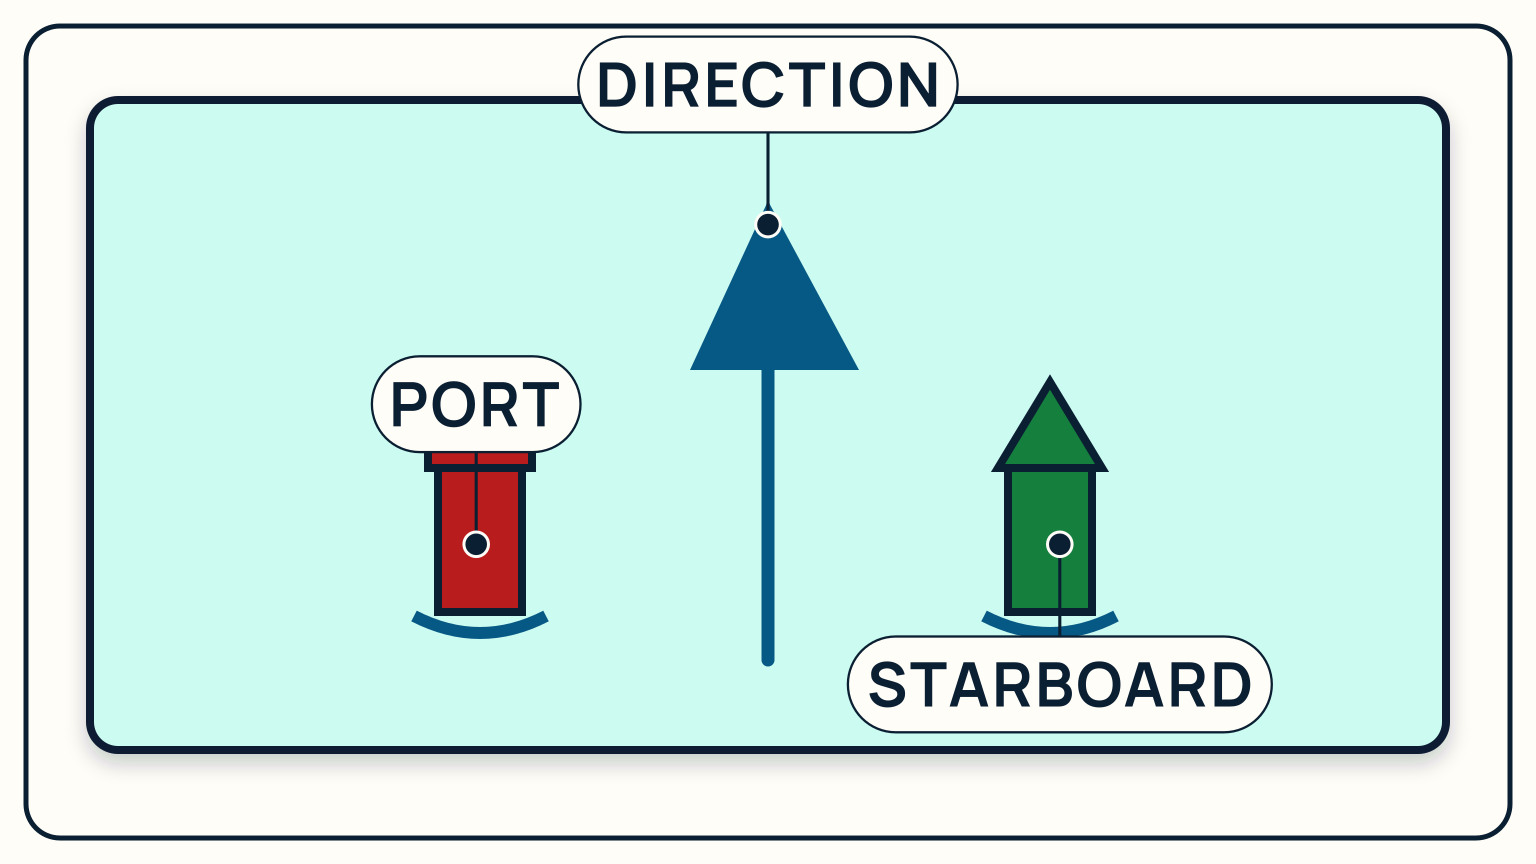
Port-hand and starboard-hand are not compass directions. They are relative to something called the direction of buoyage: the way a vessel is considered to be heading when it approaches a harbour, river, or estuary from the sea. Sail into a harbour and the marks read one way. Turn around and head back out, and the same marks read the opposite way, because you have reversed your direction relative to the buoyage rather than moved a single mark.
In an obvious channel this barely needs thought; the way in is the way in. In more complicated water, where several channels meet or a river bends back on itself, the chart states the direction of buoyage directly with a dedicated symbol, commonly a large arrow. Find that arrow before you commit to a course, and check it again if your route changes partway through, since it governs how you read every lateral mark from that point onward, not only the first one you meet. For the wider set of symbols a chart carries beyond buoyage, see how to read a nautical chart.
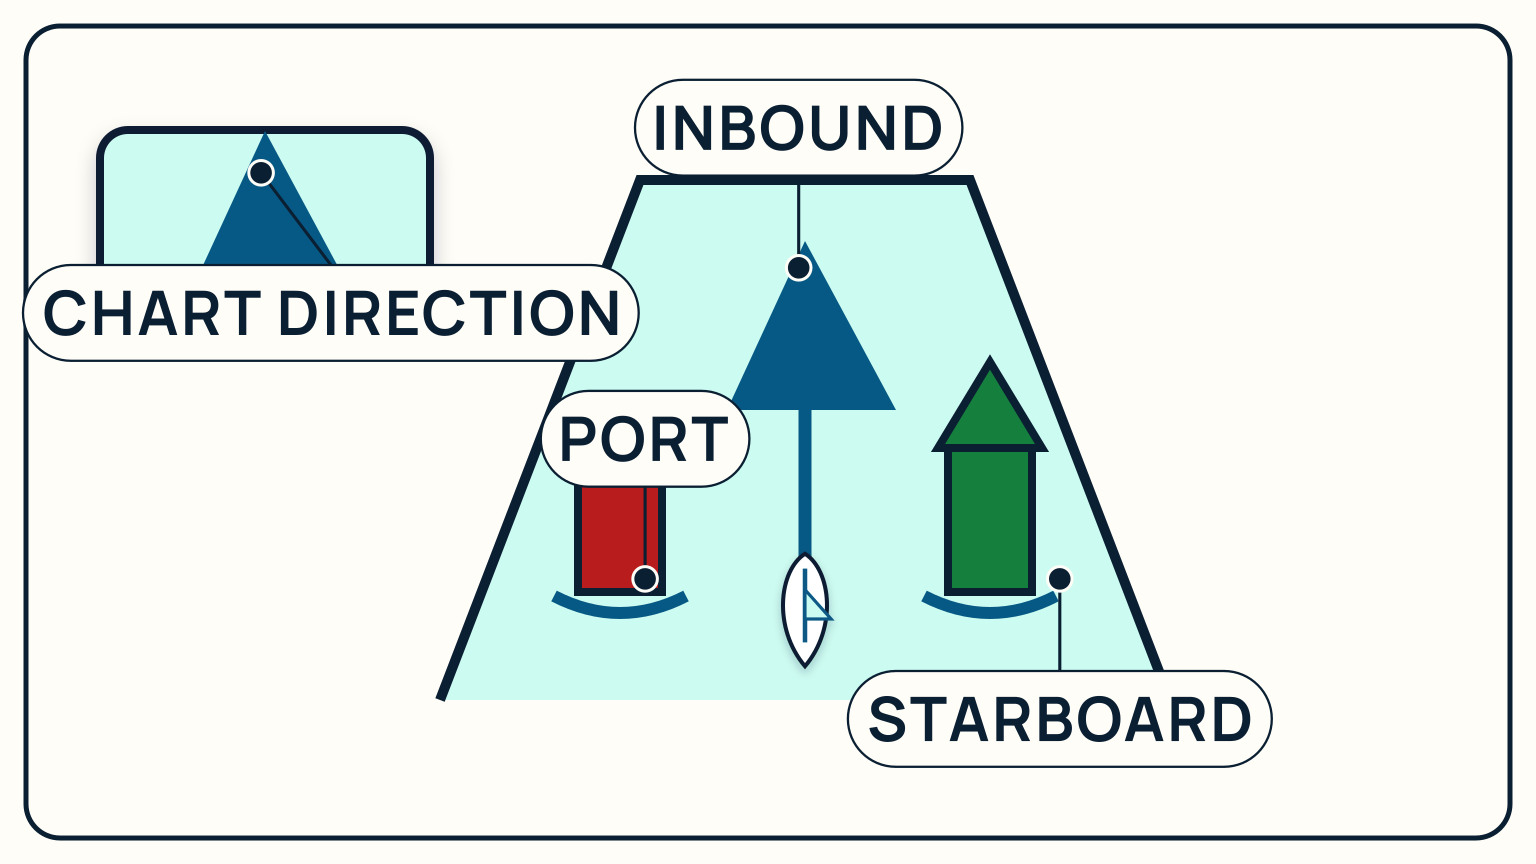
Putting the arrow into practice
Once you have found the direction-of-buoyage arrow, apply it the same way every time. Face the direction the arrow points, as if you were the vessel it describes. The mark that would sit on your left is the port-hand mark; the one on your right is the starboard-hand mark. From there, colour and shape tell you which region's convention is in play, and you can check both against the chart's own legend if either looks uncertain.
This is worth rehearsing on a calm day before you need it under pressure. Pick a marked channel near your home waters, trace the direction of buoyage on the chart, and talk through which mark you would keep on which side as you go. Run the same exercise mentally the first time you sail somewhere new, especially somewhere using the other region's colours from the ones you learned on. A few minutes of deliberate practice is what turns a colour rule into something you actually trust at the helm.
Try it with a specific case. Suppose you are sailing a chartered boat into an unfamiliar Region B harbour, the direction of buoyage arrow points straight ahead of you, and you spot a can-shaped mark on your left and a cone-shaped mark on your right. Shape alone already tells you the can is the port-hand mark and the cone is the starboard-hand mark, before you even register colour. Glance at the colours next: in Region B the can-shaped mark should be green and the cone-shaped mark should be red. If instead you saw a red can, you would know to stop and re-check the chart's region note rather than trust your first read.
What never changes, and what to verify
Four other mark types sit outside the A/B split entirely and look the same wherever you sail. Cardinal marks are black and yellow with paired cone topmarks, and tell you which side of a hazard is the safe one. Isolated danger marks are black with a red band and a pair of black spheres, sitting directly over a charted hazard. Safe water marks carry red and white vertical stripes with a spherical topmark, marking open water free of hazards, often at a landfall or a channel's start. Special marks are yellow with an X-shaped topmark and flag something other than pure navigation, like a cable route or a data buoy. None of these four change between Region A and Region B.
The one thing every mark asks of you, lateral or otherwise, is currency. Charts get corrected, buoys get moved, and a light's characteristic can change after a storm or a maintenance visit. Before you rely on any mark, confirm the chart in your hand or on your screen is current, note which region its waters belong to, and treat shape as your fallback whenever colour and memory disagree.
Buoyage stops being confusing once you stop treating colour as the whole story. Learn the region, read the shape, find the direction of buoyage, and the rest follows logically every time you approach a new channel. That habit of checking rather than assuming carries over into everything else you do with a chart. SailStarter's Module 10 lessons walk through buoyage, chart symbols, and the rest of coastal piloting in short visual steps, each one ending in a quiz that checks whether the idea actually stuck before you take it out on the water.
Try it from the lesson
Can you spot the next move?
You're entering a harbor in Region A, returning from the open sea. A red, flat-topped buoy sits ahead. Which side do you keep it on?
Why you can trust this guide
. We build each guide from public seamanship and safety sources, then teach the universal principle before any local difference.