Chart your course
Sailboat Plumbing and Holding Tank System
Quick answer
The short version
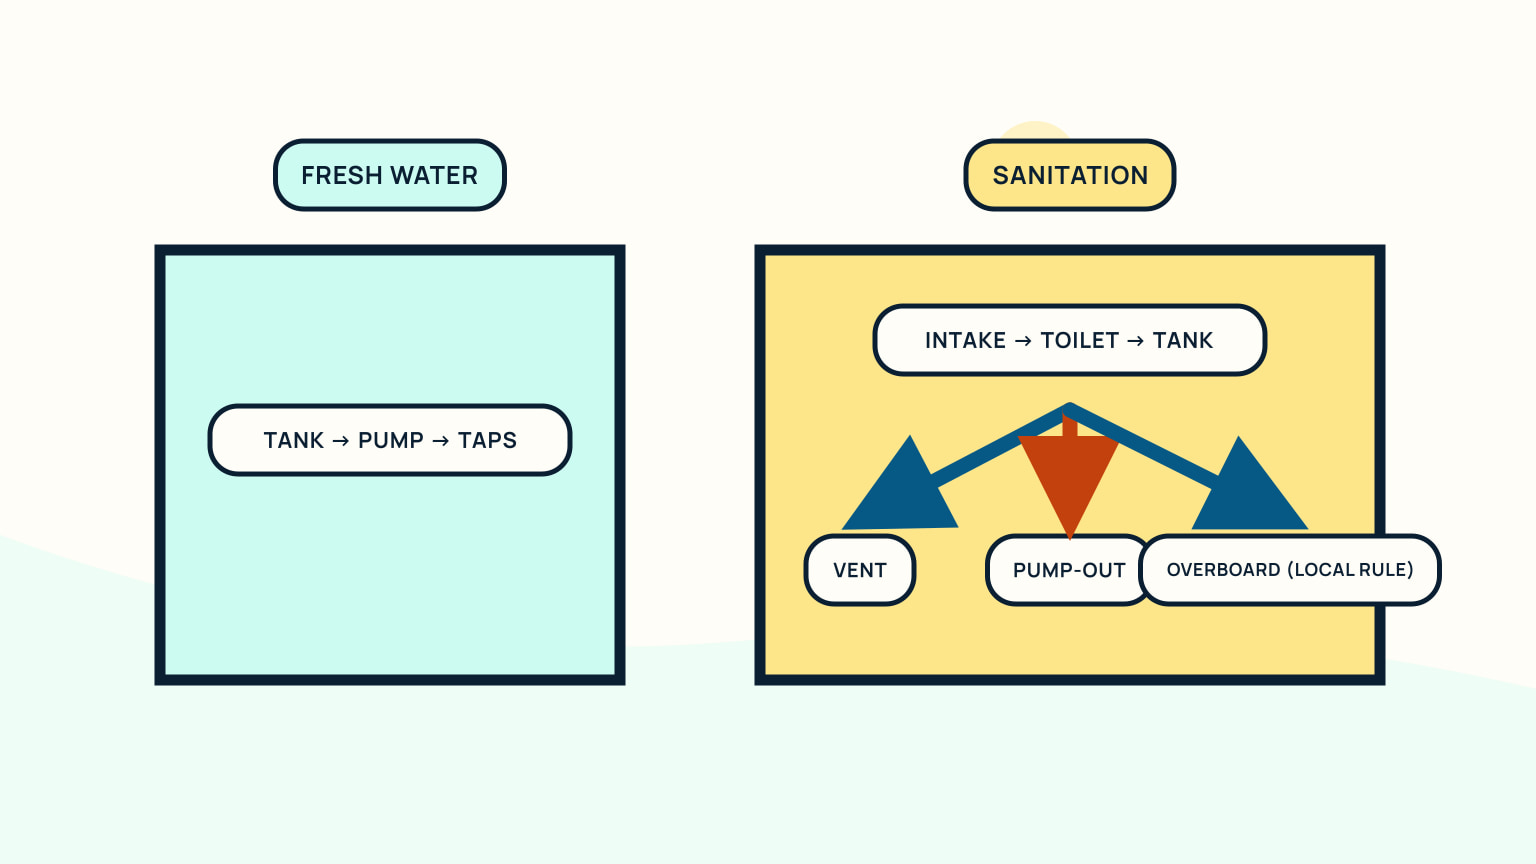
A sailboat does not have one plumbing circuit. Freshwater moves from a tank through a pump and fixtures. Toilet intake, bowl, holding tank, vent, pump-out fitting, and any overboard route form a separate sanitation path. Showers and sinks may drain directly, through a sump, or into a tank. The exact valves and connections vary. Trace each hose at both ends, label the installed components, and draw separate colour-coded paths before operating an unfamiliar valve. Holding-tank discharge rules depend on location, so verify current local rules and keep any overboard route secured wherever discharge is prohibited.
A diagram becomes useful only when it matches the boat. A generic picture can teach the component roles, but it cannot tell you which locker hides a valve or whether one branch reaches a deck pump-out. Begin with the manuals and direct access. If a hose disappears behind joinery, mark that section unconfirmed rather than drawing a convenient route. The through-hull guide can help with underwater openings; this article keeps freshwater and waste paths distinct.
Map each water path
Use one sheet per system. For freshwater, start at the fill and tank, then trace outlet, shutoff where fitted, strainer, pump, accumulator if present, hot-water equipment, and each fixture. Mark drains on a separate line because used water does not return through the supply.
For sanitation, begin at the toilet. Trace intake water if the model uses it, bowl discharge, holding tank inlet, tank vent, deck pump-out connection, and any installed discharge pump and through-hull. Confirm arrows from component markings or manuals. Hoses crossing in a locker may belong to unrelated systems.
Label normal positions only after checking the operating instructions. Add access panels, clamps, low points, and components that need inspection. Keep the map with the boat record and update it whenever a hose, valve, pump, or tank changes.
Test the map by closing the relevant supply and following the safe operating checks in the manuals. Listen for pumps, watch accessible hoses, and confirm which fixture or outlet changes. Never use taste or smell to identify an unknown fluid. Add arrows only after the route is verified. Where two systems share a compartment, label them physically with material suitable for the environment. The drawing should also show components below the waterline and any hose whose failure could admit water. Those points deserve easy access and a clear emergency response.
Identify the toilet system
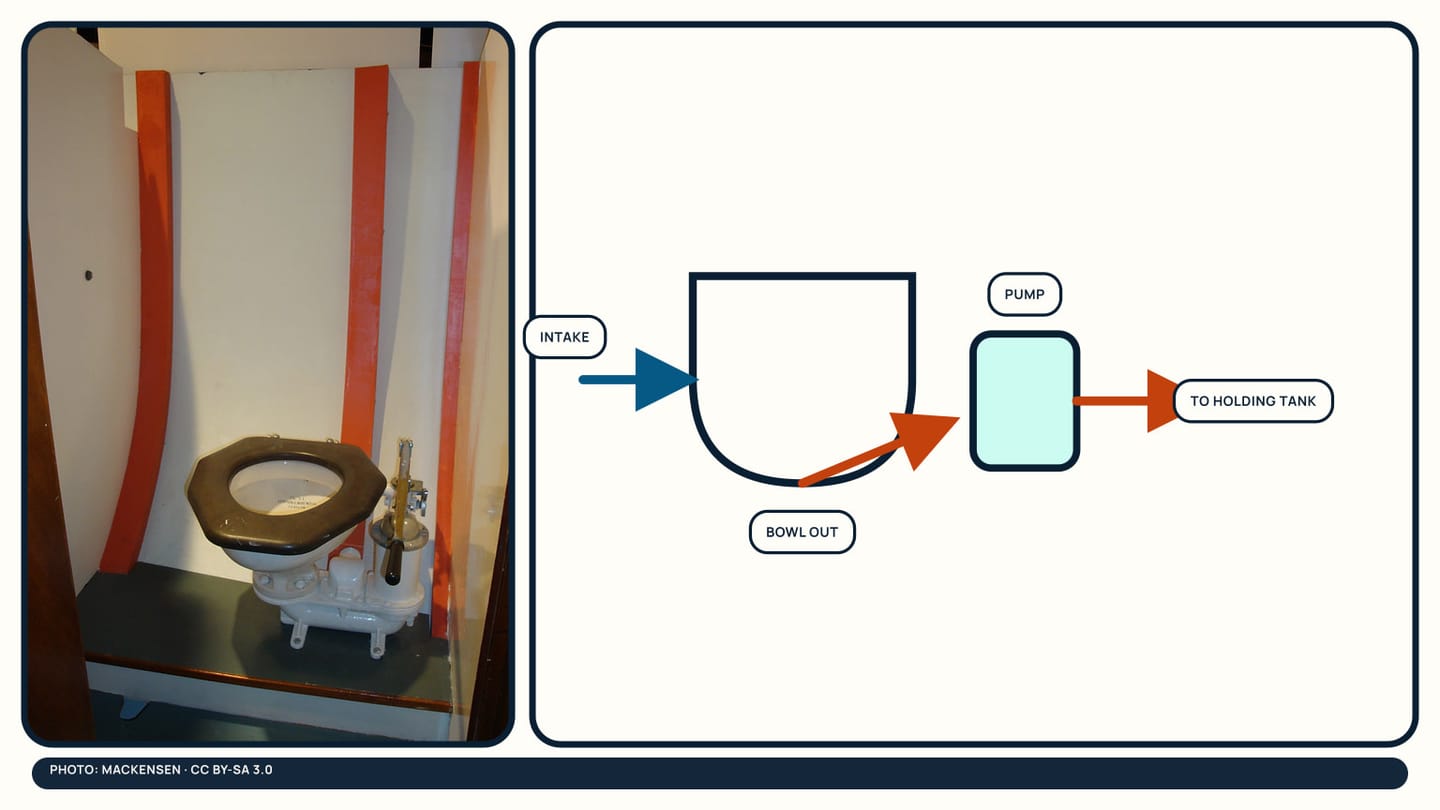
Marine toilets differ. A manual pump may bring flush water in and move waste out with separate strokes or valve positions. An electric toilet can add a motor, control, breaker, and macerating action. Some systems use freshwater; others draw seawater. Portable and separating toilets follow different paths again.
Find the maker and model before interpreting a control. Identify intake, discharge, pump, joker or check valve where documented, electrical protection, and the path to the holding tank. Do not assume a lever icon or hose colour means the same thing across models.
Odour, slow flow, or a stiff pump can have more than one cause. Record when it appears, tank level, valve positions, pump sound, vent condition, and visible leakage. Follow the manual's user checks. Strong force on a pump or an unidentified valve can turn a service issue into a broken fitting or spill.
Teach every regular crew member the normal operating sequence and what not to put through the toilet. Keep the maker's quick instructions where they can be read without covering ventilation or service access. If the toilet has a dry or secure mode, confirm what it actually closes; a control position may not replace closing a seacock where the boat's procedures require that. After maintenance, watch the complete flush path and inspect every disturbed connection. A bowl that empties is not proof that the tank vent and downstream hose remain clear.
Treat valves as critical positions
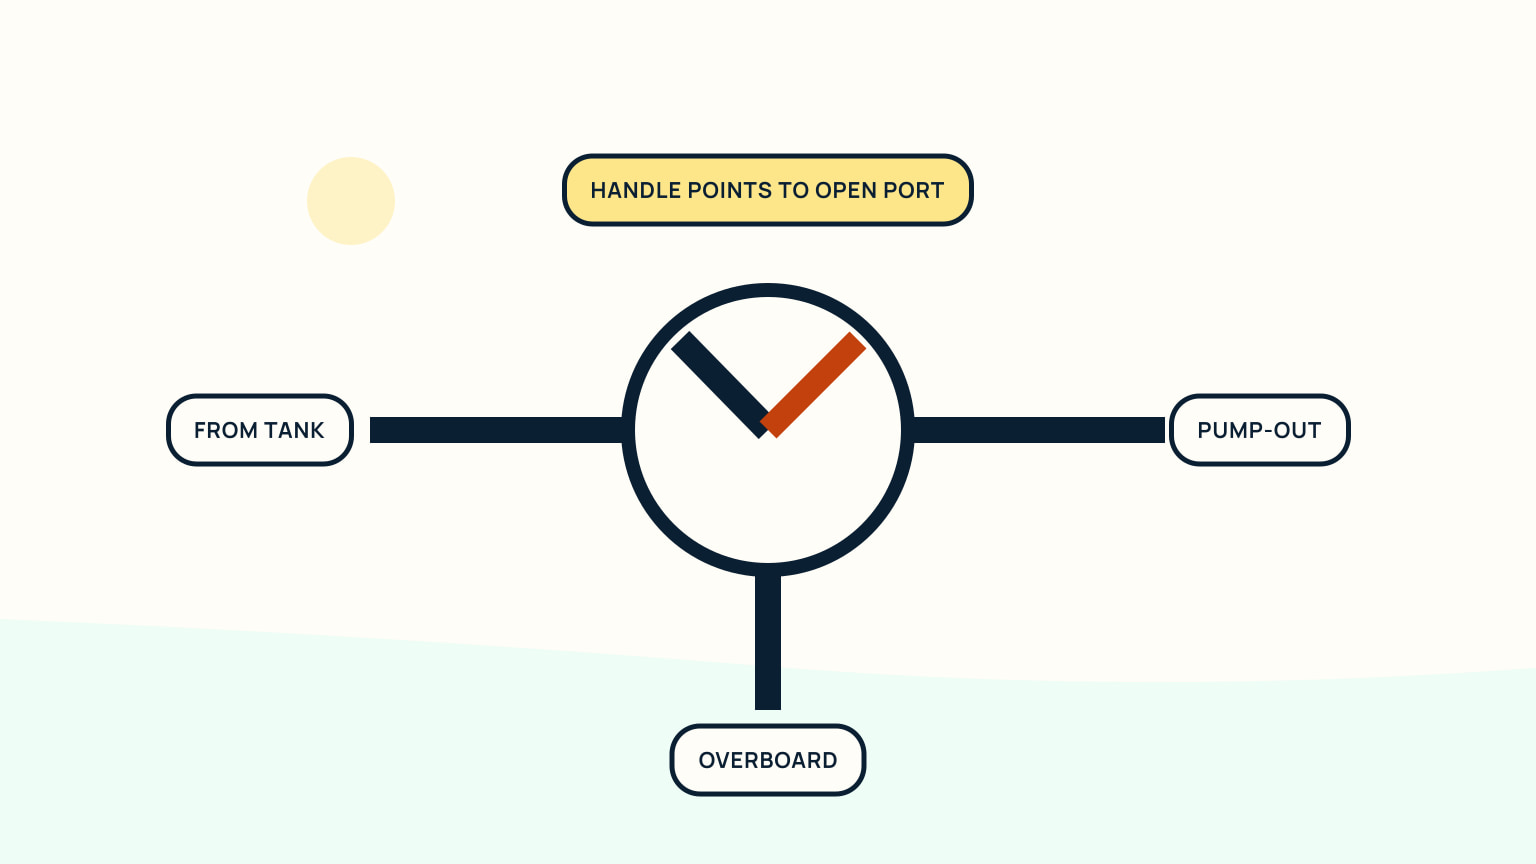
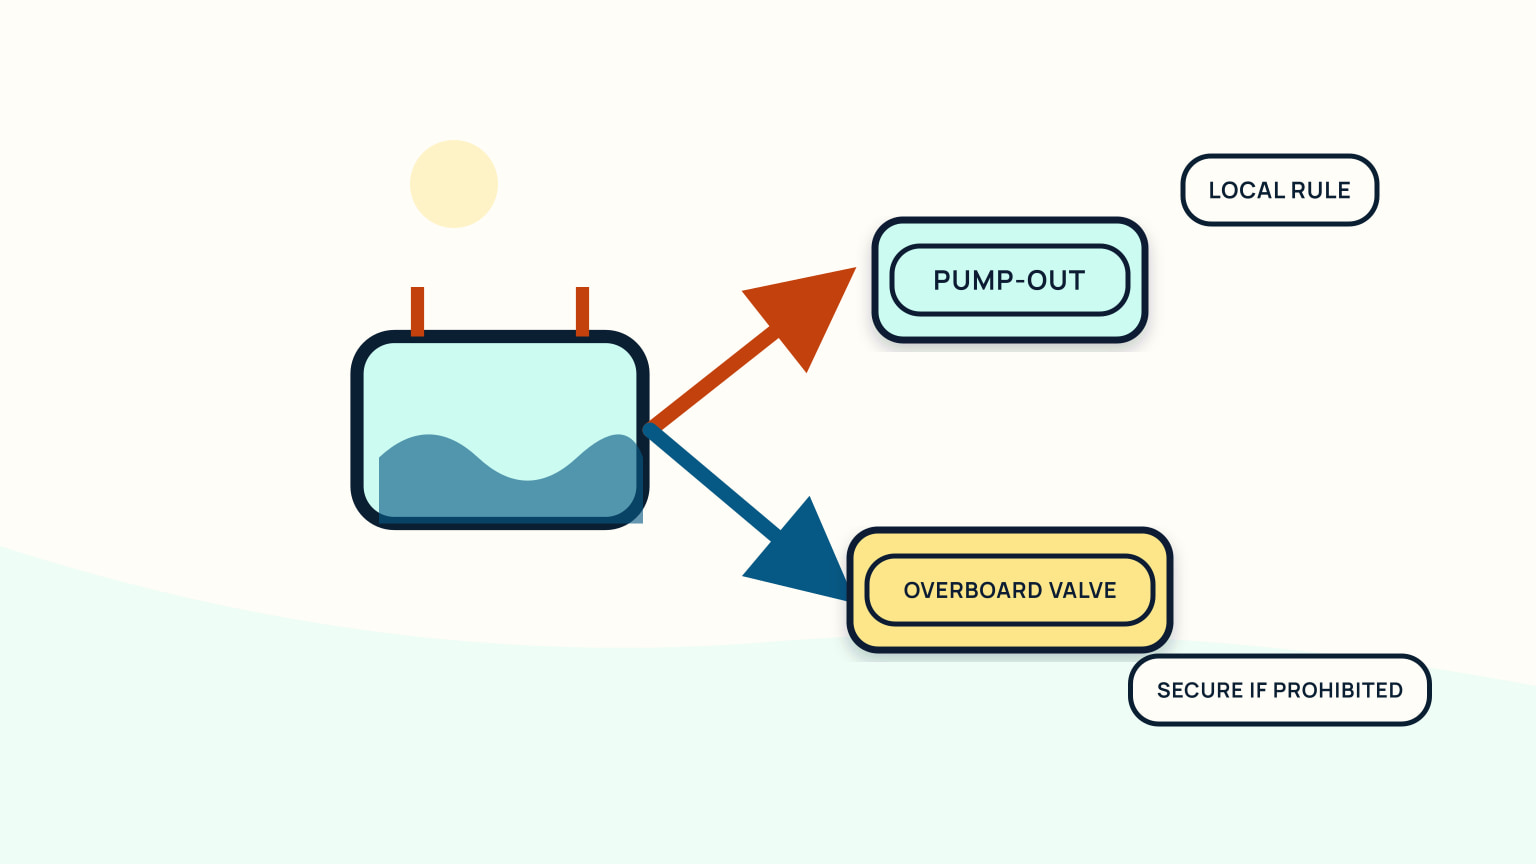
Every through-hull valve controls an opening in the hull. A diverter or Y-valve can select between holding, pump-out, or an overboard route. Moving the wrong control without knowing both ends can admit water, send waste to the wrong place, or defeat a required secured position.
Create a valve register. Give each valve a plain identifier, location, system, connected endpoints, normal position, and the manual or diagram that confirms it. Photograph the handle and surrounding hoses. Use durable labels that do not hide corrosion, clamps, or fasteners.
Exercise or service valves only according to the installed instructions and boat condition. A seized valve, cracked hose, loose fitting, inaccessible clamp, or uncertainty about whether a connection lies below the waterline requires qualified attention. Do not apply exceptional force to make the drawing come true.
Avoid labels that state only “open” or “closed.” Name the consequence: “to holding tank,” “deck pump-out route,” or “seawater intake,” when the endpoints have been verified. A diverter can have more than two useful positions and may need a lock, key, tie, or removed handle under local requirements. Photograph the secured state. During handover, ask the previous owner to demonstrate the route with the manuals open. If their explanation conflicts with the hoses, stop and resolve the discrepancy before use.
Manage the holding tank
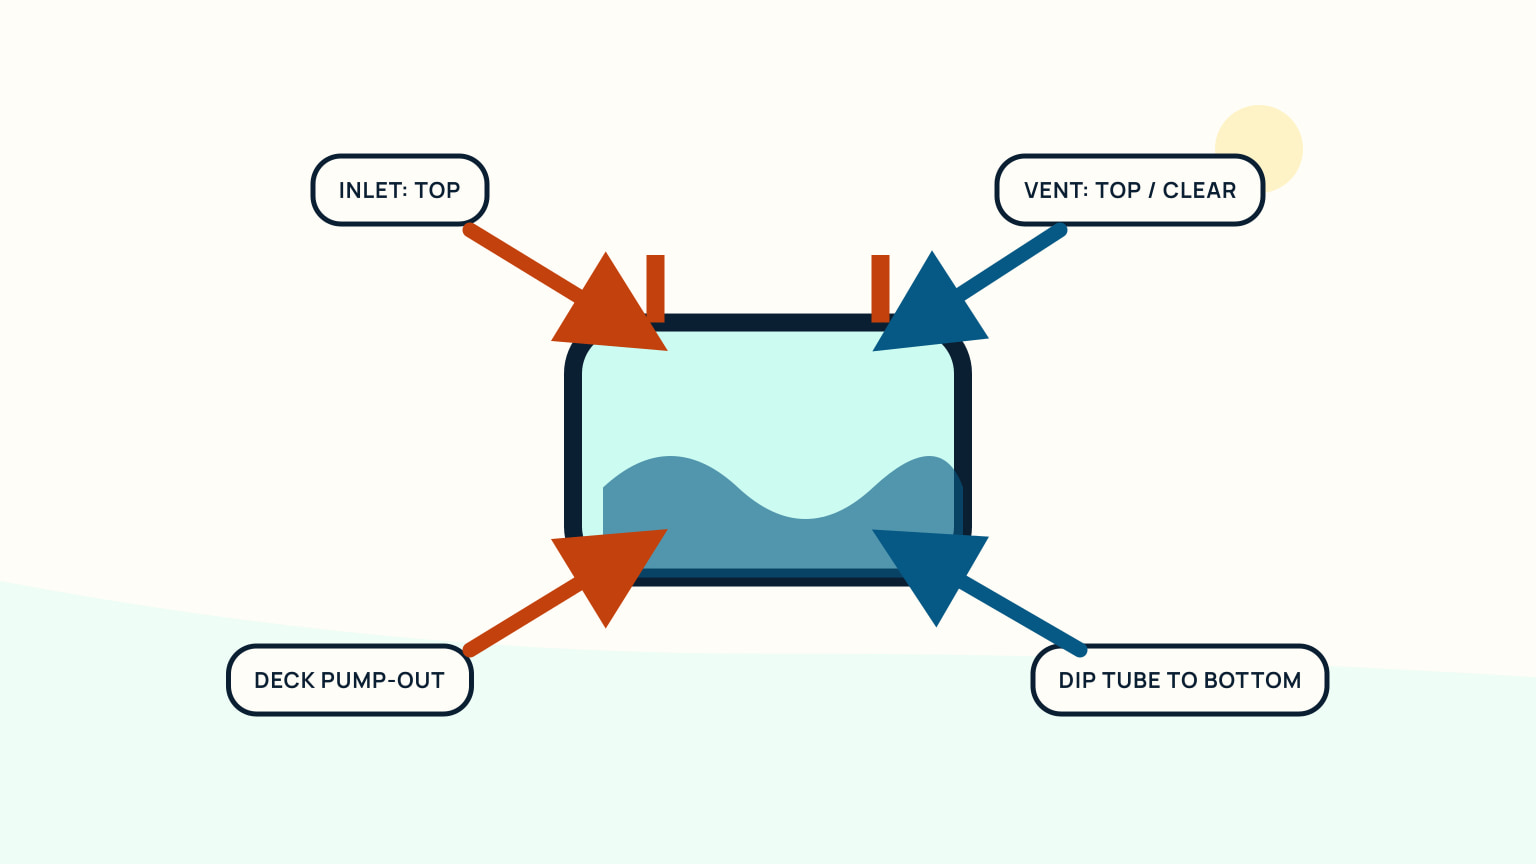
A holding tank receives toilet waste, vents gases and displaced air, and empties through an intended route. Typical service points include level indication, inlet, vent, deck pump-out fitting, inspection access, and discharge fittings. Some tank designs place connections on top and use dip tubes, reducing fittings below the liquid level.
Inspect accessible hose support, clamps, staining, odour sources, vent outlet, and tank movement. Avoid filling beyond the system's usable capacity. A blocked vent can affect pumping and tank pressure; a leaking connection needs containment and repair, not fragrance.
Use pump-out equipment and flushing procedures as directed by the system and facility. Wear the protective equipment specified for the work, prevent spills, and follow local waste rules. Record pump-out, unusual level behaviour, repairs, and hose or fitting changes in the service file.
Tank level indicators can be inaccurate when fouled or when the tank shape is irregular. Learn the system's other normal signs without relying on overfilling. Keep the vent outlet clear from external blockage and inspect the hose route for low spots or kinks according to the manual. If pump-out suction collapses a hose or tank, stop rather than applying more vacuum; the vent or installation needs assessment. When replacing hose or fittings, use materials approved for the service and support them so their weight does not load the tank connection.
Verify discharge requirements
Discharge rules are not universal. They can depend on country, inland or coastal waters, protected zones, distance, treatment equipment, and the exact waste stream. Check the current authority for the water where the boat will operate. Marina signs and another owner's recollection are prompts, not final sources.
Match the rule to the physical system. Confirm which valve or removable handle secures an overboard route, how the deck pump-out works, and whether the equipment has any treatment status recognized locally. Keep the required control secured where discharge is prohibited and document the position for crew.
Before a trip, find pump-out facilities and allow tank capacity for delays. If the route crosses jurisdictions, verify each one. The liveaboard toilet comparison can help with equipment choices, but it does not replace local discharge requirements.
Keep evidence of the rule with the passage plan: authority, page, date checked, and the zones to which it applies. If the system has treatment equipment, verify whether that exact equipment and operating state changes the rule locally. Do not assume a manufacturer label alone authorizes discharge. Brief the crew on pump-out locations, tank monitoring, and what to do if capacity becomes uncertain. Good planning avoids turning a full tank into pressure to use a prohibited route. Update the check when the itinerary, flag, or equipment changes.
Include sanitation in the handover briefing. Show crew the toilet operating steps, pump-out cap, tank indicator limits, vent location, secured discharge control, and the response to a leak or blocked pump. Keep gloves and spill-control materials where they can be reached without opening the affected locker. Clear instructions reduce the chance that an unfamiliar guest changes a valve to solve a slow flush. Revisit the briefing after any plumbing modification because old labels and habits can outlive the route they described.
Draw the actual freshwater and waste paths before troubleshooting either one. Mark any hidden or uncertain connection, then resolve it with the manual or a qualified technician. SailStarter lessons can help you identify valves, pumps, and through-hulls; the installed instructions and current local authority determine how this boat is operated.
Try it from the lesson
Can you spot the next move?
The engine is idling, the boat is safely secured and the propeller area is clear. What should you confirm before departure?
Why you can trust this guide
. We build each guide from public seamanship and safety sources, then teach the universal principle before any local difference.