Chart your course
Sailboat Freshwater System Explained
Quick answer
The short version
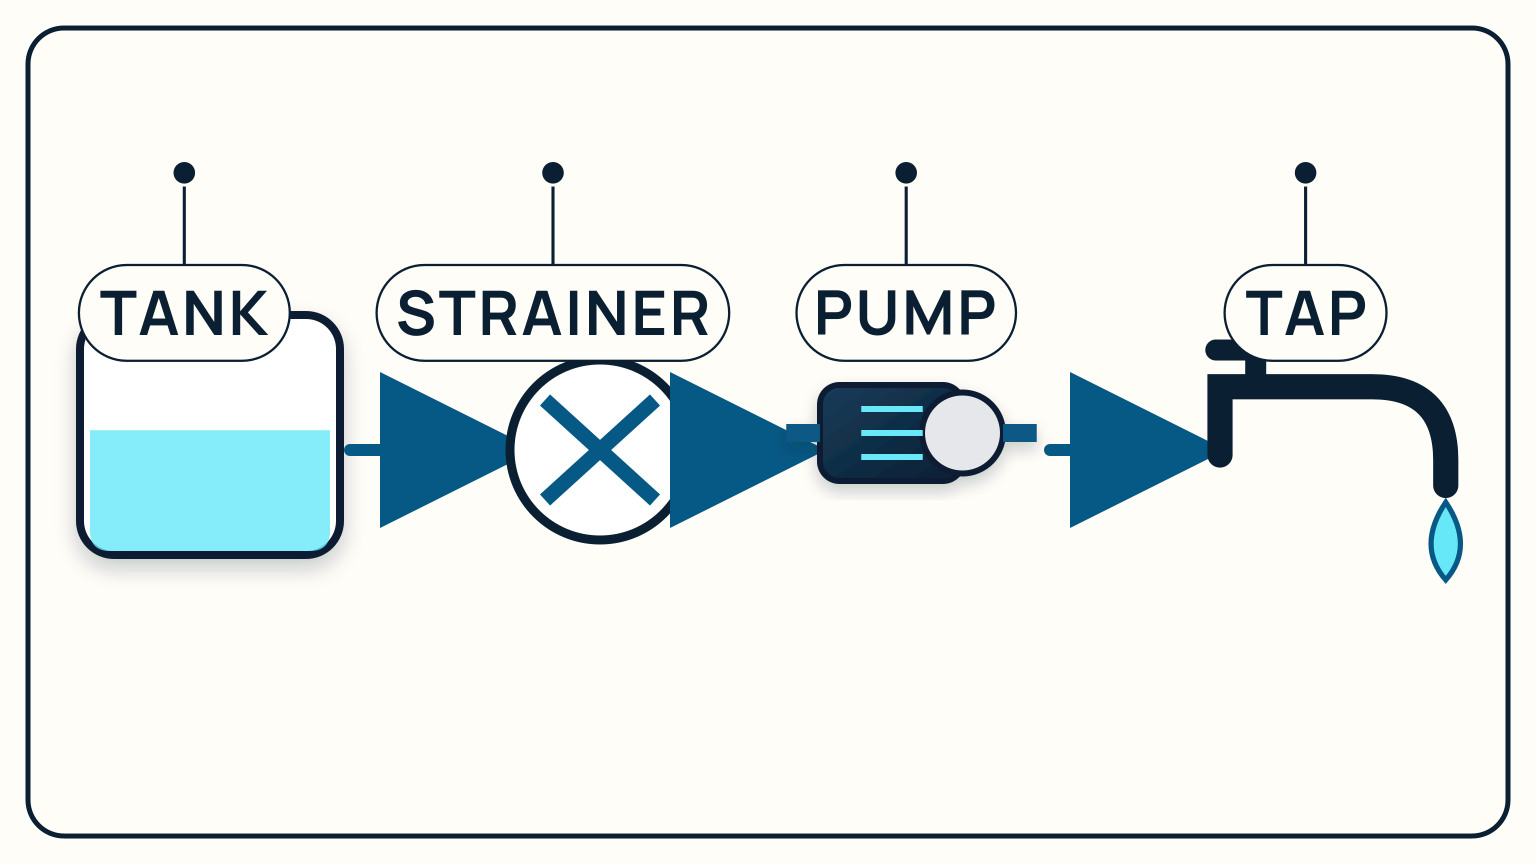
A typical pressure-water path runs from the storage tank through an accessible strainer to the pump, then into distribution plumbing and taps. The pump circuit needs suitable overcurrent protection, and the installed manufacturer's instructions control installation and service. Some systems also use an accumulator to smooth flow and reduce rapid cycling. Trace the actual route on your boat before changing a part. When behavior changes, record the flow, sound, pump cycle, visible drips, and conditions, then compare that evidence with the manual.
Do not confuse a portable transfer pump with the installed freshwater pressure system. Begin at the tank and follow fixed plumbing. Identify fills, vents, isolation valves, filters, heaters, accumulators, and outlets only where they are present. A simple line drawing can reveal which components affect the whole boat and which belong to one branch. Keep uncertain routes dashed until direct evidence or documentation resolves them.
Trace The Water Path
Find the tank and identify its fill and vent from installed information. Follow the outlet hose to the strainer, which should be accessible between the tank and pump in the documented arrangement. Continue from the pump discharge toward the distribution lines and each tap. Record branches, shutoffs, and any equipment inserted into the route.
Use photographs with wide context as well as close-ups. A picture of one hose connection is difficult to relocate later. Add arrows to a separate sketch rather than marking the boat. Show the direction from stored water toward outlets and note where a line disappears. If more than one tank or pump exists, draw separate paths until you can show how they join.
Compare the map with the pump manual and boat records. Check that the circuit protection and any service switches can be identified without opening energized equipment. The map is complete enough when another person can point to the tank, strainer, pump, protection, and chosen tap in the right order. It does not need to guess what lies behind an inaccessible panel. That uncertainty becomes a focused question for a technician.
Add isolation points and low spots where the documents identify them. These matter during service, seasonal lay-up, and diagnosis because water can remain in branches after the tank appears empty. Do not open an unfamiliar drain or valve just to test the drawing. Confirm its purpose first, then record the required operating position. A route map should reduce accidental changes, not create a tour of every handle aboard.
Understand The Pressure Pump
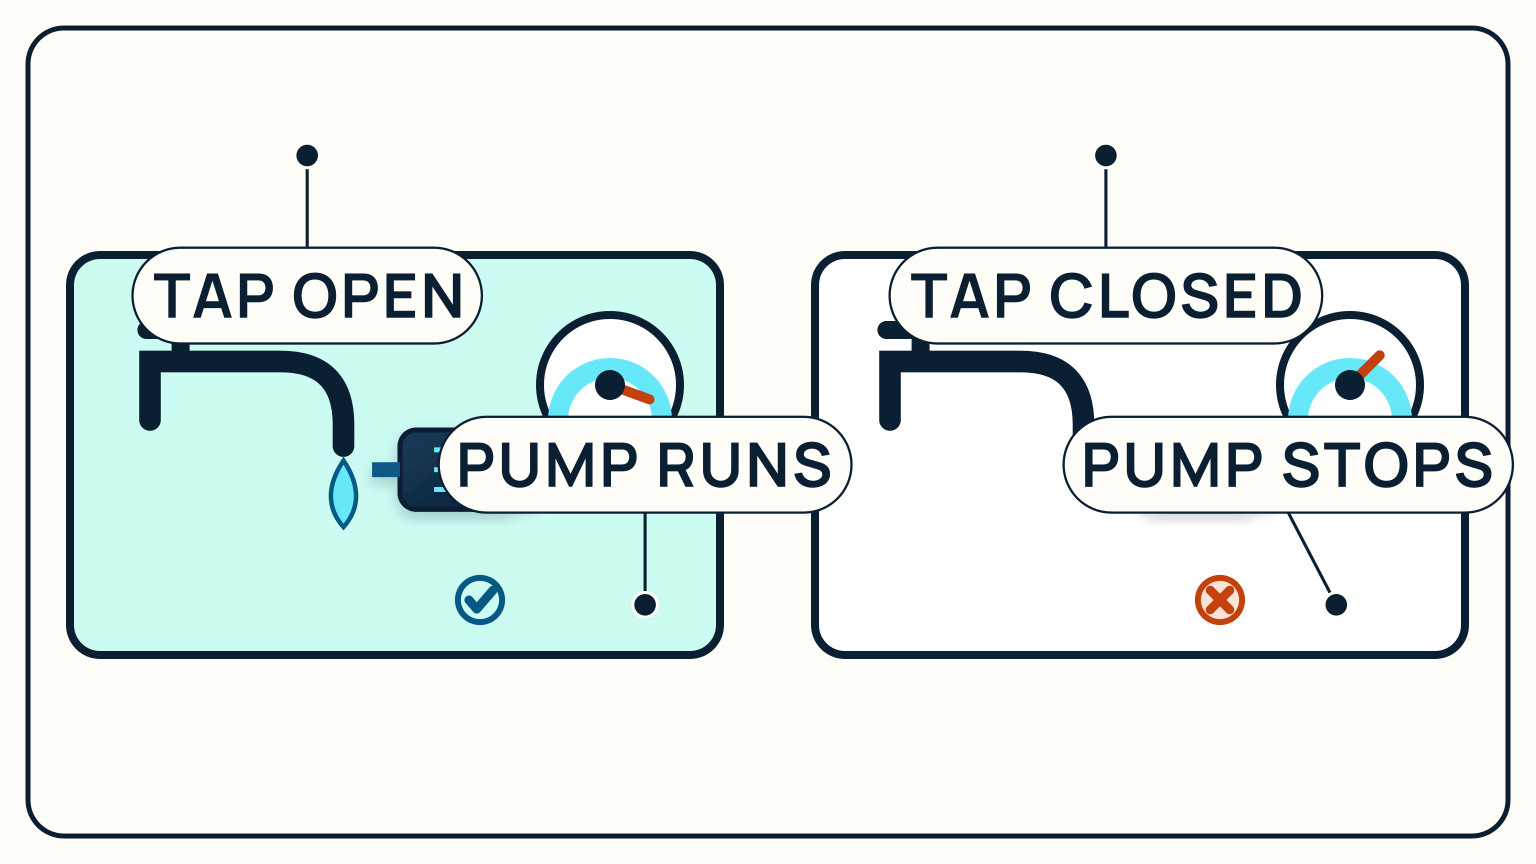
In a working pressure system, opening a tap changes system pressure and calls for water; the pump supplies flow, then stops after the tap closes and the required pressure returns. Observe this sequence on your own installation without changing settings. Note how quickly flow begins, the sound of the pump, and whether it stops cleanly.
An accumulator, where the system is designed to use one, can smooth flow and reduce rapid pump cycling. Do not assume a nearby tank is an accumulator or add one without checking the pump and manufacturer guidance. Record the make and model of the installed components and keep their manuals with the route drawing.
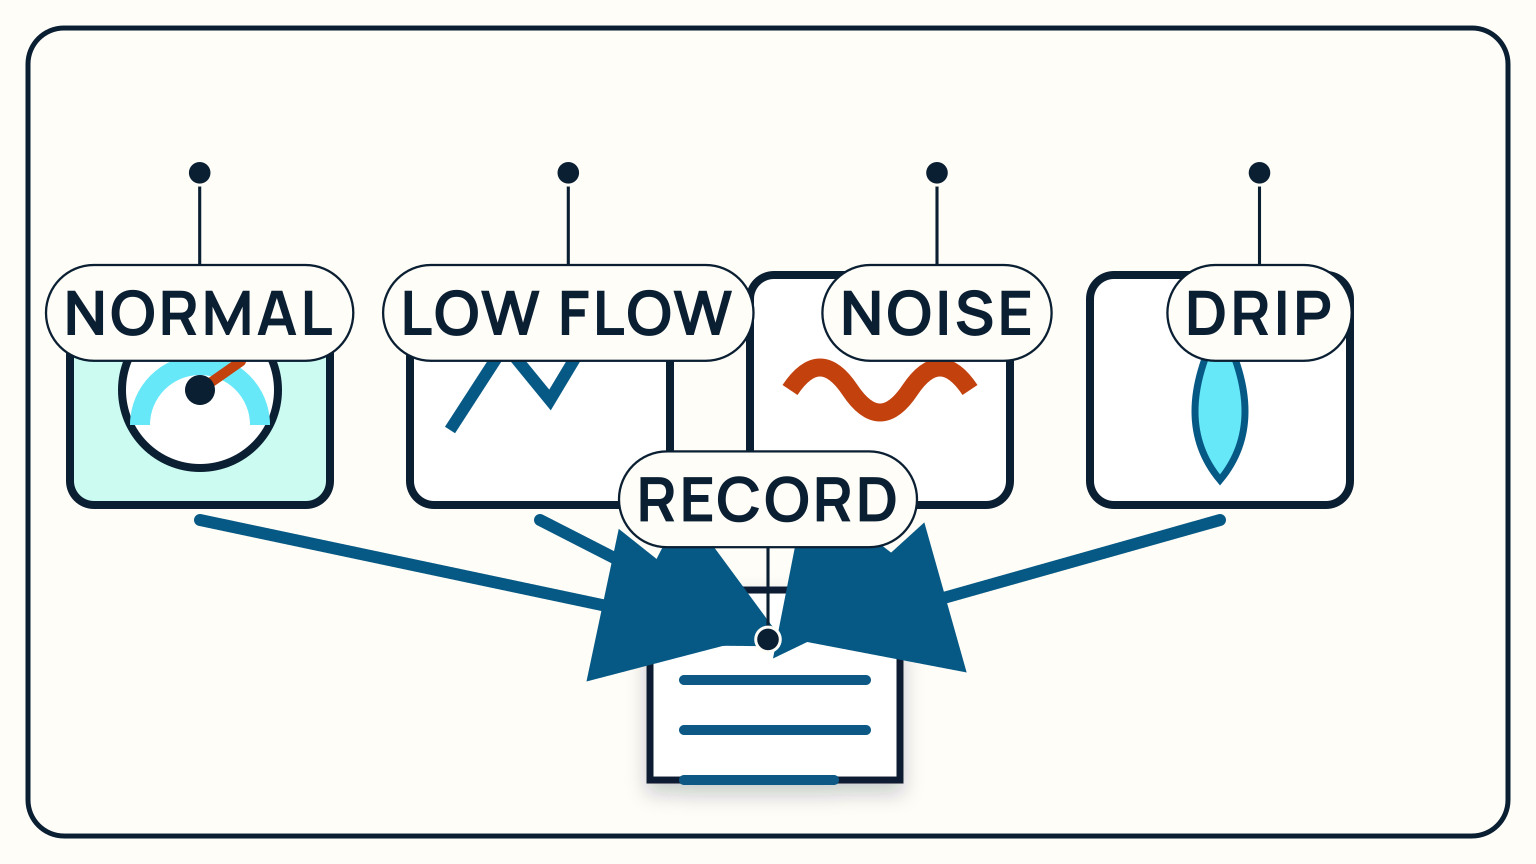
Establish a known-normal observation. Choose the same tap, begin with similar tank level and electrical conditions, and record pump start, flow, sound, and stop behavior. This is not a performance specification. It is a comparison point for a later change. If the pump never stops, cycles unexpectedly, or behaves unlike its documented operation, switch it off when appropriate and investigate from the manual rather than adjusting controls at random.
Repeat the observation at a second outlet. If both behave alike, the cause of a later whole-system change may sit earlier in the route. If only one branch differs, preserve that distinction for the technician. Do not close several valves or alter pressure settings during the comparison. Changing multiple conditions at once makes the result harder to interpret and can move the fault away from the place where it first appeared.
Protect Water Quality And The Pump
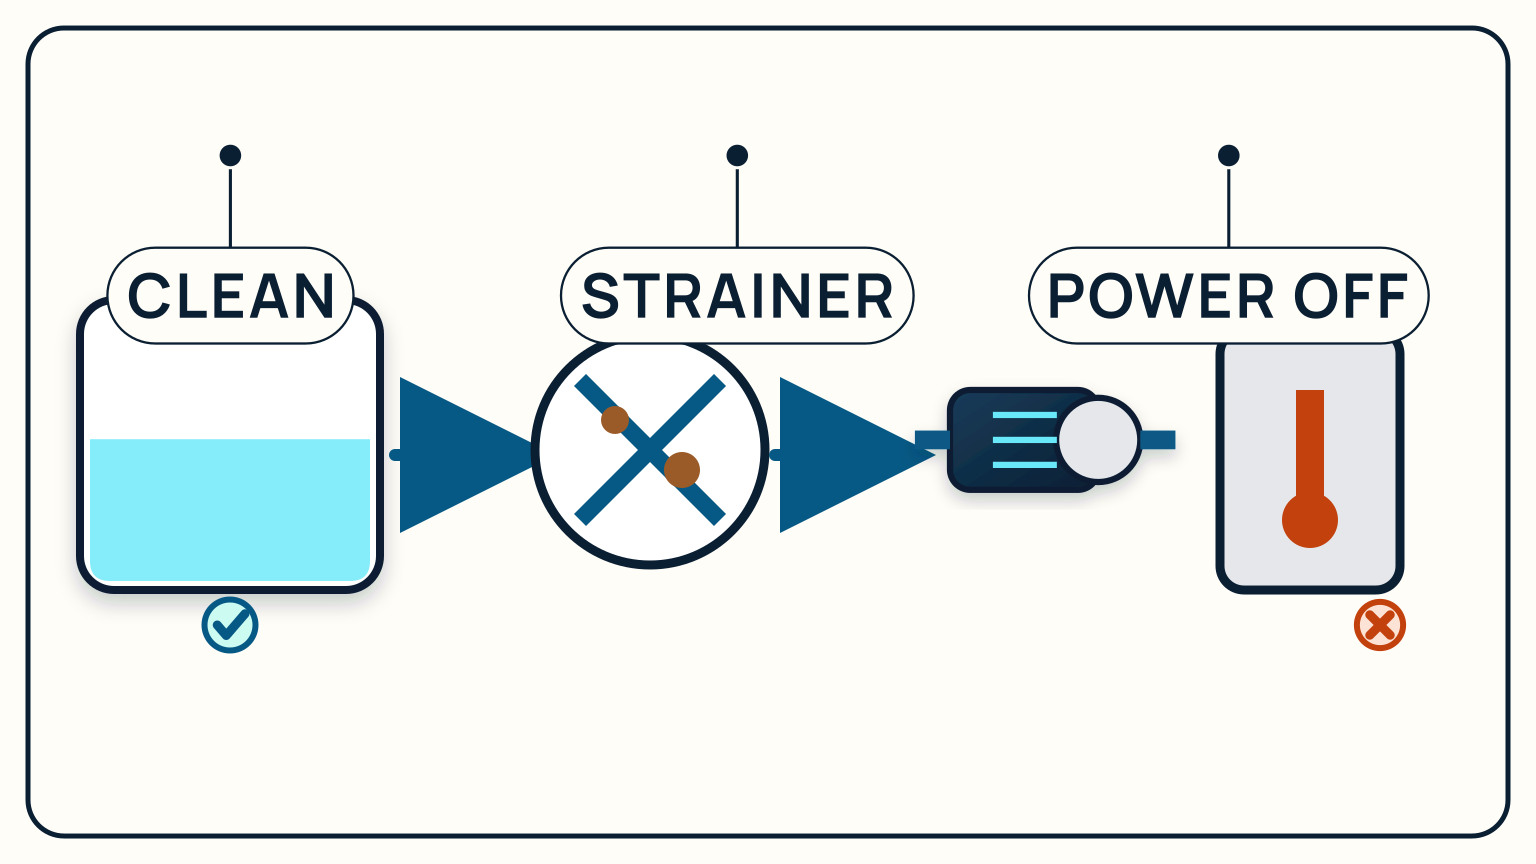
Use only the cleaning and maintenance methods specified for the installed tank, hoses, strainer, pump, and related equipment. Keep fill equipment clean and avoid introducing unverified products into the system. Water-quality decisions can depend on local supply and equipment, so obtain current guidance for the place where the boat is filled.
Inspect the accessible strainer at the interval and by the method in its instructions. Isolate electrical power and water as directed before service. Observe what the strainer contains, clean or replace it as specified, restore the seal correctly, and check for leaks after the system returns to service. Do not keep running a pump that is starved of water or that the manual says should be stopped.
Protect access as carefully as the component. A strainer buried under loose gear is unlikely to receive a calm inspection, and a service switch that nobody can identify invites the wrong circuit to remain live. Label the access on the route map, keep the manual nearby, and record completed maintenance. If contamination, damaged plumbing, or uncertain potable-water materials are found, stop using that supply and ask the appropriate marine technician or local authority for guidance.
Use a maintenance container for parts and tools that have touched the freshwater system so they are not mixed with fuel, waste, or general bilge work. Replace seals and consumables only with items specified for the component. After service, flush or commission the system by the documented method and inspect every disturbed joint. Note taste, odor, color, and leakage without declaring water safe from appearance alone.
Diagnose A Change In Behaviour
Describe the symptom before naming a failed part. Low flow, a new pump sound, rapid cycling, delayed start, a visible drip, or failure to stop are different observations. Note which outlets are affected and whether the condition changes with tank level, another open tap, or a recent service event. One branch behaving differently from every outlet points the investigation toward a different part of the map than a whole-boat change.
Begin with safe external checks allowed by the manual: water available in the tank, known valve positions, visible hose condition, accessible strainer condition, circuit protection, and leaks. Do not replace the pump only because it sounds unfamiliar. A restriction, air entry, power issue, or downstream leak can also change behavior, and the actual cause needs evidence from the installed system.
Compare the observation with the known-normal record and provide the technician with the pump model, route sketch, recent changes, and exact symptom. State whether the pump was running continuously, cycling, silent, or accompanied by leakage. Stop use when water is escaping into the boat, electrical equipment is wet, or the manual calls for shutdown. A precise description shortens diagnosis and avoids turning one uncertain noise into a chain of unnecessary parts.
After a repair, reproduce the original test condition and record the result. The absence of one noise is not enough if flow or shutoff behavior is now different. Check disturbed joints and the circuit state, then update the route drawing if a component moved. Keep the old symptom note. It gives future technicians a history of what changed and prevents the same investigation from beginning with an incomplete recollection.
If the symptom appears only when the boat heels, pitches, or the tank is partly full, record that operating state rather than trying to recreate it unsafely at the berth. Movement can change what reaches a pickup or where a loose connection leaks. The observation narrows the technician's work while avoiding a broad claim about the cause. Repeat the comparison only under normal, controlled use.
The freshwater system becomes easier to manage once you can trace it and recognize its normal cycle. Keep the route, component models, manuals, maintenance notes, and leak observations together. SailStarter's systems lessons can help you build that working map. Use the pump maker or a competent marine technician for installation changes, persistent faults, and repairs beyond the documented owner tasks.
Review the map whenever a tank, filter, heater, pump, or outlet is added or removed. A drawing that still shows abandoned branches can send future diagnosis toward the wrong valve. Archive the old version and date the new one so later crews can see what changed and why.
Mark the new known-normal behavior immediately after successful commissioning. That reliable baseline is part of the completed work, not an optional note to reconstruct after the next fault.
Try it from the lesson
Can you spot the next move?
The engine is idling, the boat is safely secured and the propeller area is clear. What should you confirm before departure?