Chart your course
Deck Core Moisture Explained
Quick answer
The short version
A cored deck uses outer skins around a lighter middle material. Water can enter near fittings, fasteners, cracks, seams, or failed bedding and remain in the core. That can contribute to rot, delamination, and reduced structural integrity. Look for cracked sealant, staining, drips, unusual flex, loose hardware, or changed interior finish, but treat each as a clue. Survey screening can combine visual inspection, sounding, moisture measurement, flex checks, and samples where justified. Stop obvious entry, then use competent diagnosis to define the affected area, load path, and repair.
The phrase "moisture in the deck" does not describe one repair. Construction and core materials vary, and water may travel away from its entry point. A meter pattern or dull sound can guide closer inspection without proving the entire extent. Avoid drilling exploratory holes or removing loaded hardware simply to settle a suspicion. Record the conditions and let a surveyor or repair specialist decide which invasive work is justified.
Understand The Sandwich
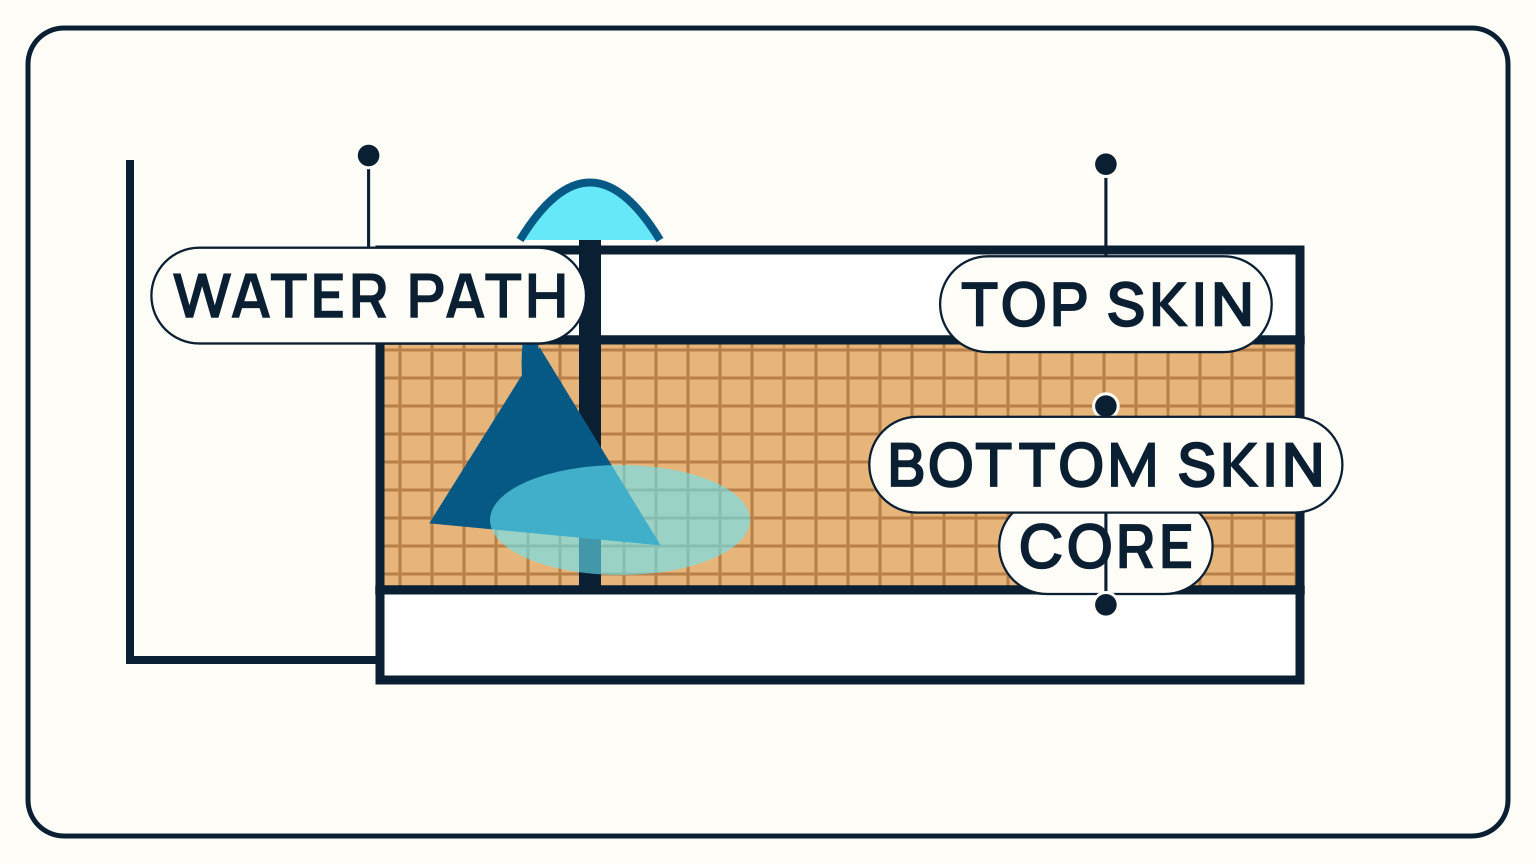
Think of the deck as stacked layers. The outer skins carry load around the lighter core, producing a stiff panel without solid laminate everywhere. Hardware passes through or attaches to those layers. Bedding and properly detailed penetrations are intended to keep water out of the core while the fitting transfers its load.
When the seal around a fastener or fitting fails, water can follow the penetration through the top skin and into the core. It may spread along the middle layer before appearing below. A stain in the cabin therefore shows where water became visible, not necessarily the first entry point. The figure uses a cutaway to show this vertical route and the wet area extending sideways.
Do not assume every cored deck has the same materials or repair method. Find the boat's construction information where available and note the hardware involved. A repair has to restore both water exclusion and the structure's intended load path. Covering an interior stain or adding sealant around the outside may reduce a symptom without addressing damaged or saturated material already inside.
Use the cutaway as a question guide when reading a report. Ask which skin was inspected, what is known about the core, and how the fitting transfers load through the area. A reading taken from above may not describe the lower skin. Likewise, an interior stain says little about bond condition without further evidence. Naming the layer prevents the broad phrase "wet deck" from replacing a precise finding.
Spot Water Entry Clues
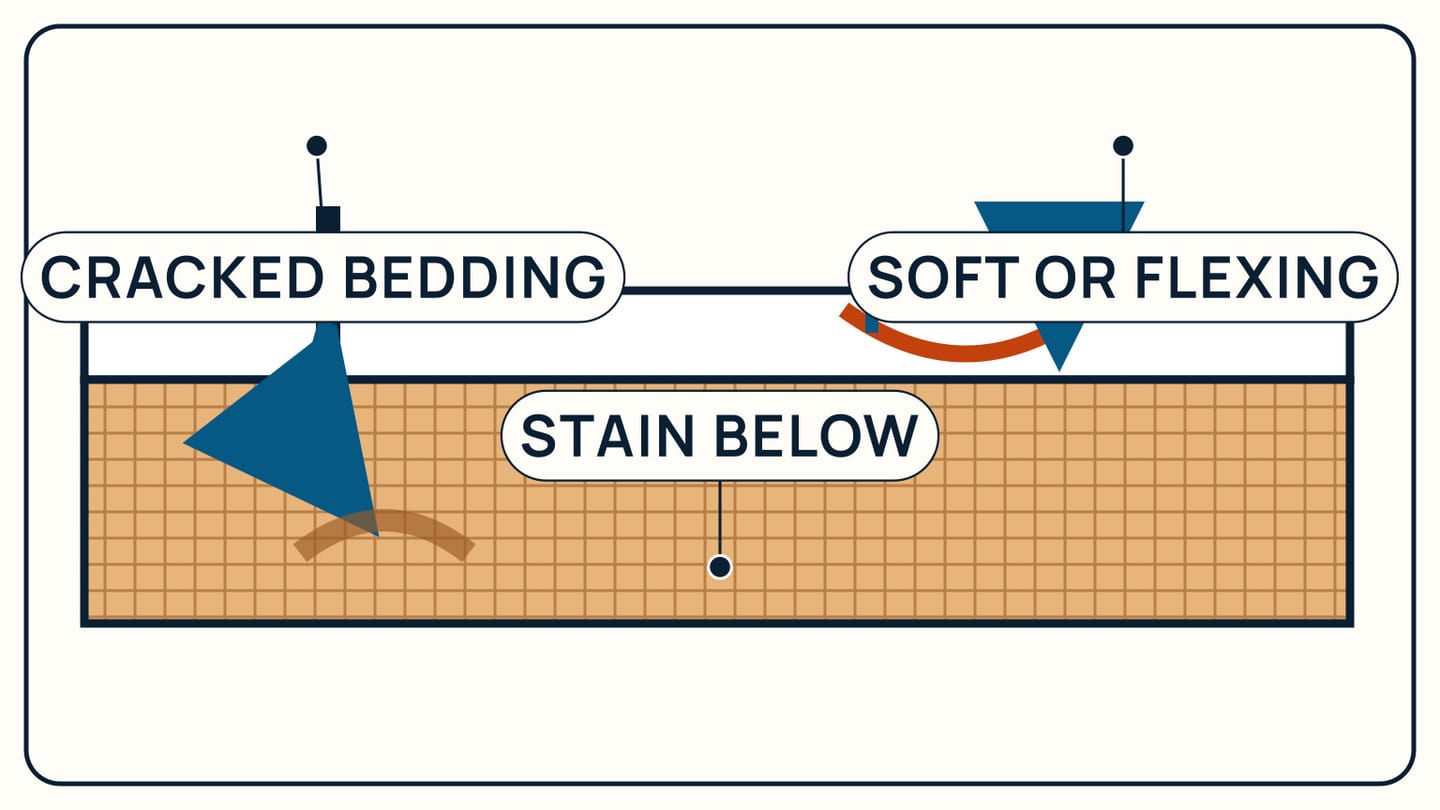
Inspect around deck hardware and beneath it. Look for cracked or separated bedding, loose fittings, corrosion trails, staining, drips, changed paint or liner finish, and local flex. Photograph the whole fitting and the interior area below, then add close-ups. Note whether the clue changes after rain, washdown, sailing loads, or a dry period.
Use touch and movement cautiously. An unusual soft feel or flex can be important evidence, but repeatedly loading a suspect area is not a test of strength. Do not remove hardware that carries rigging or other significant loads without a repair plan. If active water entry is visible, protect the area from further exposure while arranging inspection.
Trace upward and outward from the visible clue. Water may travel along a fastener, cable, liner, or core before it appears. Compare nearby fittings, seams, and cracks rather than declaring the closest object guilty. Keep dates and conditions with the photographs. A repeatable pattern after rain is stronger evidence than a mark whose history is unknown, though neither alone defines the repair.
Create a small condition grid around the area and mark only direct observations: visible crack, stain, drip, movement, previous repair, or no access. This helps a surveyor see the pattern without turning your notes into a moisture diagnosis. Include hardware loads and interior obstructions on the sketch. If the clue changes after sailing but not rain, preserve that difference because load and water paths may need to be considered together.
Separate Screening From Diagnosis
Survey screening may use several methods because each reveals a different part of the picture. Visual inspection finds surface and interior clues. Sounding can identify changes in the laminate response. Moisture measurement can show a pattern. Walking the deck can reveal unusual flex, and a sample may be justified where the surveyor needs direct material evidence.
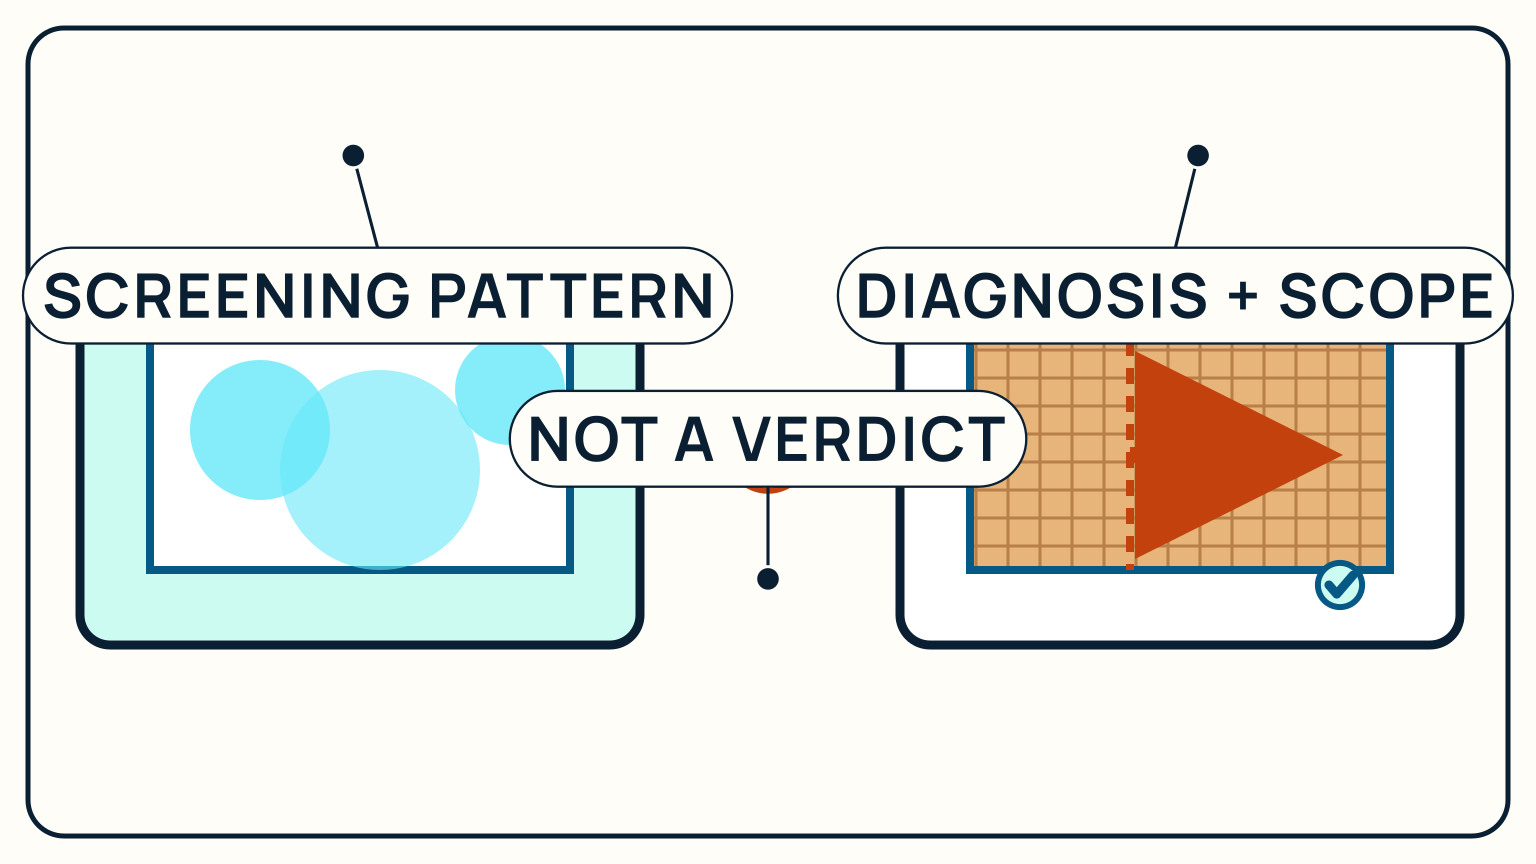
None of those observations supplies a complete repair method by itself. Meter response can be influenced by construction and nearby material. A dull sound shows a change worth investigating, not automatically the boundary of damaged core. Ask the surveyor to mark the screened area, explain uncertainty, and state what additional inspection is needed before a repairer can price the job.
Keep screening evidence separate from the final diagnosis, as the comparison figure does. The left panel is a pattern that directs attention; the right panel defines material and extent for scope. This separation matters during a purchase or refit. A broad allowance based on one reading can understate or overstate the work. Obtain specialist input before a structural concern becomes a budget promise.
Ask the surveyor how the screening boundary was selected and what would make it expand. A few spot readings, a sounding map, and a flex observation should not be silently combined into one certainty. Record where metal, tanks, wiring, unusual laminate, or inaccessible structure limits interpretation. The repairer needs that uncertainty when deciding where to open, and a buyer needs it when deciding whether the remaining unknown is acceptable.
Stop The Leak And Plan Repair
Stop obvious water entry promptly without hiding the evidence. A temporary cover may protect the area while the boat waits for inspection. If hardware is involved, coordinate any removal or rebedding with the person responsible for the load and repair. Record temporary work clearly so it is not mistaken for a completed structural repair.
The permanent plan needs four decisions: the entry source, the wet or damaged extent, the load path through the area, and the finished repair scope. The repairer may need to open structure to establish boundaries, remove affected material, restore the core and skins, and reinstall the fitting with appropriate water exclusion. The exact method belongs to the actual construction and professional specification.
This diagnosis feeds directly into repairing a soft, saturated deck area once the entry point and extent are confirmed. Agree on completion evidence before work begins. Ask how repaired structure, dryness, bonding, finish, and hardware installation will be checked. Keep photographs of the opened area and hidden work. After completion, monitor the original clue during the conditions that revealed it. A dry interior finish is encouraging, but the professional return-to-service check should address the structure and fitting, not only the absence of a visible drip.
Keep removed hardware, fastener details, and the opening sequence in the job record where useful. The information can explain the original water path and guide later service. Record the dimensions of the repaired area and the materials specified by the repairer without presenting them as a universal recipe. Future owners and surveyors then have evidence of what was opened, what was found, and how the load-carrying assembly was restored.
Plan adjacent work around the structural repair. Wiring, headliners, non-skid finish, and nearby hardware may need access at different stages. Do not let a cosmetic schedule force the core work to close before its inspection point. The repairer should define when the area can accept normal loads and when related hardware may return. Put those states in the project sequence so another trade does not assume the deck is ready.
After the first suitable rain or washdown, inspect both the repaired fitting and the previous interior clue under safe conditions. Compare with the dated baseline and report any recurrence promptly. Ongoing observation cannot certify the laminate, yet it can show whether the water-exclusion part of the repair remains effective. Continue the professional inspection schedule recommended for the restored area.
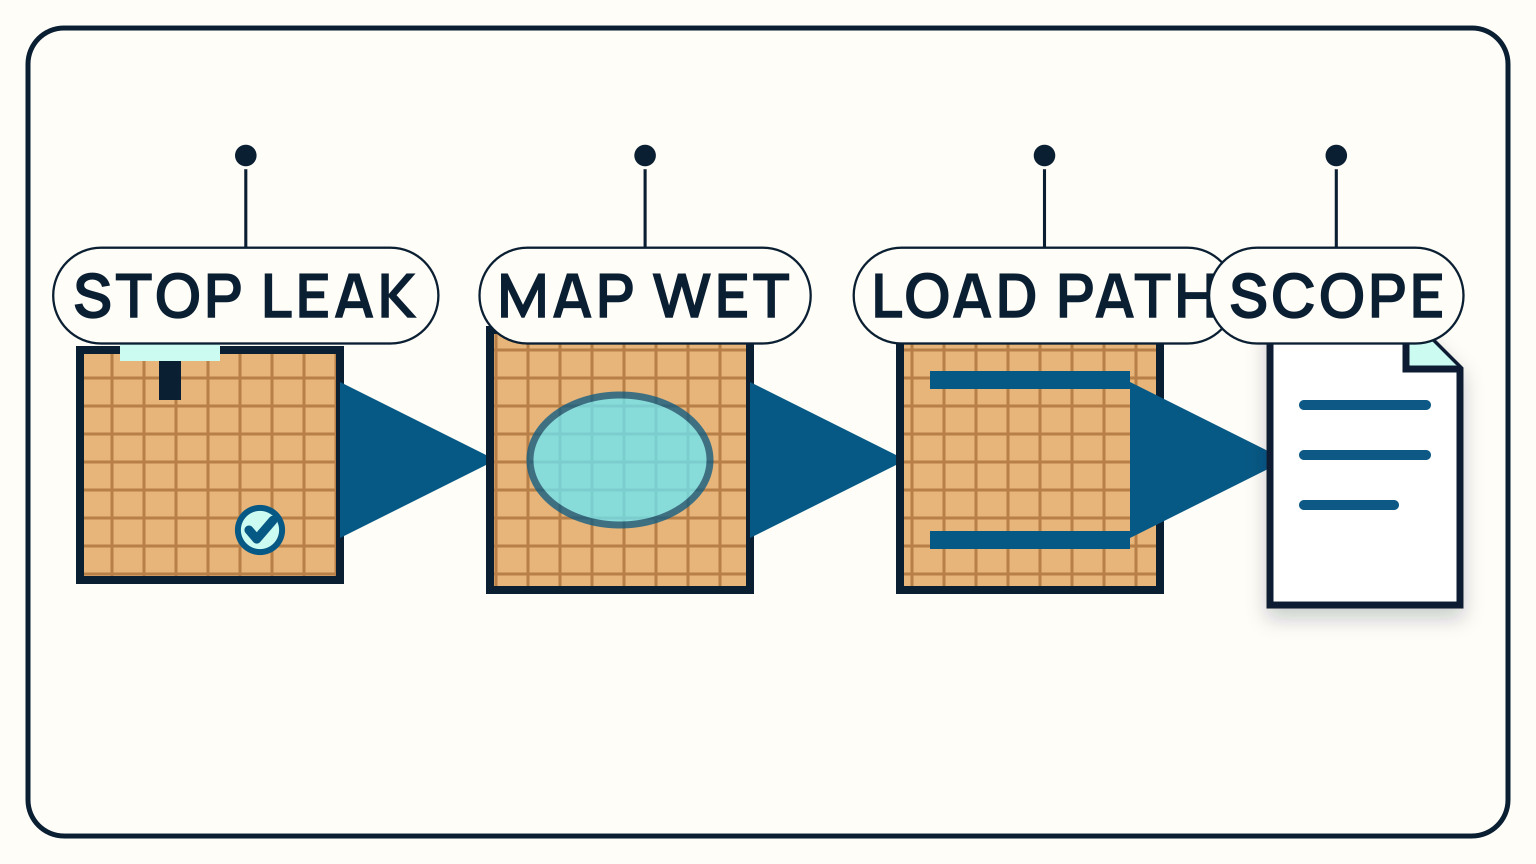
Deck-core moisture becomes manageable when observation, screening, diagnosis, and repair remain distinct. Preserve the evidence, prevent further entry, and avoid invasive guesses. SailStarter's ownership lessons can help you organize the inspection record. A competent surveyor or repair specialist should establish the affected extent, structural implications, repair method, and completion checks for the boat in front of them.
Keep the final record aboard with the fitting service history. Future maintenance should protect the repaired penetration and give the next surveyor a clear starting point instead of an unexplained patch.
Photograph the finished area in a wide context so it can be found after trim and hardware make the repair visually disappear.
Try it from the lesson
Can you spot the next move?
A wide sailboat glides past on two side-by-side hulls, barely leaning at all. What type is it?
Why you can trust this guide
. We build each guide from public seamanship and safety sources, then teach the universal principle before any local difference.